Custom UIHostingController
Table of Contents
In the previous "How to use SwiftUI in UIKit" post I failed to do a custom subclass of UIHostingController, today I going to show how to do it (It quite easy I don't know why I can't do it at that time).
The problem
When you want to use SwiftUI in Storyboard IBSegueAction should suffice for most cases, but a subclass of UIHostingController also got its merit.
The problem I found which I can't figure out a way to accomplish with IBSegueAction is when I try to assign one on UITabBarController's root view controllers as SwiftUI.
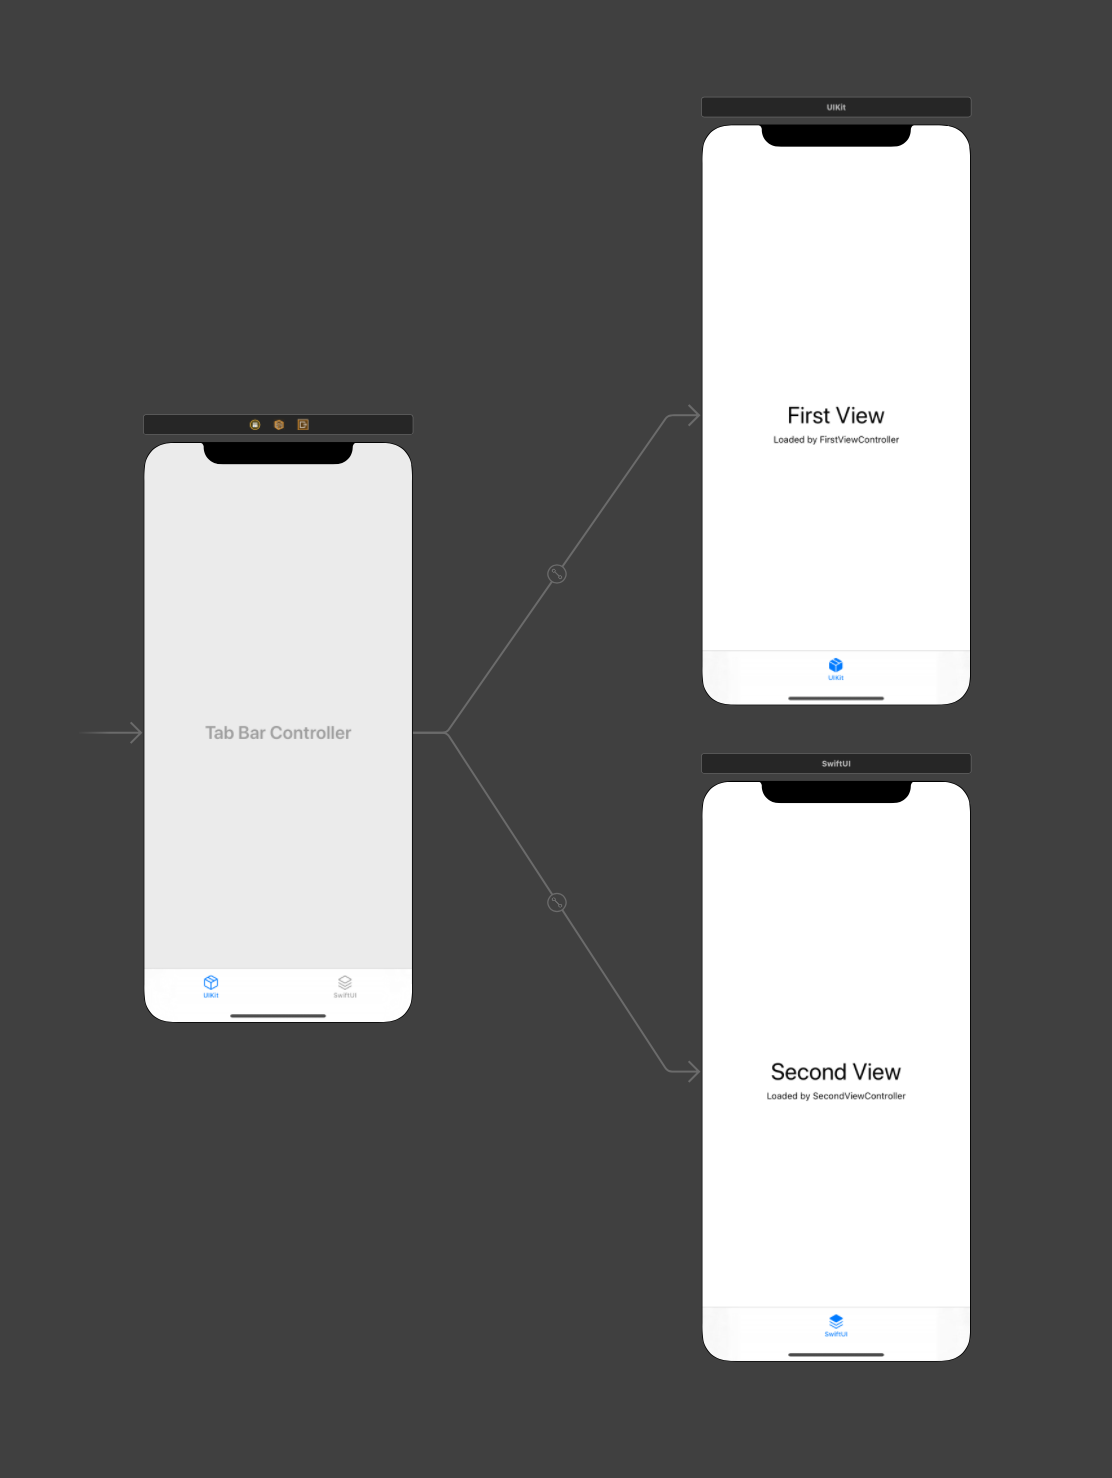
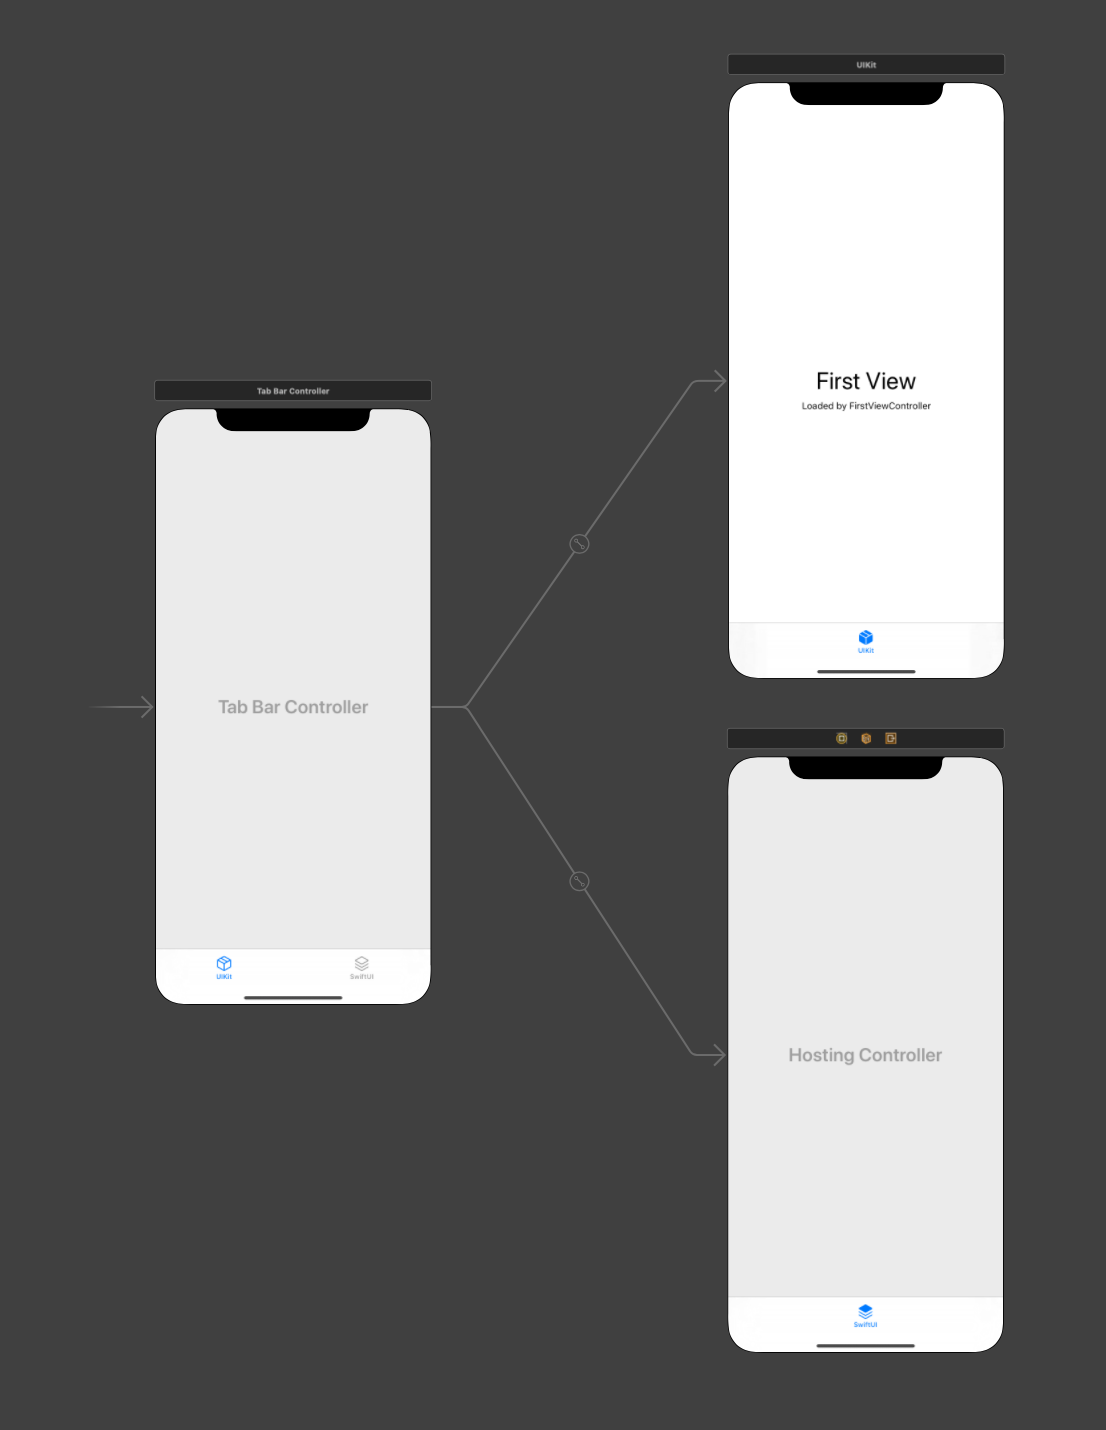
If I want to replace the second view controller with SwiftUI, I can replace the second view controller with UIHostingController, but no controller can listen for IBSegueAction. I tried assigning it to custom UITabBarController, but it didn't work.
You can easily support sarunw.com by checking out this sponsor.
Screenshot Studio: Create App Store screenshots in seconds not minutes.
Solution
From Apple's Xcode beta release notes
You can add SwiftUI hosting controllers, such as
UIHostingController, to connect a storyboard controller flow to a hosting controller that manages a SwiftUI view hierarchy. You can populate the contents of a hosting controller in Interface Builder by providing a custom subclass that programmatically sets therootViewof the controller.
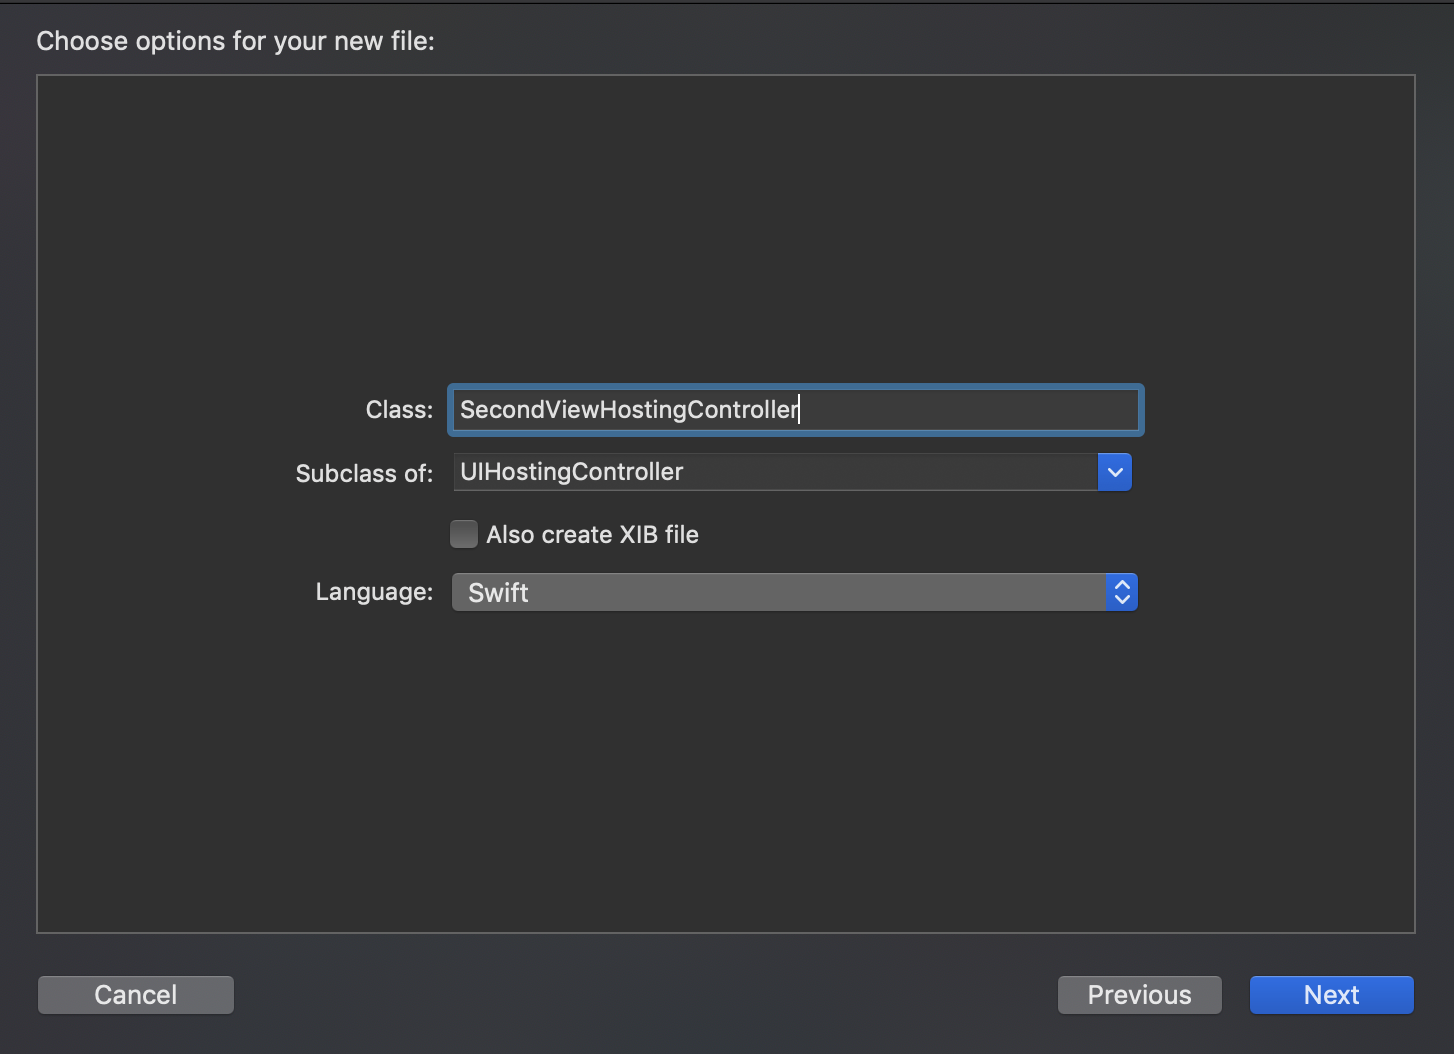
So to solve this, we first create a subclass of UIHostingController
then customized it like this.
struct SecondView: View {
  var body: some View {
      VStack {
          Text("Second View").font(.system(size: 36))
          Text("Loaded by SecondView").font(.system(size: 14))
      }
  }
}

class SecondViewHostingController: UIHostingController<SecondView> {
	required init?(coder aDecoder: NSCoder) {
		super.init(coder: aDecoder, rootView: SecondView())
	}
}
Then assign this custom class to UIHostingController in the storyboard.
Conclusion
Subclass a UIHostingController have a limitation, we can't inject dependency to the destination view since it relies on old init?(coder aDecoder: NSCoder). I hope this technique will belong in your toolbox and can help you when the time comes.
Feel free to follow me on Twitter and ask your questions related to this post. Thanks for reading and see you next time.
References
You can easily support sarunw.com by checking out this sponsor.
Screenshot Studio: Create App Store screenshots in seconds not minutes.
Related Post
Read more article about SwiftUI, UIKit, iOS, or see all available topic
Enjoy the read?
If you enjoy this article, you can subscribe to the weekly newsletter.
Every Friday, you'll get a quick recap of all articles and tips posted on this site. No strings attached. Unsubscribe anytime.
Feel free to follow me on Twitter and ask your questions related to this post. Thanks for reading and see you next time.
If you enjoy my writing, please check out my Patreon https://www.patreon.com/sarunw and become my supporter. Sharing the article is also greatly appreciated.
Become a patron Buy me a coffee Tweet ShareSwiftUI's ViewModifier
Learn a crucial concept in SwiftUI, view modifier, and a guide of how to create your custom modifier.
Modality changes in iOS13
In iOS13, the modal presentation gets a new look and dismissal gesture. This article will talk about what you can do with these new welcoming changes.