How to share an iOS distribution certificate
Table of Contents
One of the most challenging tasks as an iOS developer is managing certificates. Fastlane helps us a great deal throughout these years, and with the coming of Xcode Cloud[1], which promises a cloud signing feature, managing certificates might be a thing in the past. But I think there would be an unpleasant time where you have to manage this yourself. When the time comes, I want you to be prepared.
The process usually consists of two parties.
- The one with all the access permission who create and export certificate and share with others.
- The one with fewer access imports the certificate to be able to distribute an app.
The hard part is on the former. They have to create and export. The one who wants to distribute an app needs to ask for the p12 file and import it to their machine.
Creating a Certificate
This process is quite straightforward
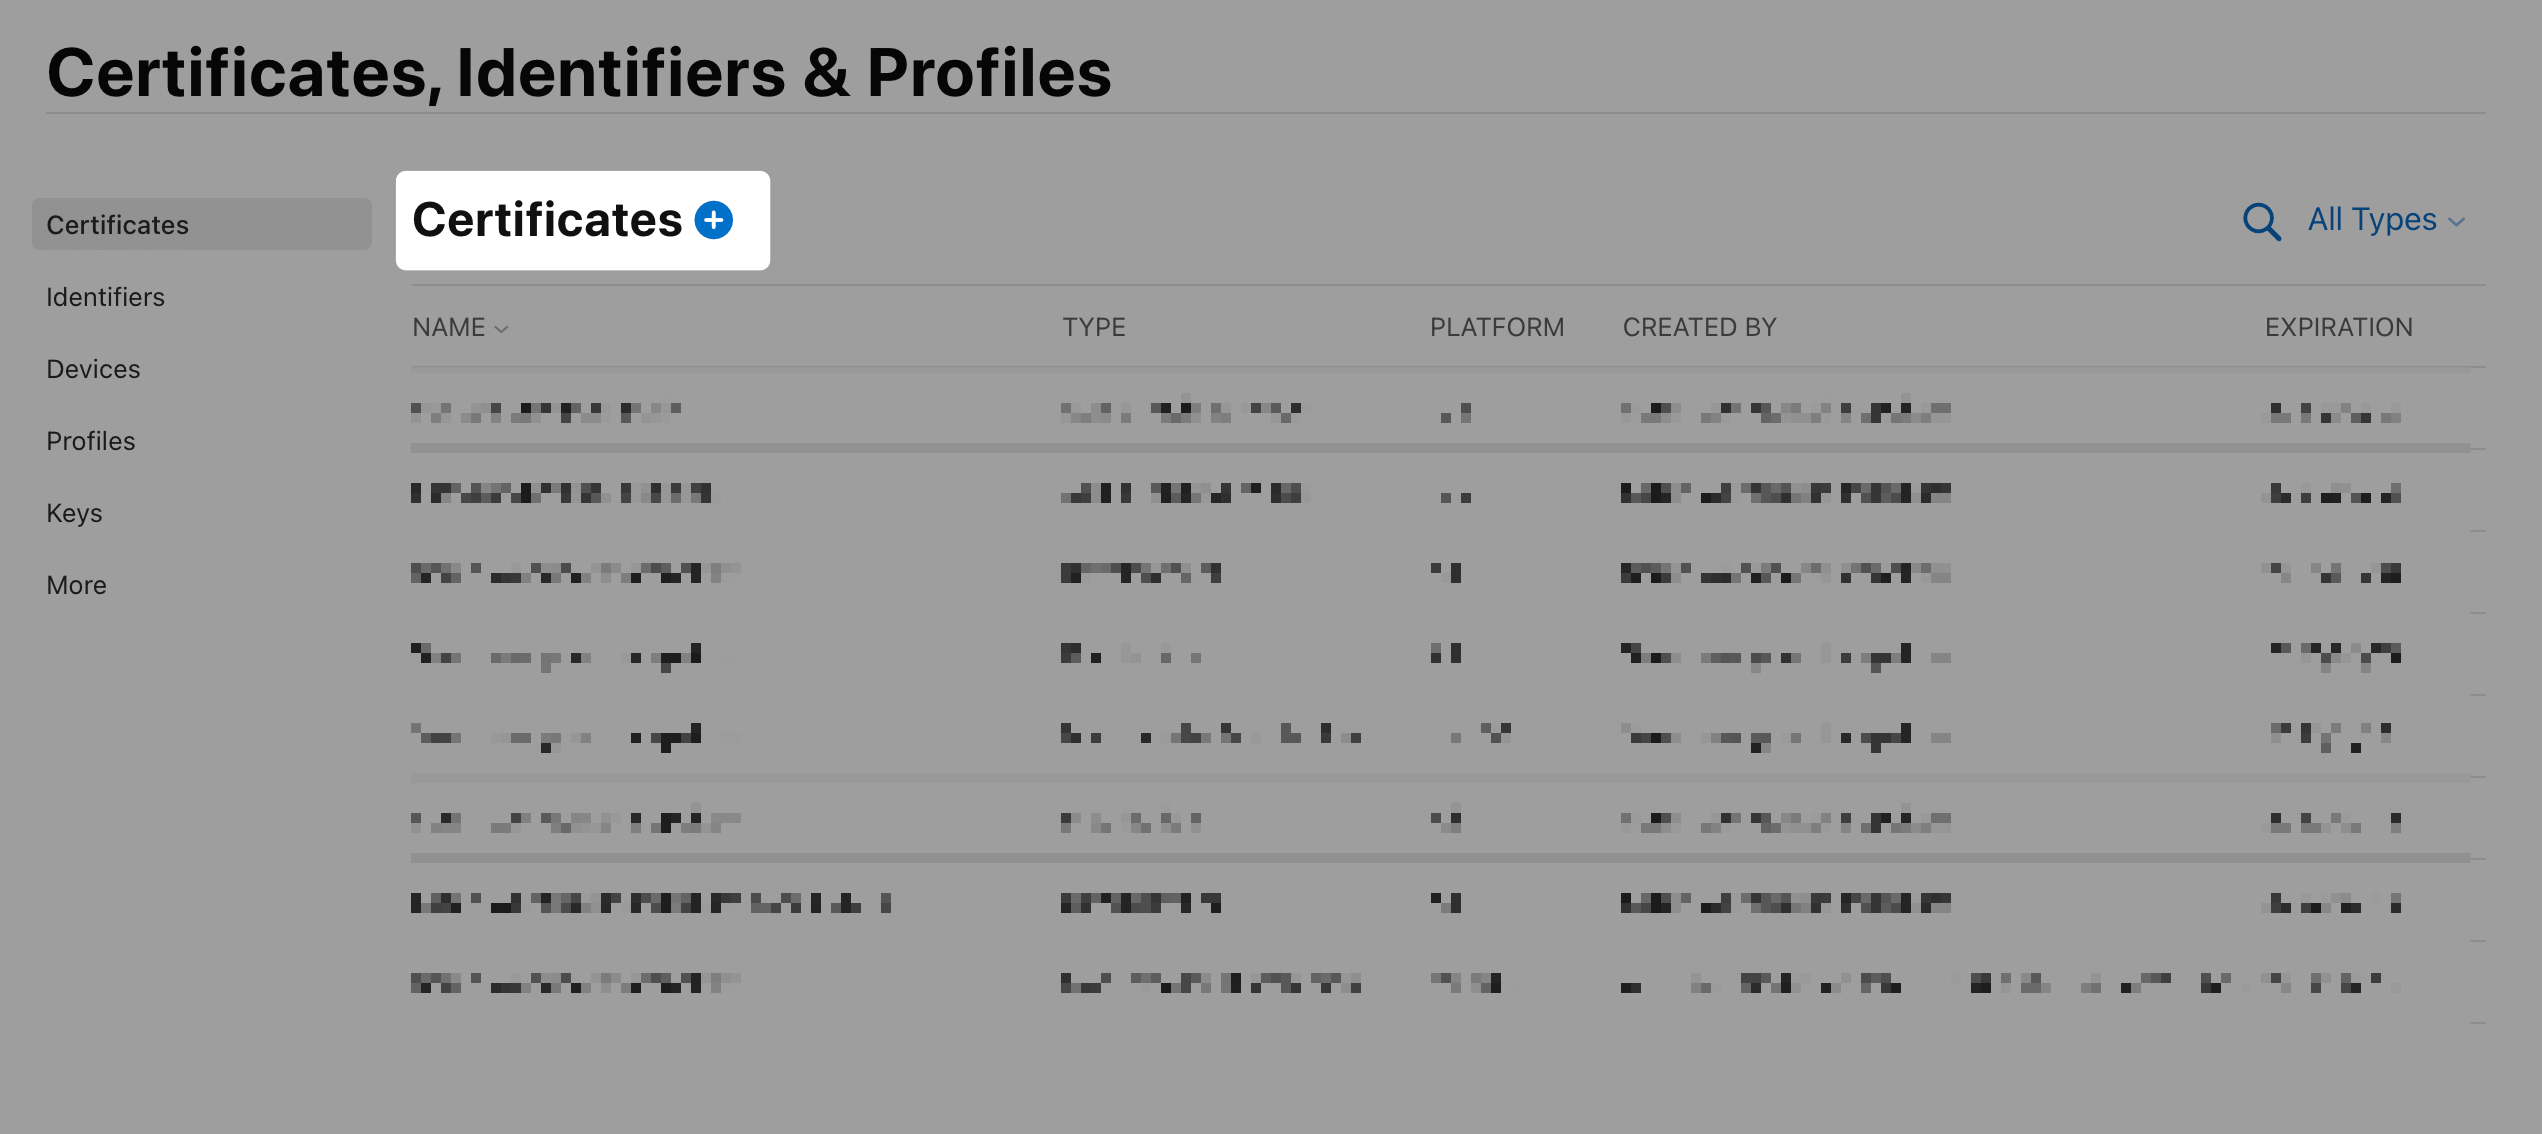
- Go to the Apple developer website and click Certificates, IDs & Profiles.
- Click plus icon to add a new certificate.
![]()
- Select "Apple Distribution" and click continue.
![]()
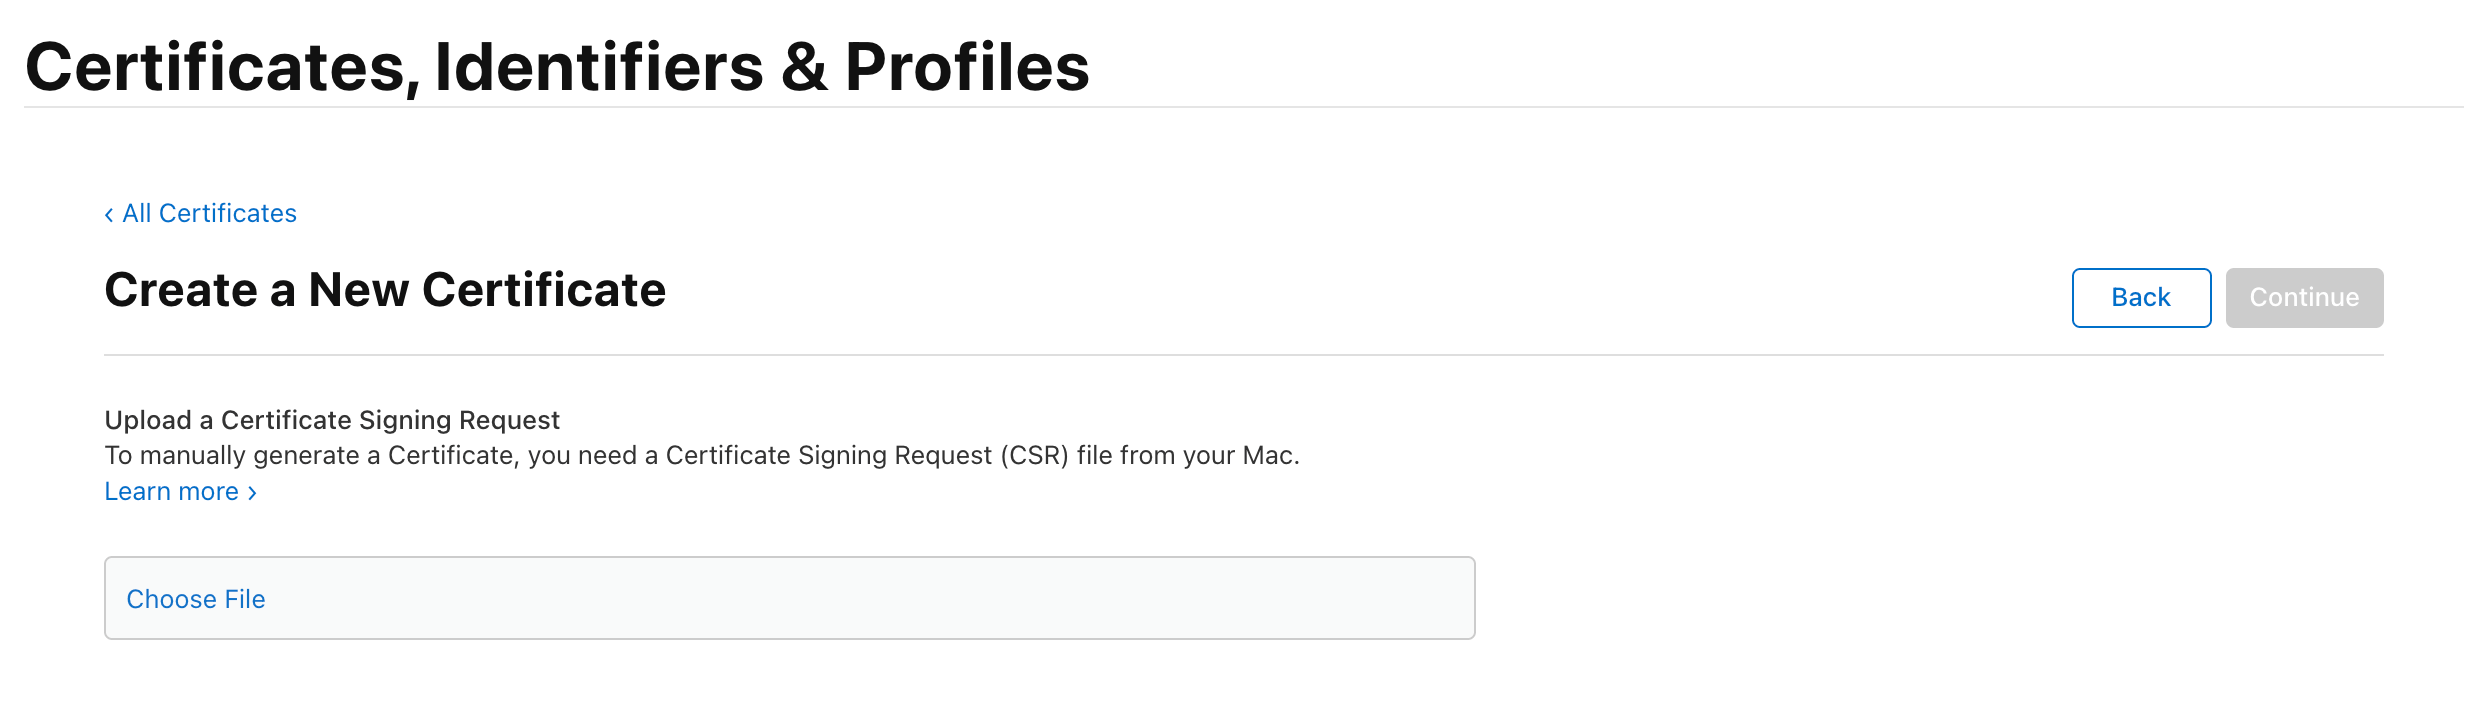
- Upload Certificate Signing Request. You can follow Apple instruction here or read it here.
![]()
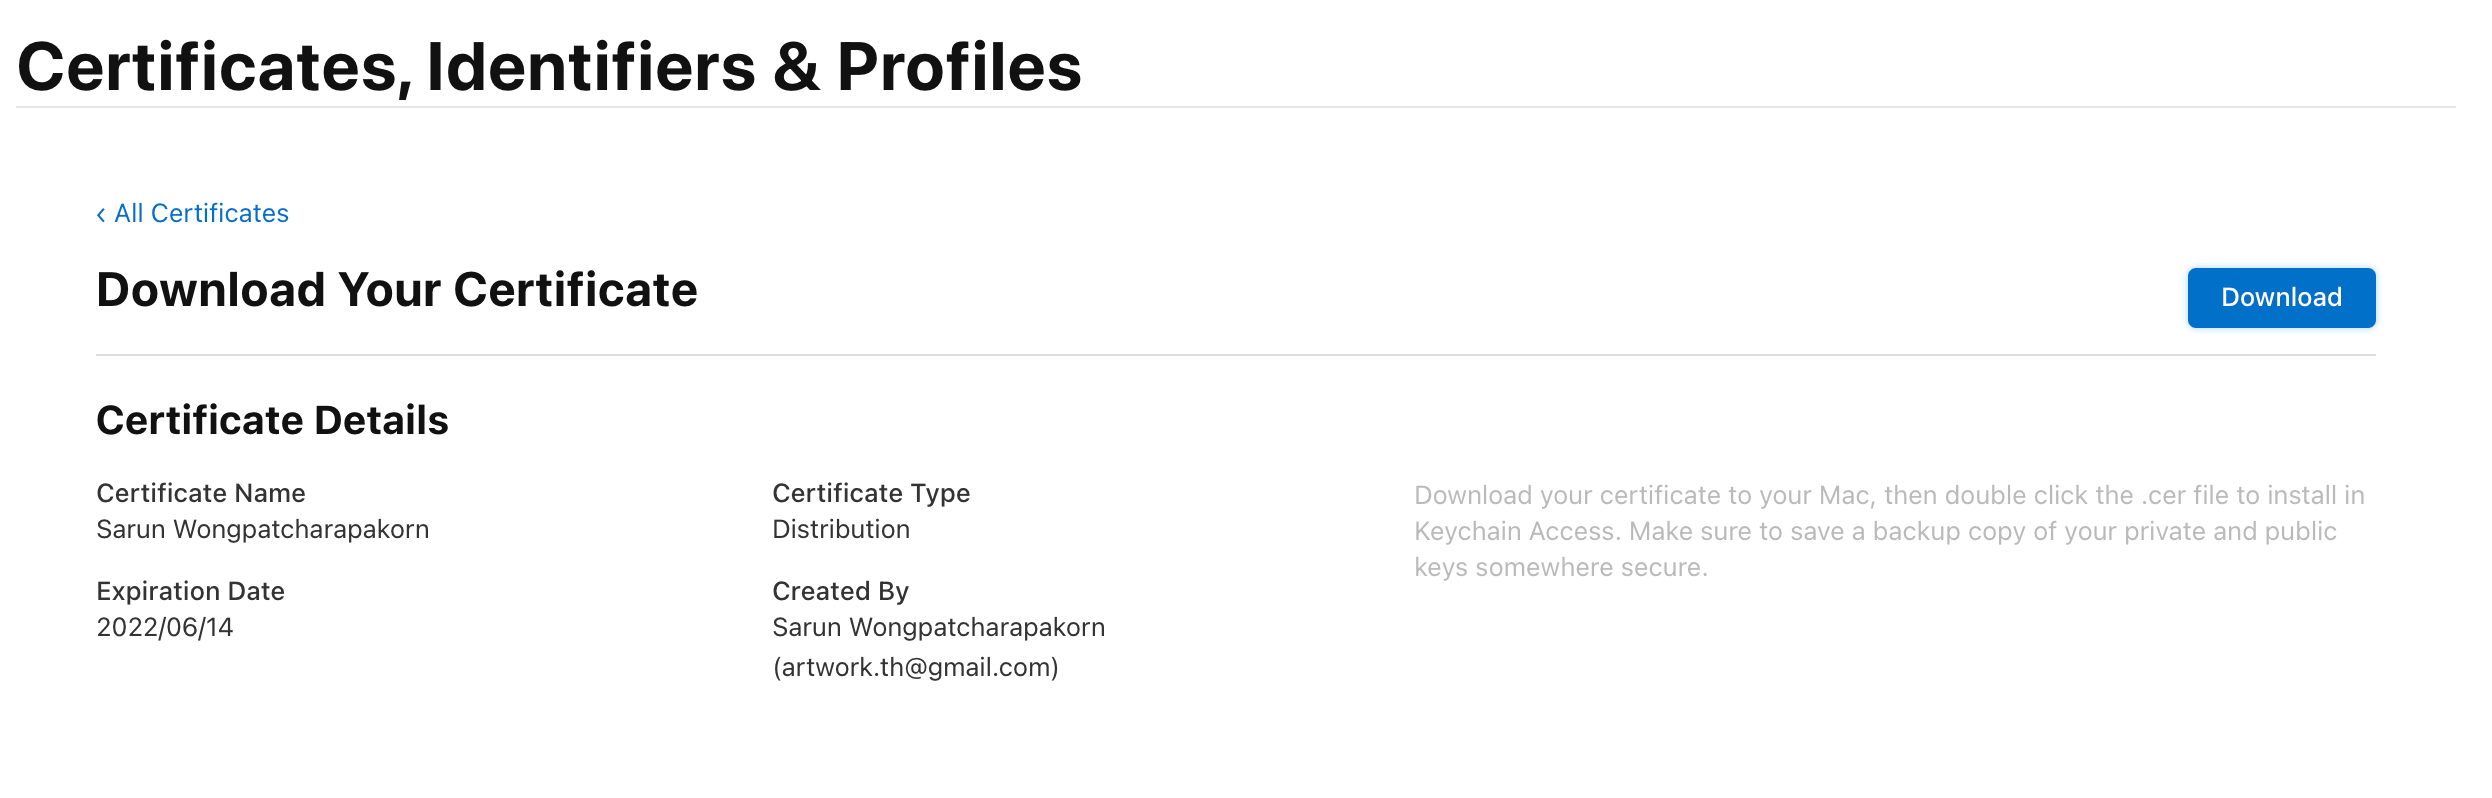
- At the end, you will get distribution.cer file.
![]()
- Double click the
cerfile to install it in Keychain Access. The keychain app should open up automatically, and you will see your certificate under My Certificates tap. You can identify your certificate by name. It will show in this formatTYPE_OF_CERTIFICATE FIRSTNAME LASTNAME (TEAM_ID). If you expand it, you will find a key with the same name that you just created in Create a certificate signing request.
![]()


At this point, you have a working distribution certificate for use on your machine. To share this certificate with other machines, you must export it.
Create a certificate signing request
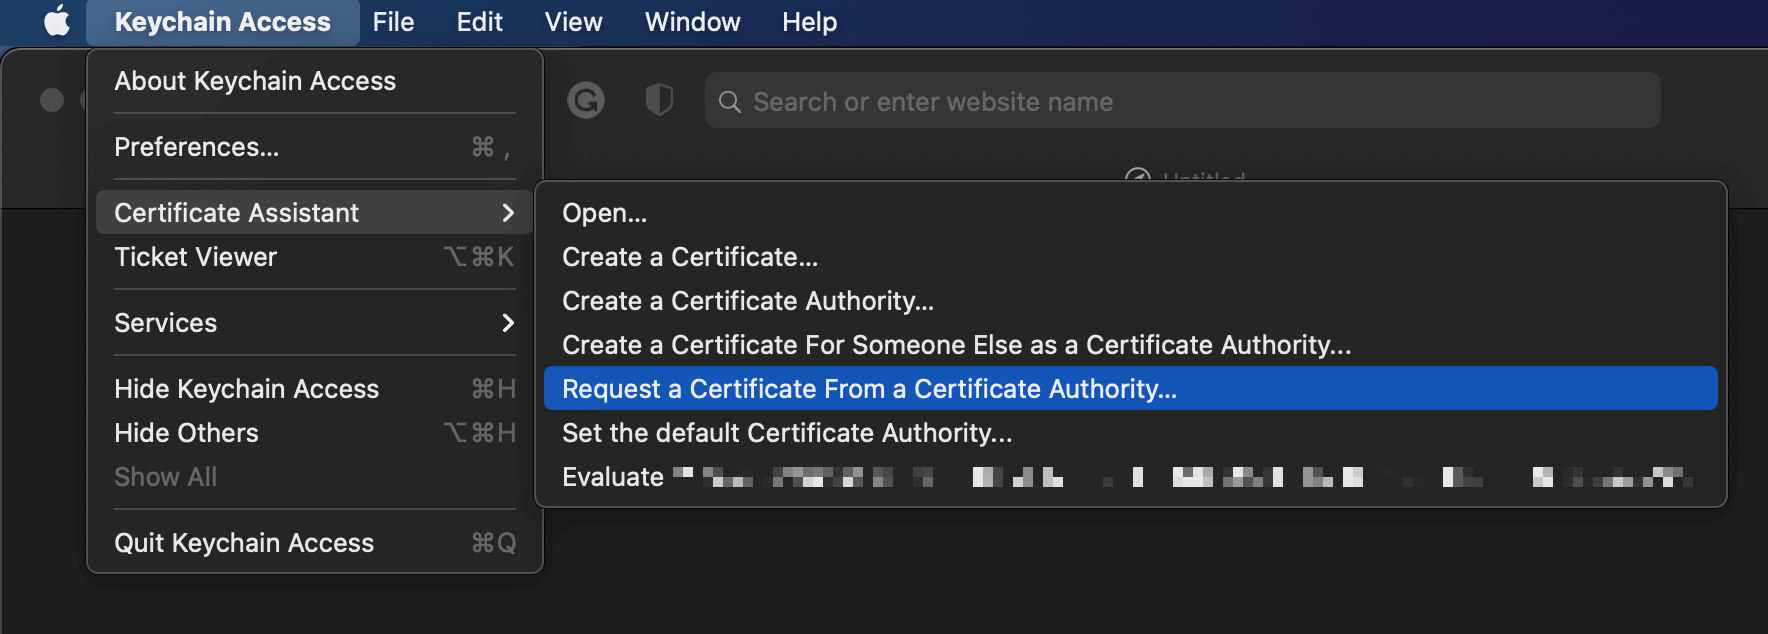
- Launch Keychain Access located in
/Applications/Utilities. - Choose Keychain Access > Certificate Assistant > Request a Certificate from a Certificate Authority.
![]()
- In the Certificate Assistant dialog, enter an email address in the User Email Address field.
- In the Common Name field, enter a name for the key (for example, Sarunw Dist Key).
- Leave the CA Email Address field empty.
- Choose Saved to disk, and click Continue.
![]()

You can easily support sarunw.com by checking out this sponsor.
Localization Buddy: Easiest way to localize and update App Store metadata.
Exporting a certificate
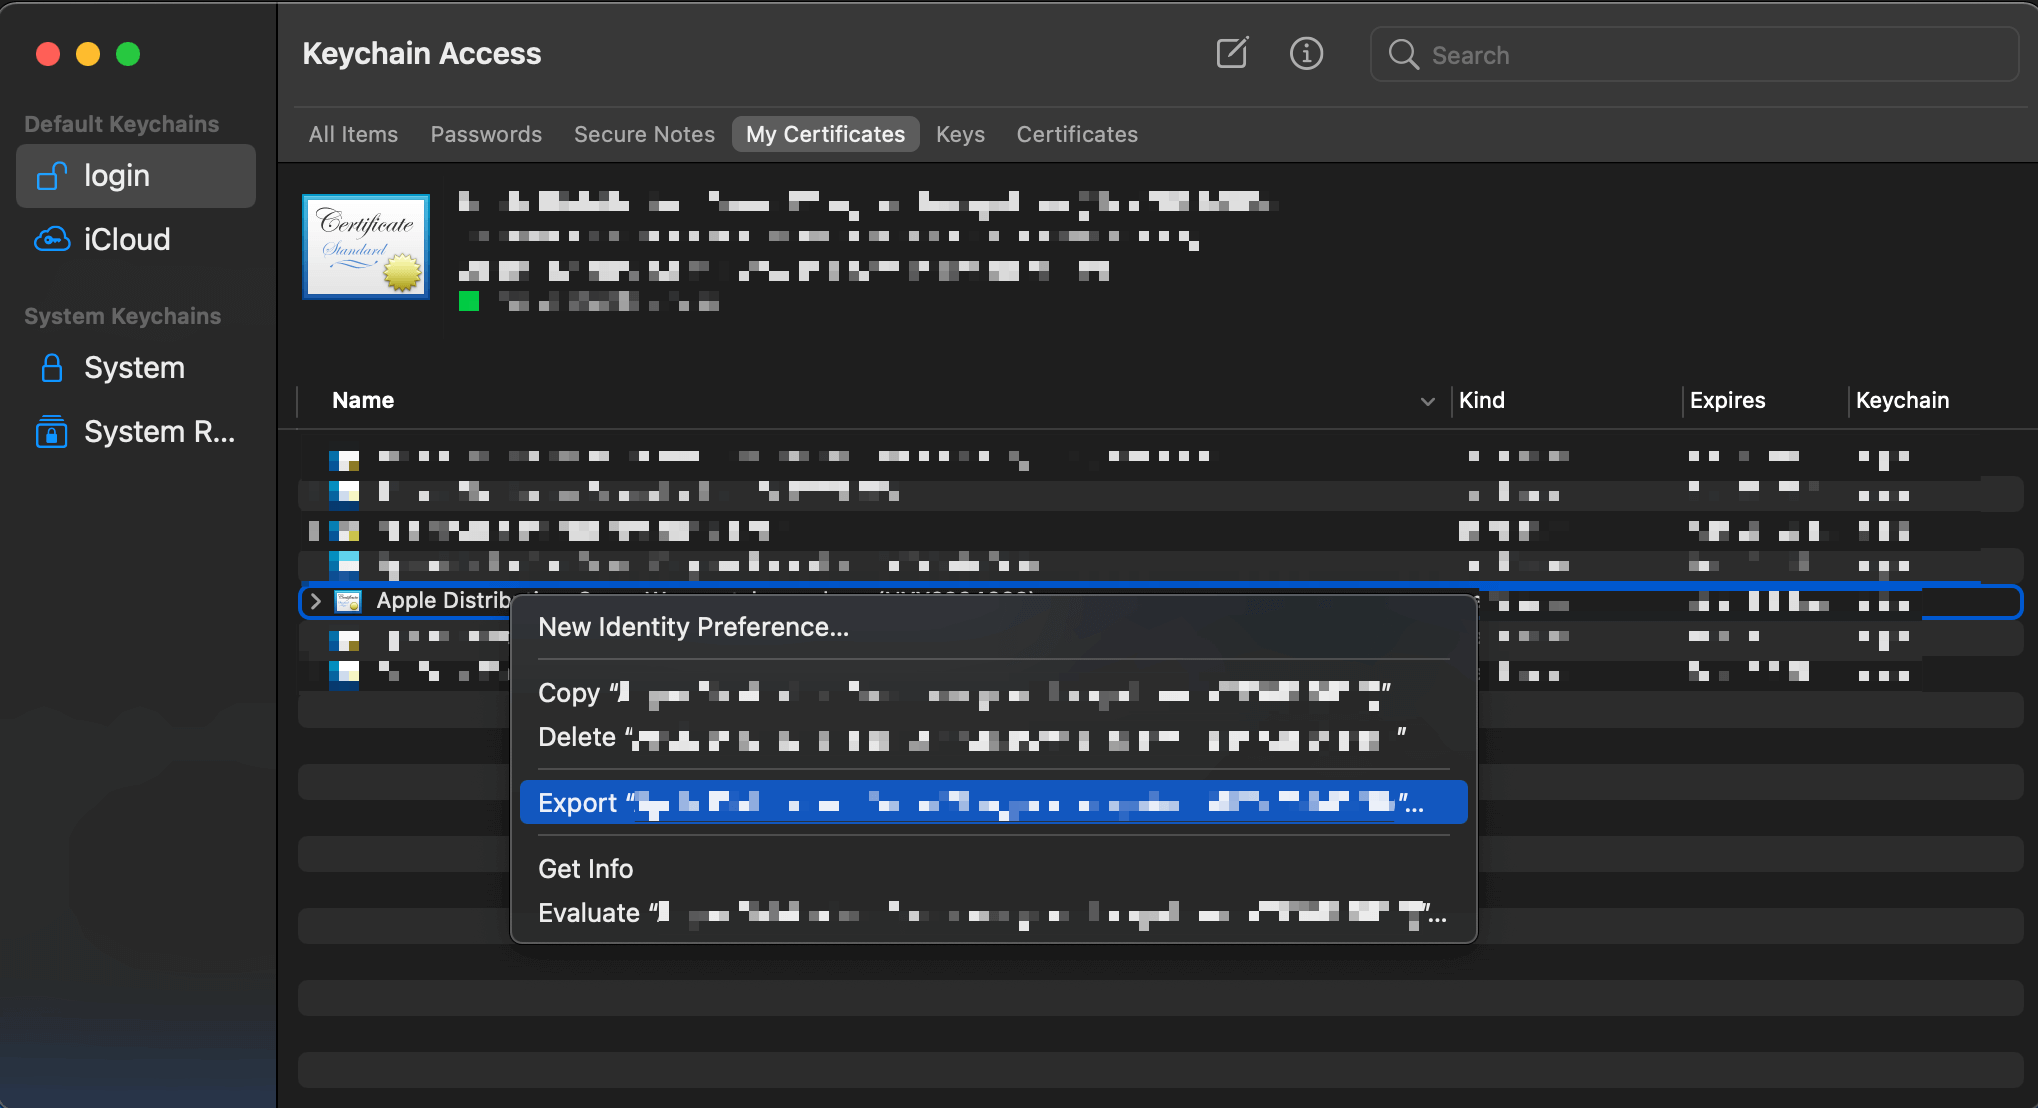
- Open Keychain Access.
- Select My Certificates tab.
- Select the certificate you want to export. Should be in this format
TYPE_OF_CERTIFICATE FIRSTNAME LASTNAME (TEAM_ID), e.g., Apple Distribution: Sarun Wongpatcharapakorn (XYZ). - Right-click and select Export.
![]()
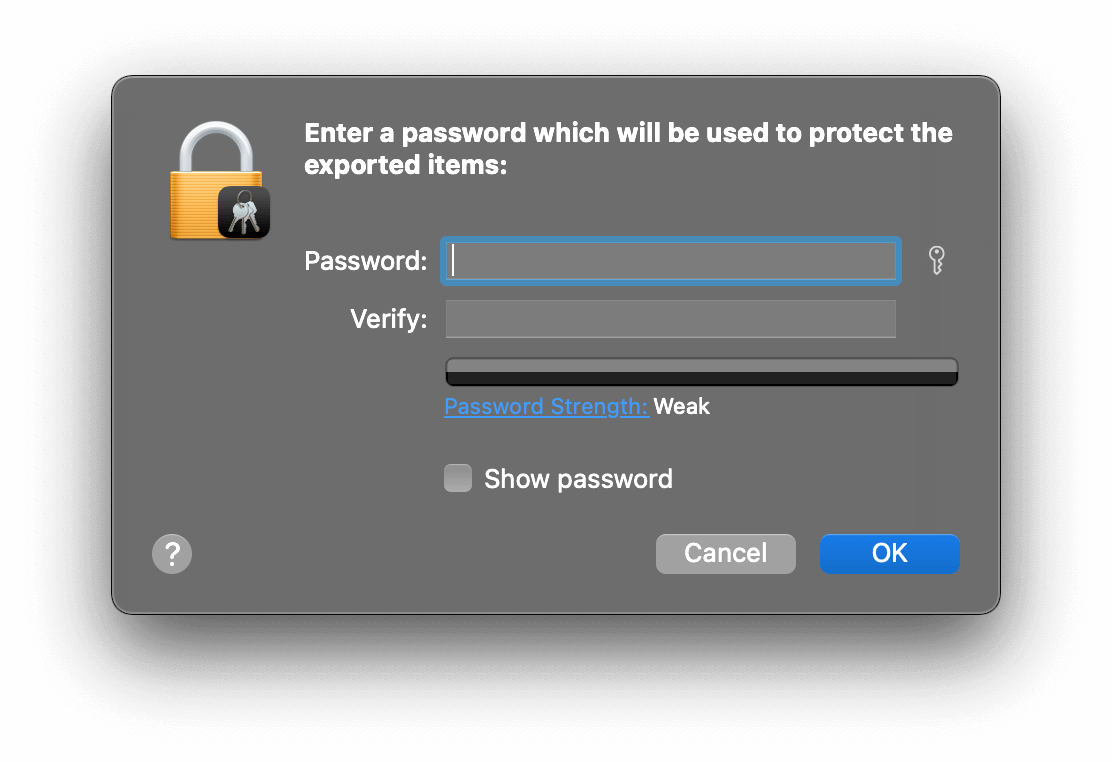
- Select a location to save p12 file.
- You can optionally protect the file with a password. This will be used when you import the certificate on the other machine. You can leave it blank if you want.
![]()
- Enter the computer password, then click Allow.
![]()
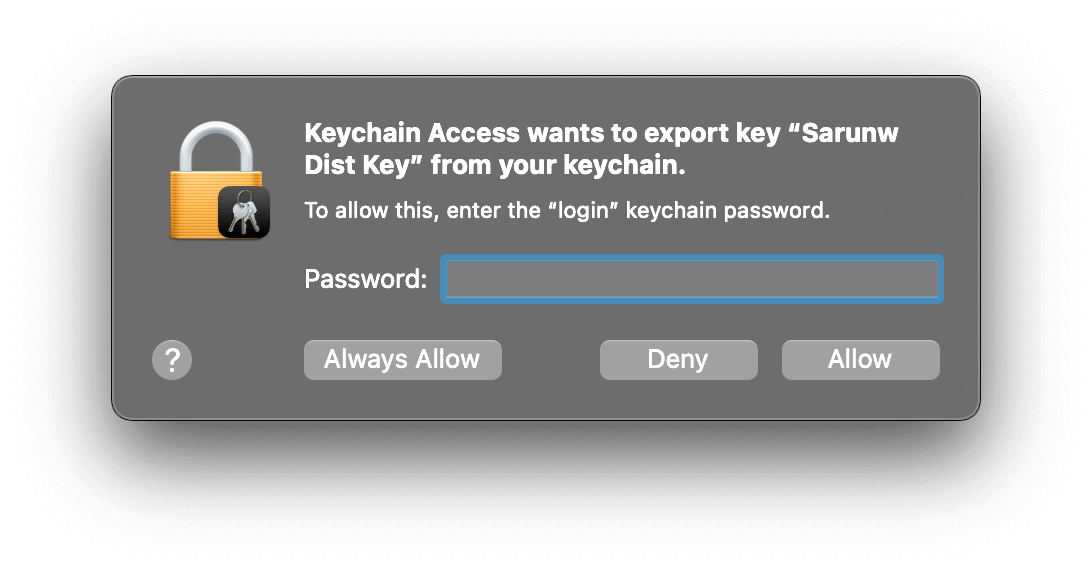
You will get a p12 file as a result from all these steps.
You can easily support sarunw.com by checking out this sponsor.
Localization Buddy: Easiest way to localize and update App Store metadata.
Import a certificate
The last step is to import the p12 file on a machine that you want to distribute the app.
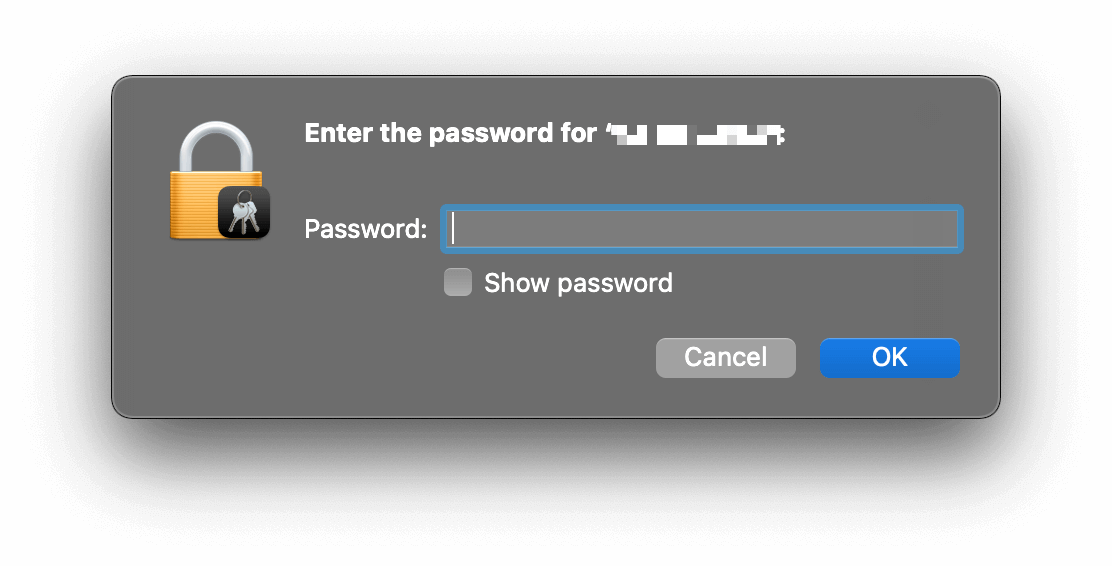
- Double click on the p12 file (this should cause Keychain Access to open).
- You will see a dialog asking for the password (regardless of whether you set it or not). If you don't have a password set when you export it, just leave it blank and press OK.
![]()
- You should now have a new certificate in the login keychain.
Xcode Cloud is a continuous integration and delivery service built into Xcode. It was first introduced in WWDC 2021. ↩︎
Read more article about Development or see all available topic
Enjoy the read?
If you enjoy this article, you can subscribe to the weekly newsletter.
Every Friday, you'll get a quick recap of all articles and tips posted on this site. No strings attached. Unsubscribe anytime.
Feel free to follow me on Twitter and ask your questions related to this post. Thanks for reading and see you next time.
If you enjoy my writing, please check out my Patreon https://www.patreon.com/sarunw and become my supporter. Sharing the article is also greatly appreciated.
Become a patron Buy me a coffee Tweet ShareA better way to ask for a one-time user's location with the Location Button
Asking for sensitive data like location is hard. Learn how Apple makes it easier with the new Location Button.
New Formatters in iOS 15: Why do we need another formatter
We have a new way to format data into a localized string in iOS 15. Why do we need another formatter? How does it differ from the old one? Let's find out.