SF Font Expanded, Condensed, and Compressed: Three New font width styles in iOS 16
Table of Contents
In iOS 16, Apple introduces three new width styles to the SF font family.
- Compressed
- Condensed
- Expanded

UIFont.Width
Apple introduces a new struct, UIFont.Width, that represents these new width styles.
There are four styles right now.
standard: This is the default width that we always have.compressed: The narrowest width style.condensed: The style that has width between compressed and standard.expanded: The widest width style.

You can easily support sarunw.com by checking out this sponsor.

Offline Transcription: Fast, privacy-focus way to transcribe audio, video, and podcast files. No data leaves your Mac.
How to use SF Font with new width styles
To use these new width style, Apple have a new UIFont's class method that accepts this new UIFont.Width.
class UIFont : NSObject {
    class func systemFont(
        ofSize fontSize: CGFloat,
        weight: UIFont.Weight,
        width: UIFont.Width
    ) -> UIFont
}
You can create a font with new width like you normally do with this new method.
let condensed = UIFont.systemFont(ofSize: 46, weight: .bold, width: .condensed)
let compressed = UIFont.systemFont(ofSize: 46, weight: .bold, width: .compressed)
let standard = UIFont.systemFont(ofSize: 46, weight: .bold, width: .standard)
let expanded = UIFont.systemFont(ofSize: 46, weight: .bold, width: .expanded)
SwiftUI
Currently (Xcode 14 beta 6), these new width styles and initializer are only available in UIKit. Luckily, we can easily use this in SwiftUI.
There are many ways to integrate UIKit into SwiftUI. I will give you two ways to use new width styles in SwiftUI.
Convert UIFont to Font
We learned in How to convert UIFont to Font in SwiftUI that Font has an initializer that accepts UIFont as an argument.
To do that.
- You create a
UIFontwith a new width style. - Create
Fontout of thatUIFont. - Then use it like a normal
Font.
struct NewFontExample: View {
    // 1
    let condensed = UIFont.systemFont(ofSize: 46, weight: .bold, width: .condensed)
    let compressed = UIFont.systemFont(ofSize: 46, weight: .bold, width: .compressed)
    let standard = UIFont.systemFont(ofSize: 46, weight: .bold, width: .standard)
    let expanded = UIFont.systemFont(ofSize: 46, weight: .bold, width: .expanded)

    var body: some View {
        VStack {
            // 2
            Text("Compressed")
                .font(Font(compressed))
            Text("Condensed")
                .font(Font(condensed))
            Text("Standard")
                .font(Font(standard))
            Text("Expanded")
                .font(Font(expanded))
        }
    }
}
1 Create a UIFont with a new width style.
2 Initilize Font from UIFont, then pass that to .font modifier.
Create a Font extension
This is actually the same way as Converting UIFont to Font. We just created a new Font extension to make it easier to use in the SwiftUI world.
extension Font {
    public static func system(
        size: CGFloat,
        weight: UIFont.Weight,
        width: UIFont.Width) -> Font
    {
        // 1
        return Font(
            UIFont.systemFont(
                ofSize: size,
                weight: weight,
                width: width)
        )
    }
}
1 I create a static function that passes along parameters that UIFont needed. Then, initialize UIFont and create Font out of that.
Then we can use it like this.
Text("Compressed")
    .font(.system(size: 46, weight: .bold, width: .compressed))
Text("Condensed")
    .font(.system(size: 46, weight: .bold, width: .condensed))
Text("Standard")
    .font(.system(size: 46, weight: .bold, width: .standard))
Text("Expanded")
    .font(.system(size: 46, weight: .bold, width: .expanded))
How should I use new width styles
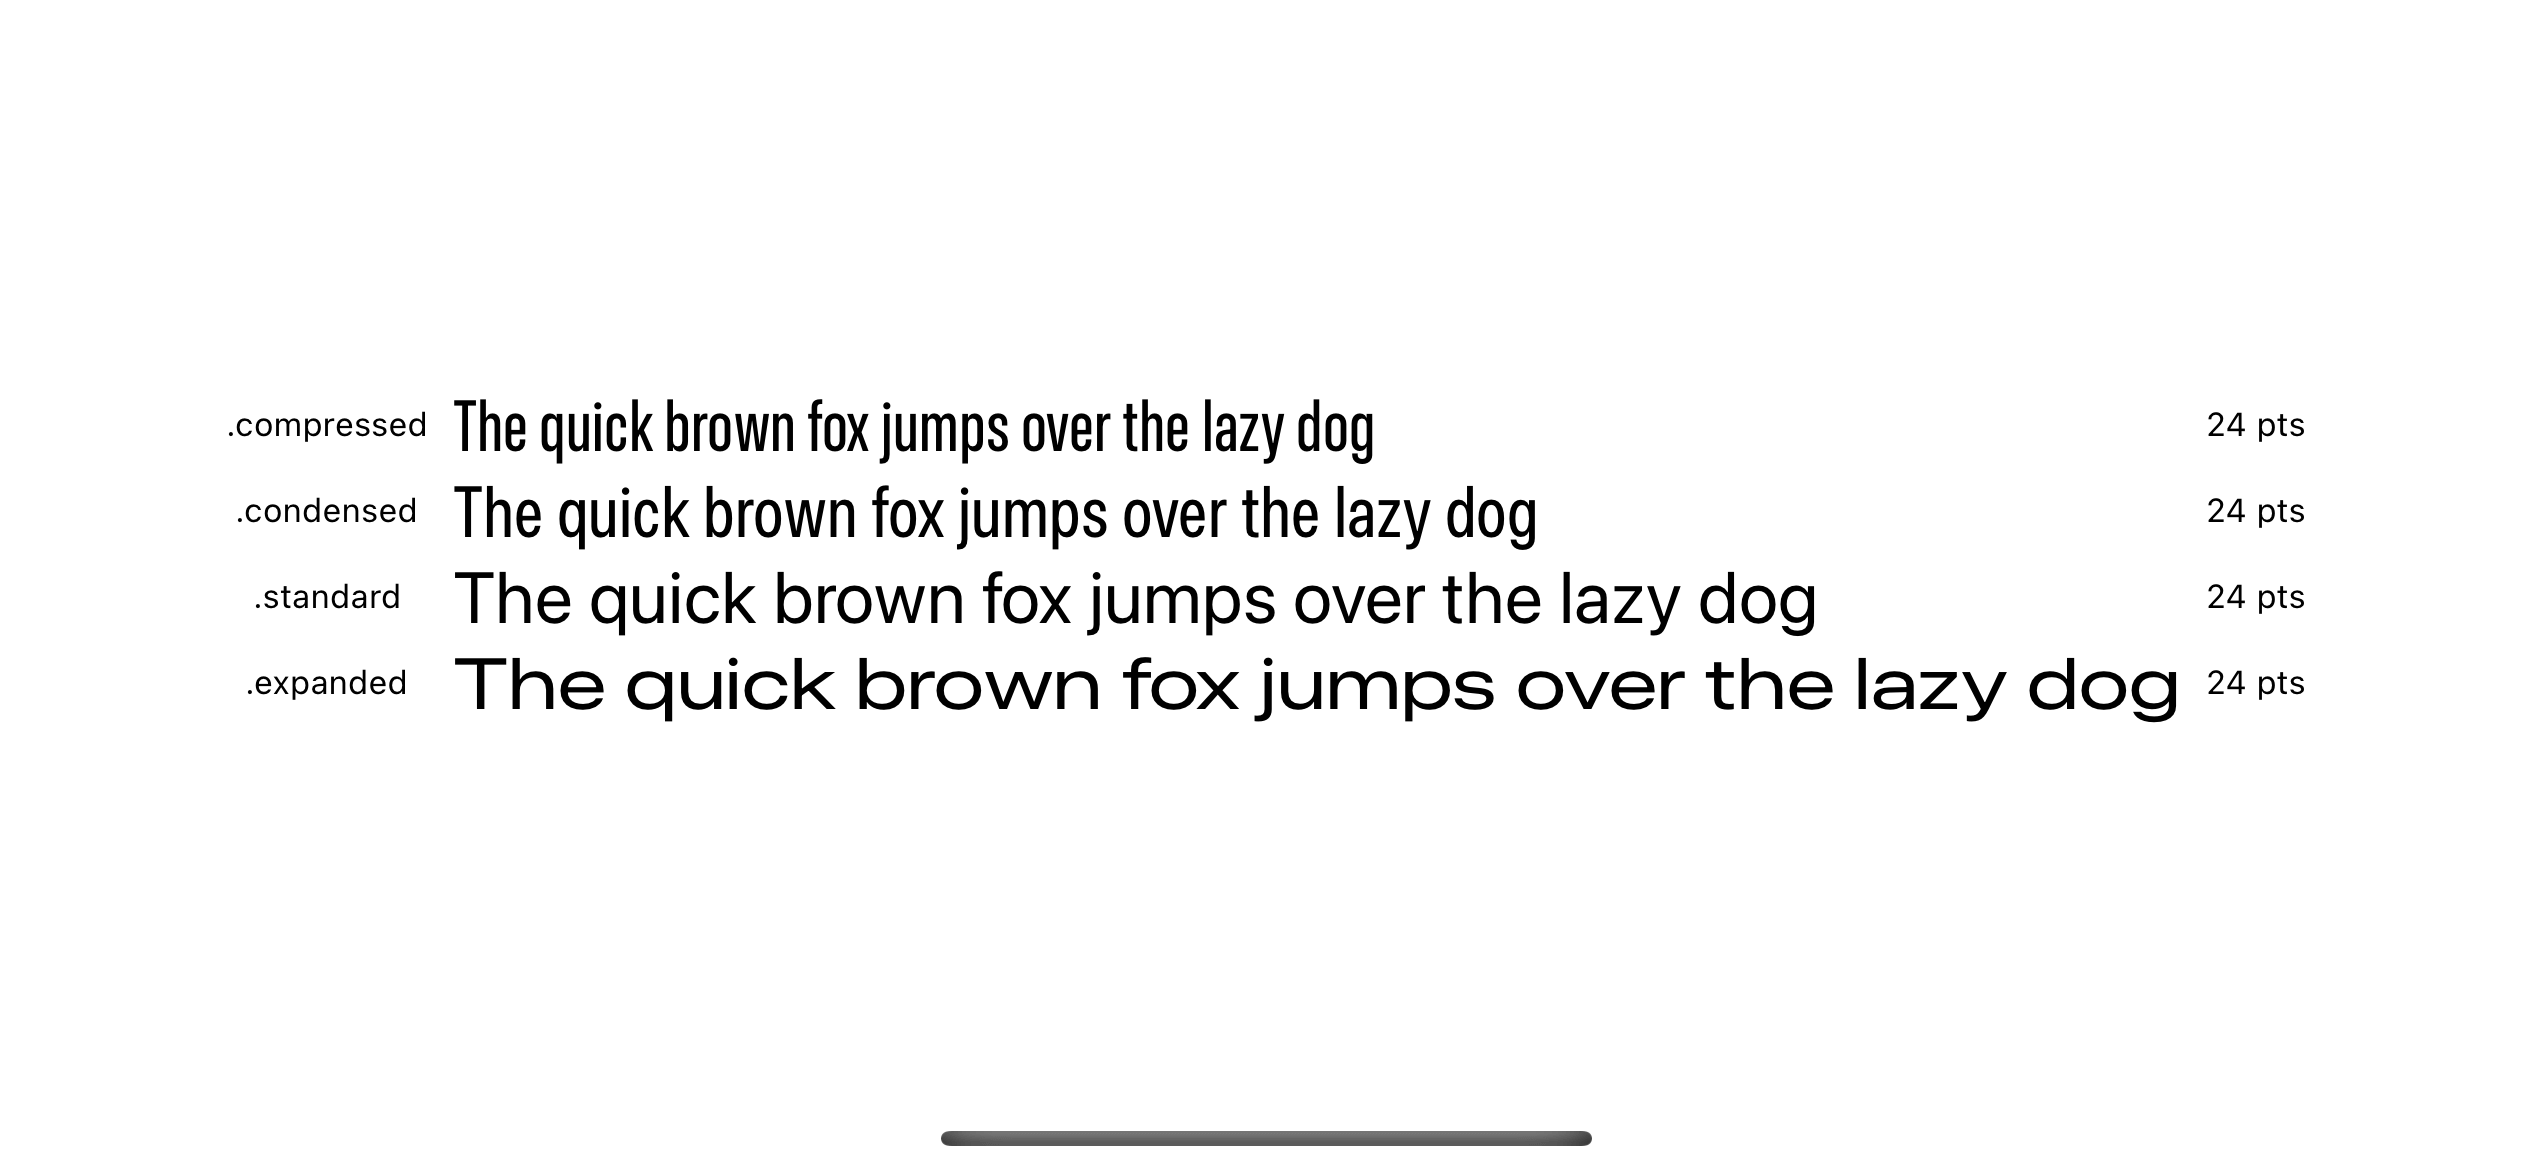
You can use it wherever you want. There is no limitation here. All new widths with the same size got the same x-height[1]. The only difference is its width.
Here is an example of different font width styles of the same text, font size, and font style.

What is the benefit of the new width styles
You can use new width styles with existing font styles like thin or bold to create a unique experience for your app.
Apple uses this in their Photo app by combining different font widths and styles in the title and subtitle of Memories.

Here is a combination of different font widths and styles for your inspiration.
Text("Pet Friends")
    .font(Font(UIFont.systemFont(ofSize: 46, weight: .light, width: .expanded)))
Text("OVER THE YEARS")
    .font(Font(UIFont.systemFont(ofSize: 30, weight: .thin, width: .compressed)))

Text("Pet Friends")
    .font(Font(UIFont.systemFont(ofSize: 46, weight: .black, width: .condensed)))
Text("OVER THE YEARS")
    .font(Font(UIFont.systemFont(ofSize: 20, weight: .light, width: .expanded)))
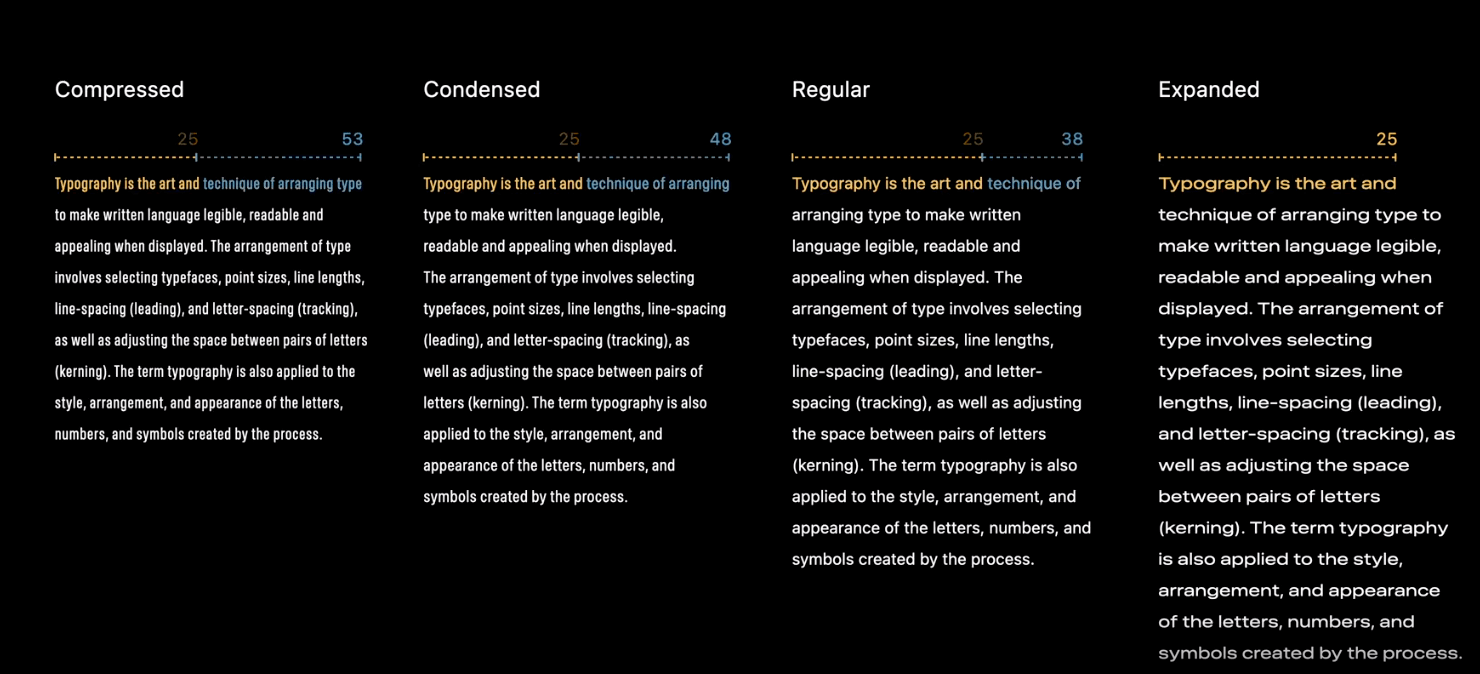
You can also use new width styles to control the readability of your text.
Here is an example of how a different width style affects the number of characters per line and paragraph length.

You can easily support sarunw.com by checking out this sponsor.

Offline Transcription: Fast, privacy-focus way to transcribe audio, video, and podcast files. No data leaves your Mac.
Where can I download this Font
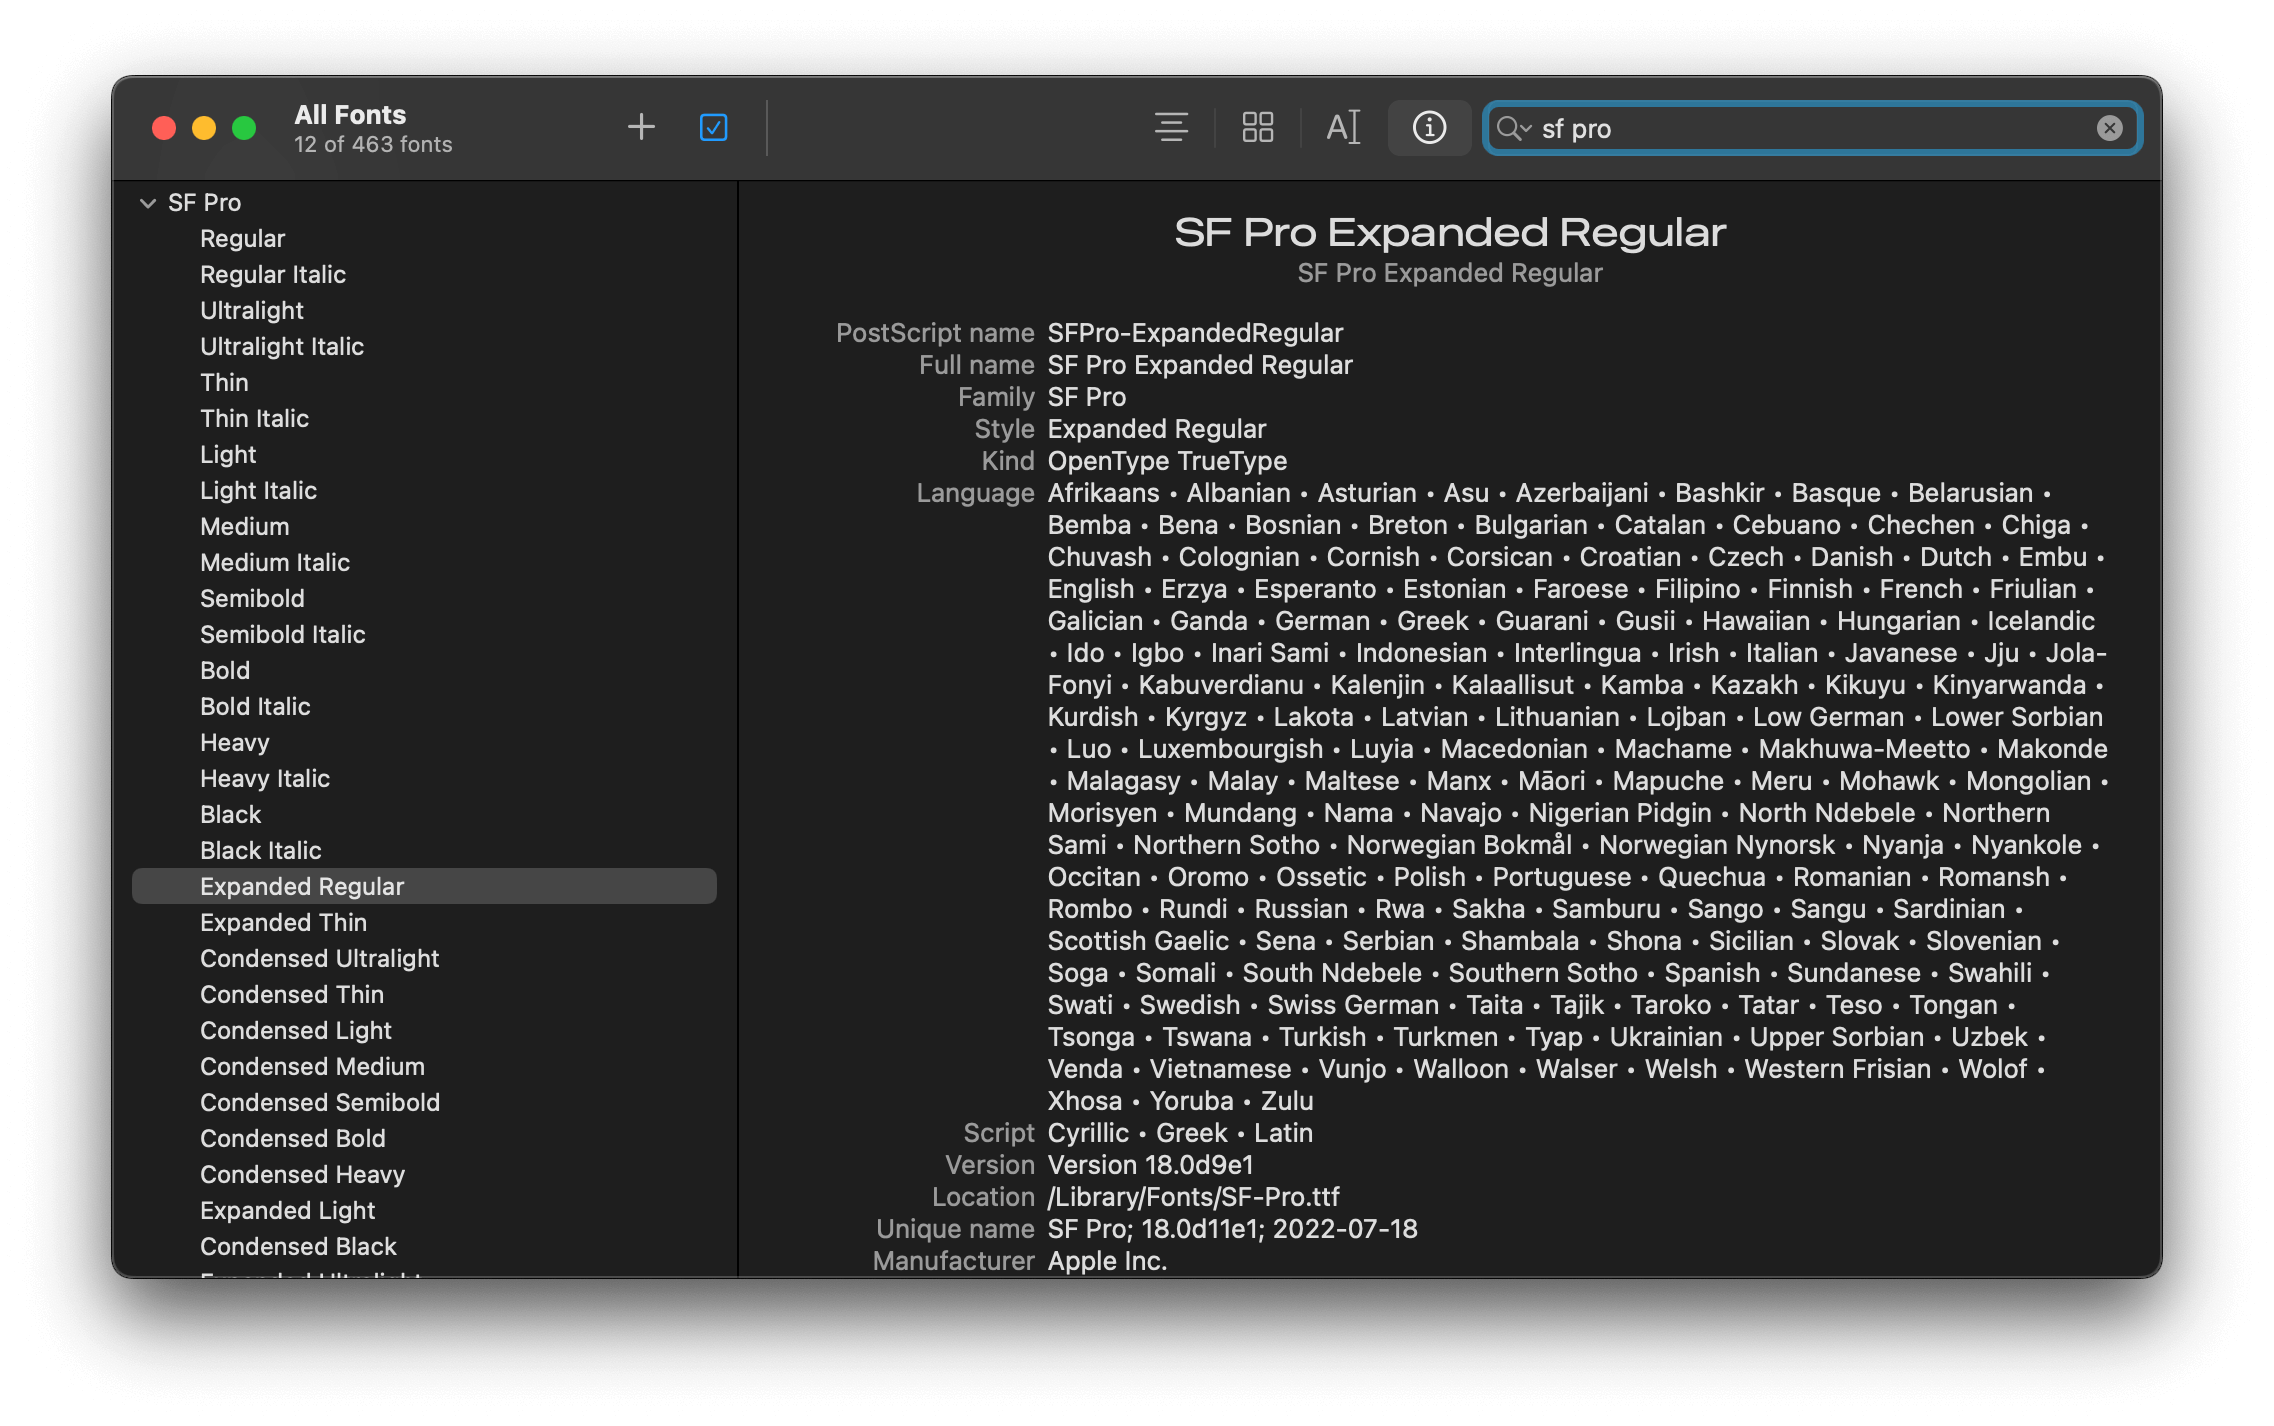
You can download these new font width styles at Fonts for Apple platforms.
Once downloaded and installed, you will find a new style combining existing wights and new width styles.

Read more article about SwiftUI, UIKit, Font, Text, iOS 16, WWDC22, or see all available topic
Enjoy the read?
If you enjoy this article, you can subscribe to the weekly newsletter.
Every Friday, you'll get a quick recap of all articles and tips posted on this site. No strings attached. Unsubscribe anytime.
Feel free to follow me on Twitter and ask your questions related to this post. Thanks for reading and see you next time.
If you enjoy my writing, please check out my Patreon https://www.patreon.com/sarunw and become my supporter. Sharing the article is also greatly appreciated.
Become a patron Buy me a coffee Tweet ShareHow to add button to navigation bar in SwiftUI
Learn how to add navigation bar buttons in SwiftUI.