Spell checking in Xcode
Table of Contents
One hidden feature in Xcode is its support for spell checking. Today, I will show you how to enable it and explore some capabilities.
How to enable spell-checking in Xcode
You can enable this feature by going to Edit menu > Format > Spelling and Grammar > Check Spelling While Typing.
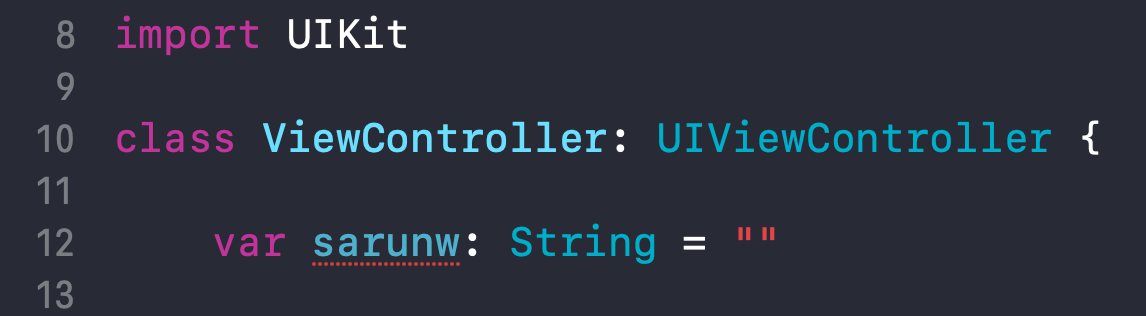
After you enable spell checking, Xcode will underline any typo with a red underline.
You can easily support sarunw.com by checking out this sponsor.
AI Paraphrase:Are you tired of staring at your screen, struggling to rephrase sentences, or trying to find the perfect words for your text?
How to detect the typo
As mentioned earlier, the misspelled word will be highlighted with a red underline. But it is hard to notice all the words if you have a large file. An easy way to find all misspelled words is by using the following command:
⌘ - command + ; or
Edit menu > Format > Spelling and Grammar > Check Document Now.
Check Document Now command will find and select a misspelled word. Repeat this command will jump to the next one. So you can see every typo in the current file with this method.
How to fix the typo
There are two ways to correct misspelled words.
Context menu
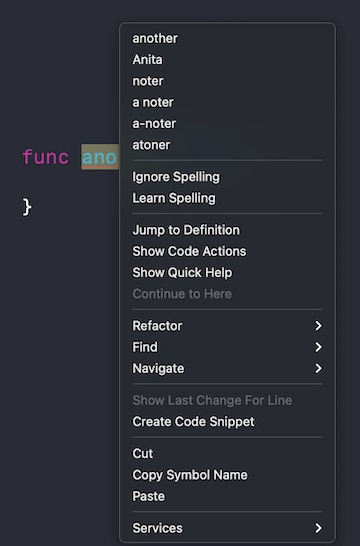
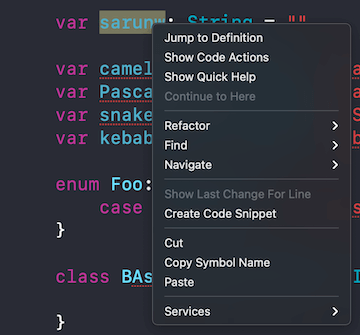
Right-click or Control-click on the misspelled word will open a menu with suggested corrections. Click any of them to choose.
Fixing typo this way would be very slow if you have a large number of misspelled words. The faster way would be using Spelling and Grammar window.
Spelling and Grammar window
To fix typo with this method, first, you need to open the Spelling and Grammar window.
Open Spelling and Grammar window with the following shortcut:
⌘ - command + : or
Edit menu > Format > Spelling and Grammar > Show Spelling and Grammar.
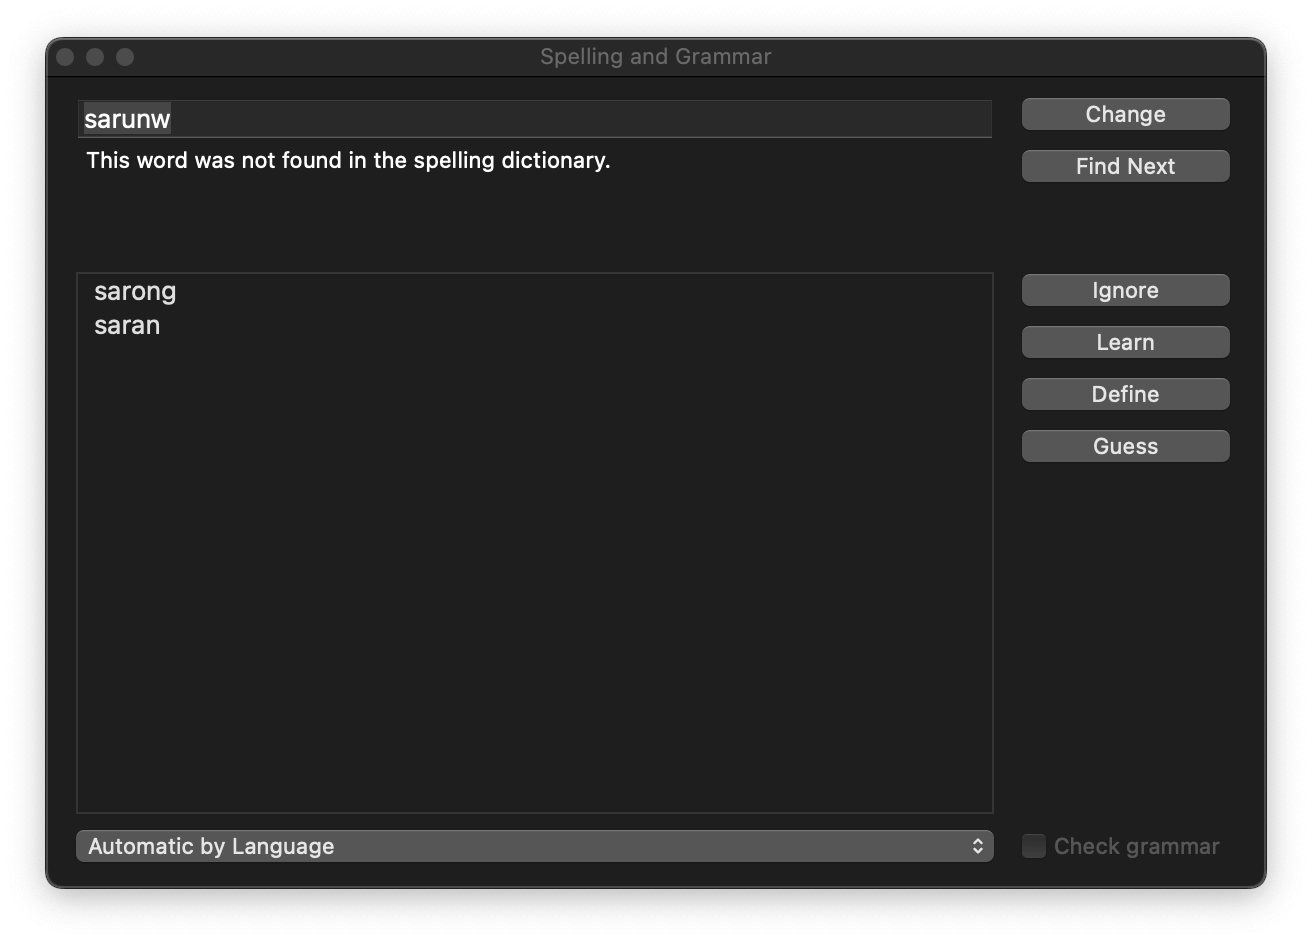
This window will show up over your Xcode.
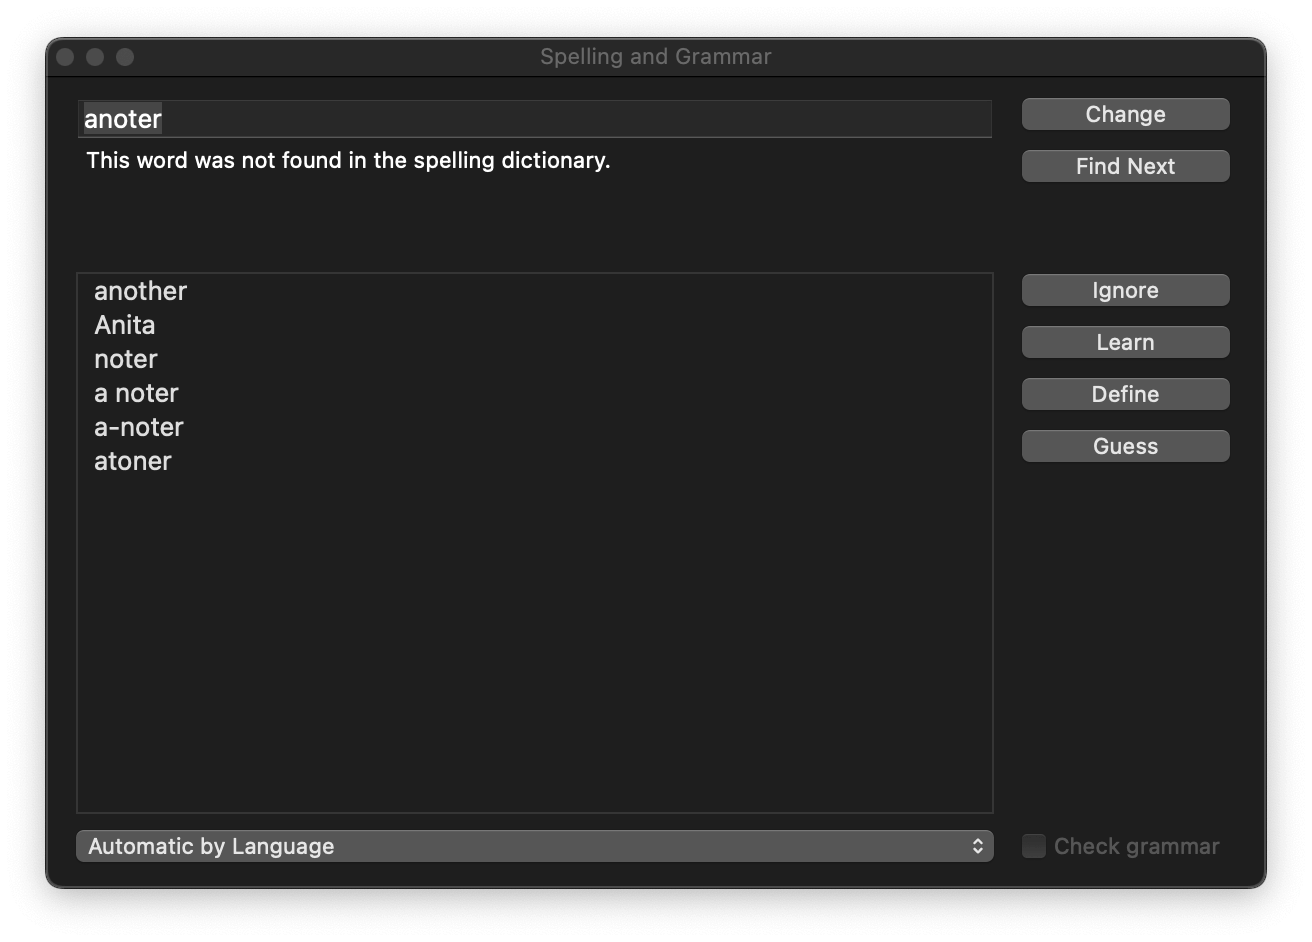
We have many options here.
- Change. Select the suggested word from the bottom and click Change to fix the text. This is equivalent to right-click and select.
- Find Next. This will select the next mispelled word. This is equivalent to ⌘ - command + ; shortcut.
- Ignore. This option will ignore the selected item, but it doesn't work with Xcode. Once you ignore, the red underline will be gone, and that word will be treated as correct, but if you leave that file and come back, the ignore-state isn't saved, and the word will be treated as misspelled again.
- Learn. This option will add the selected item to the dictionary, and the word won't treat as misspelled again.
- Define. This will look up the selected item in the dictionary.
- Guess. This will suggest possible corrections for this item.
But we won't use any of that options when doing the correction.
To quickly fix every mistake in the file, we do the following:
- Open up the Spelling and Grammar window.
- Then, we use Check Document Now (⌘ - command + ;) to jump to each word.
- Double click the correction that you want from the list.
- Spelling and Grammar will automatically jump to the next word. Then you repeat step 3.
Capabilities
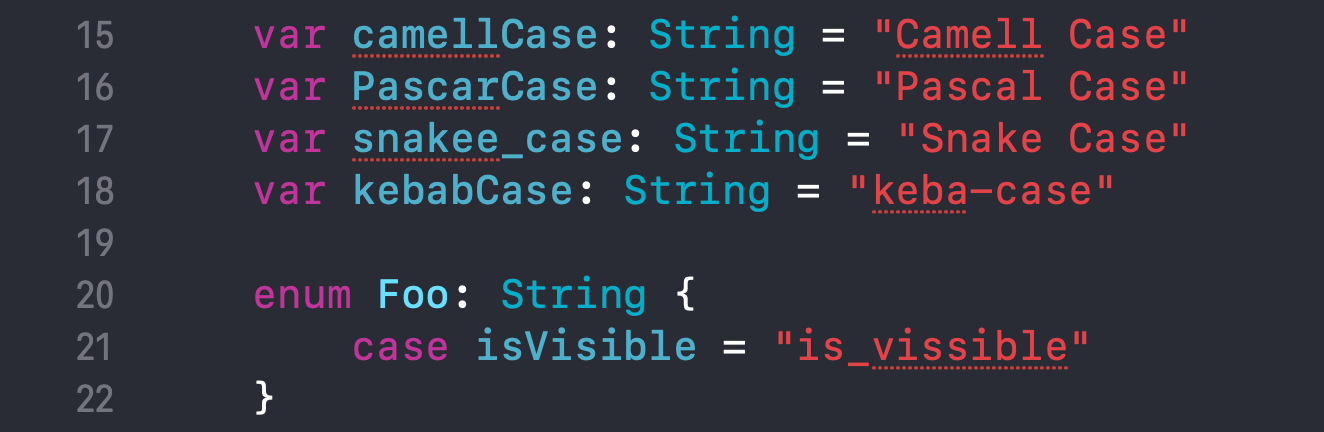
Spelling in coding is not straightforward as regular writing. We have a unique way to style our variables, methods, and classes. We will learn in this section whether the spell checking can support camelCase, snake_case, PascalCase, and kebab-case.
I test by declaring variable names with all four cases.
var camellCase: String = "Camell Case"
var PascarCase: String = "Pascal Case"
var snakee_case: String = "Snake Case"
var kebabCase: String = "keba-case"

enum Foo: String {
    case isVisible = "is_vissible"
}
Here is the result. Xcode can detect variables or strings regardless of cases.
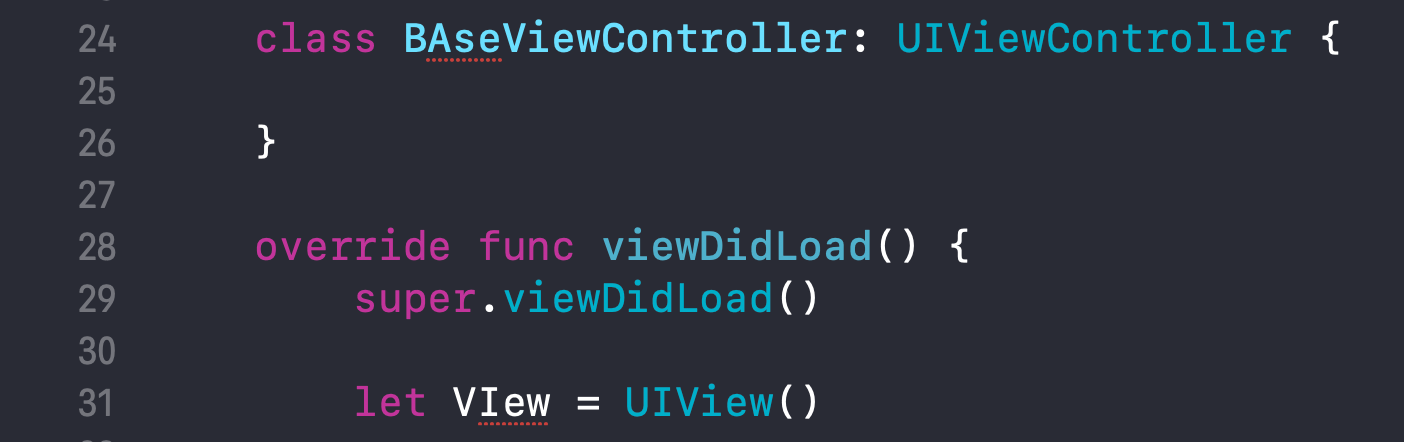
Be able to detect typos from different cases means it is case sensitive. This makes it can catch wrong capital cases like "VIew".
How to add a new word
You might have a unique word that not define in the system dictionary, such as your app name or prefix. In this case, you can add a new word to the dictionary.
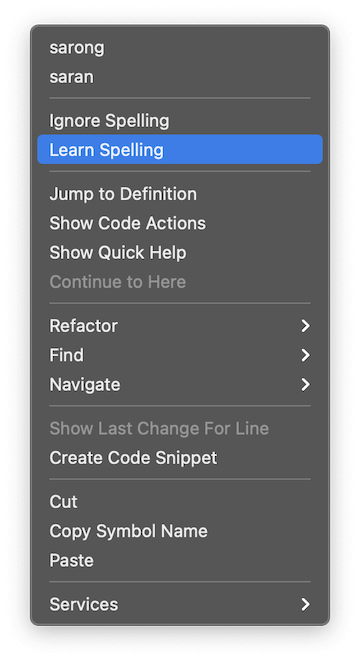
You can make your dictionary learn a new word by right-clicking and select Learn Spelling.
Another way to do it is via the Spelling and Grammar window by clicking the Learn button.
How to unlearn a word
If you accidentally learn a wrong word or want to revert your decision, you can unlearn the word, but it is not a straightforward operation for Xcode.
Apps that fully support spell checkings, such as the Pages and Notes app, can unlearn the word, but Xcode isn't one of this kind.
Right-click on the learned word on the Pages app, and you will see an Unlearn Spelling option.
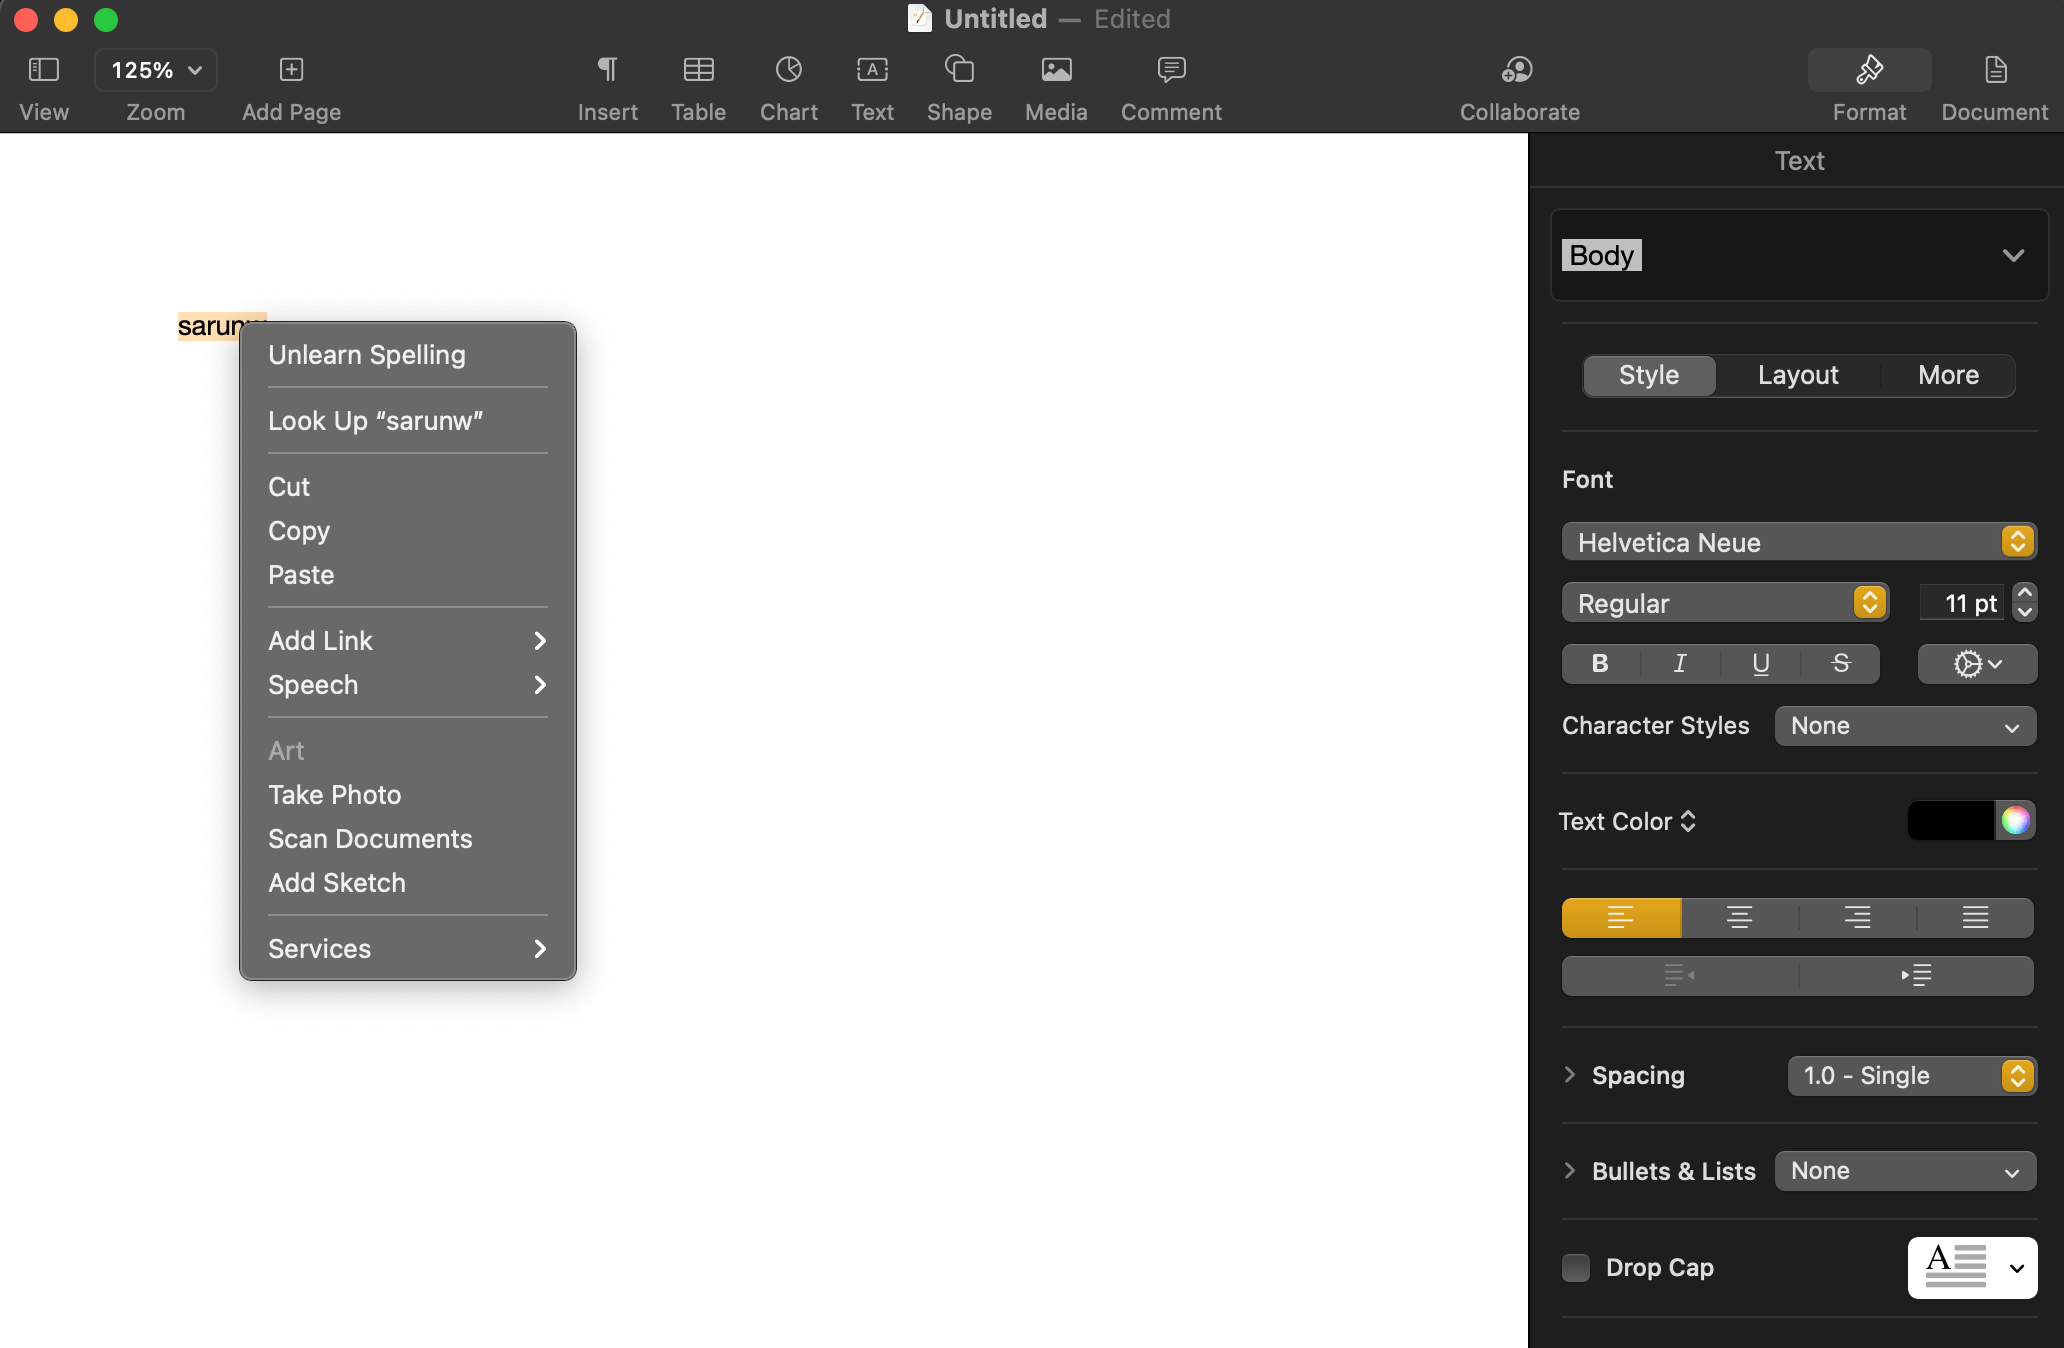
If you right-click on the learned word on Xcode, the Unlearn Spelling option won't show up. In my case, I learn the word "Sarunw", but when I right-click to unlearn, the option isn't there.
How would you unlearn the word then? We have two hacky ways to do this.
Quick and dirty
The quick and dirty solution is to copy the word, paste it into the Pages or Notes app, right-click and choose Unlearn Spelling from the pop-up menu.
Bulk Edit
If you have a big chunk of falsely learn words, manually copy and unlearn it one-by-one might not be possible. You can edit the list of learned words directly by following these steps:
- Open
LocalDictionarylocated at~/Library/Spelling. - You will see a list of learned words. Remove the one you want to unlearn and save the file.
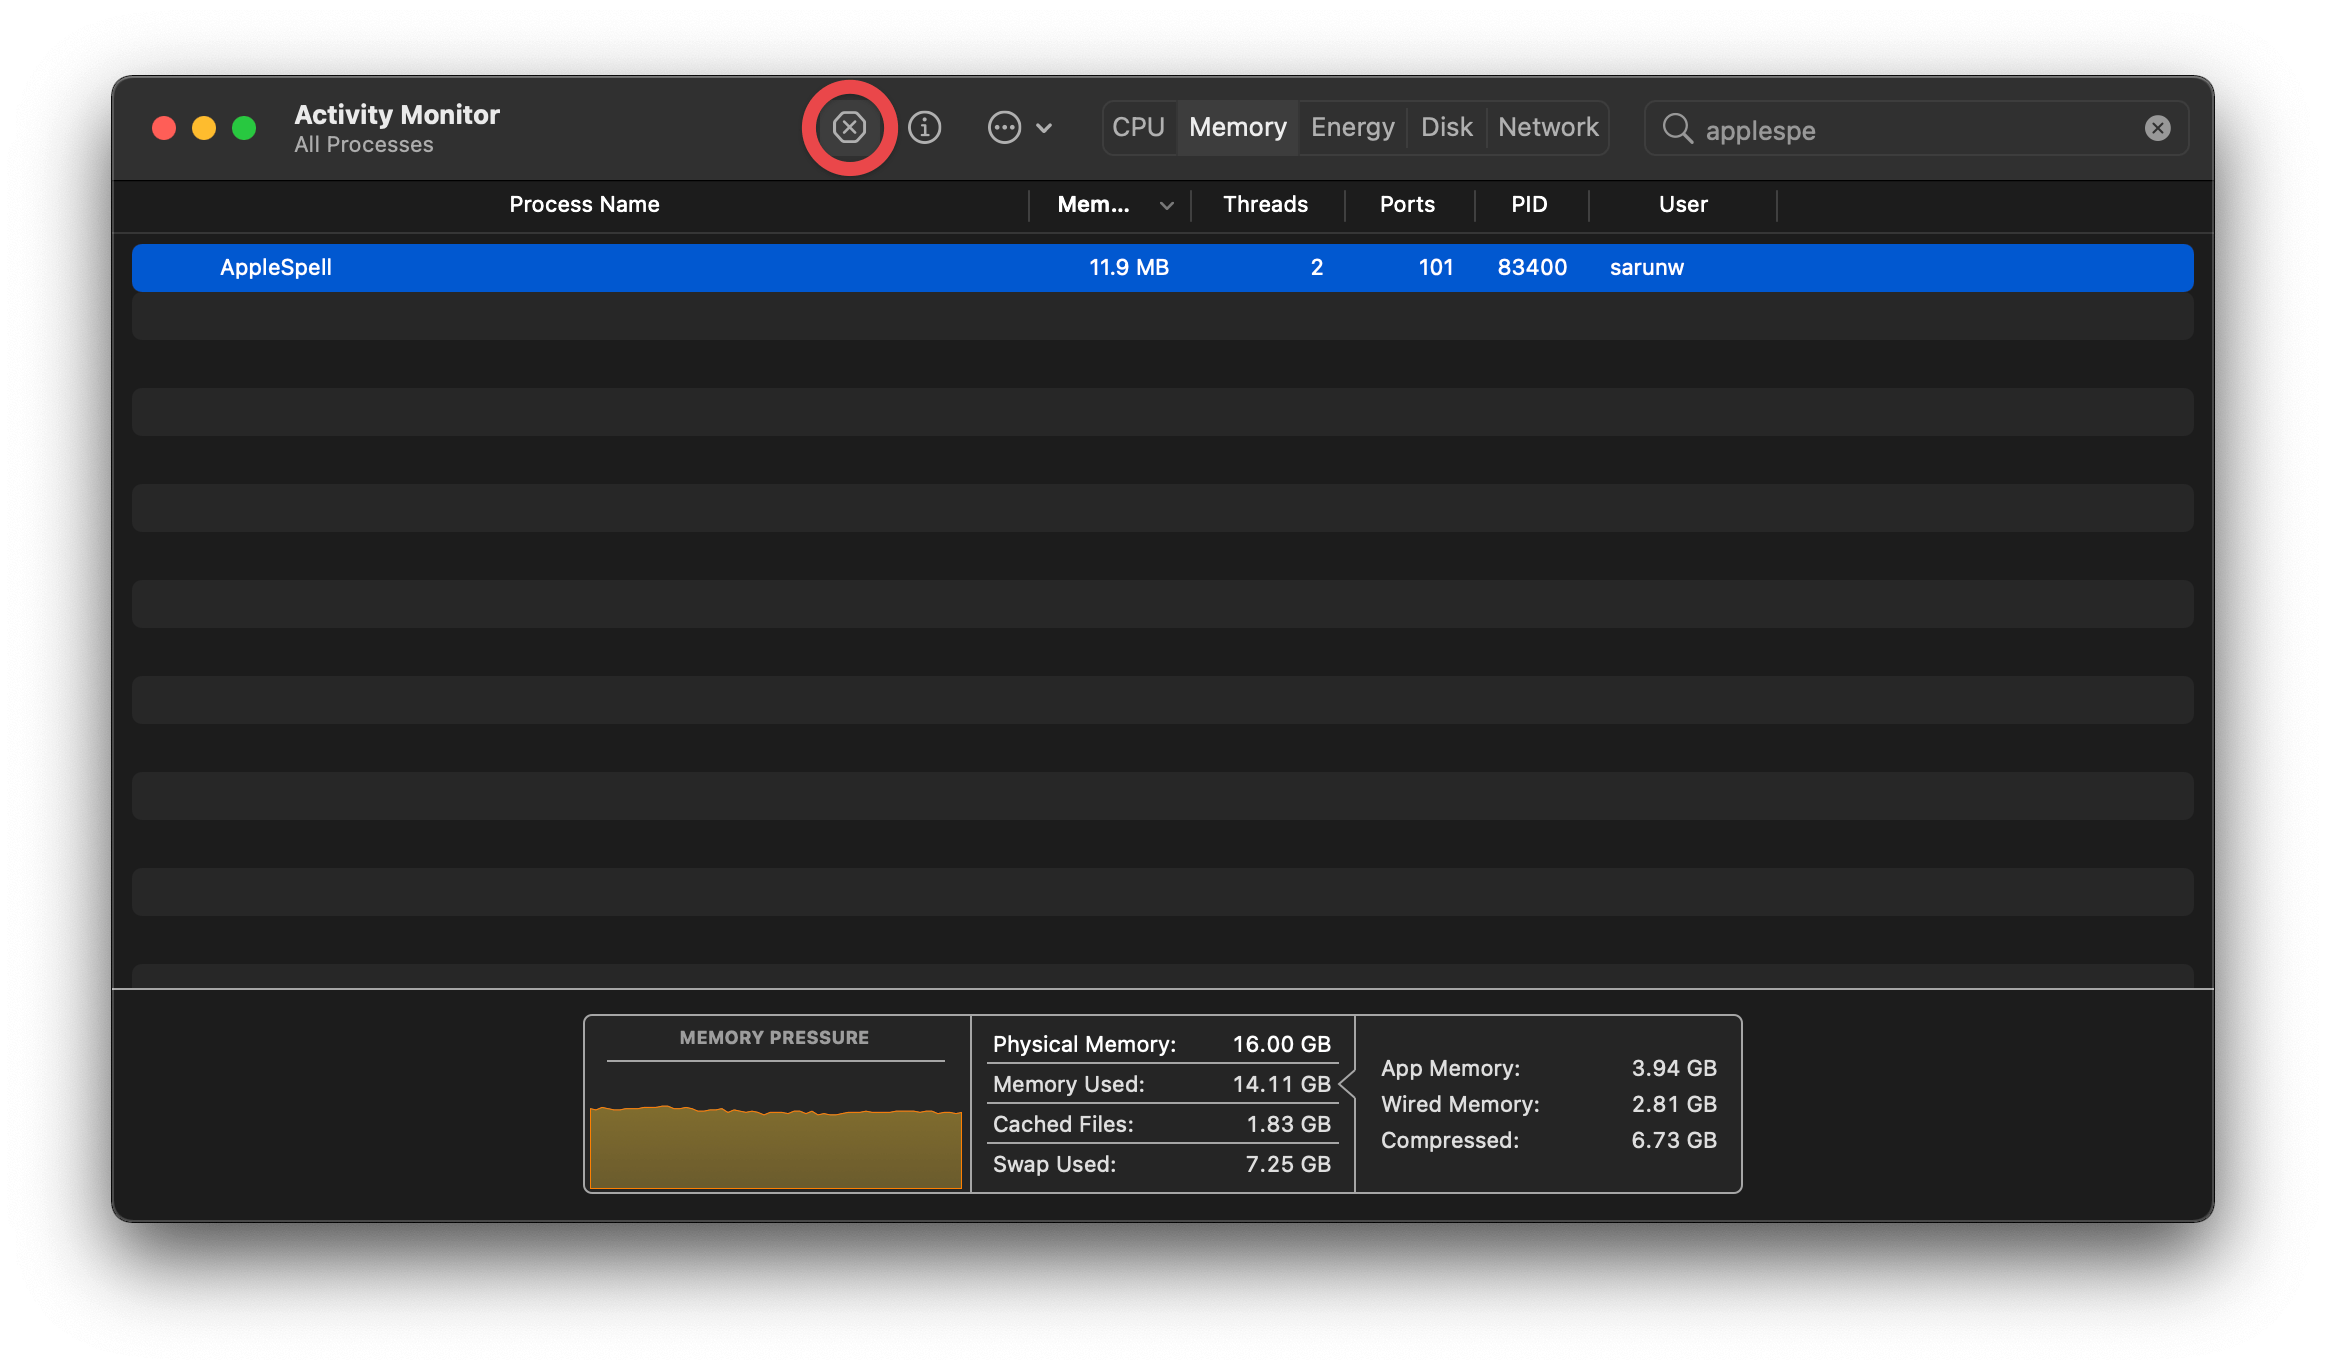
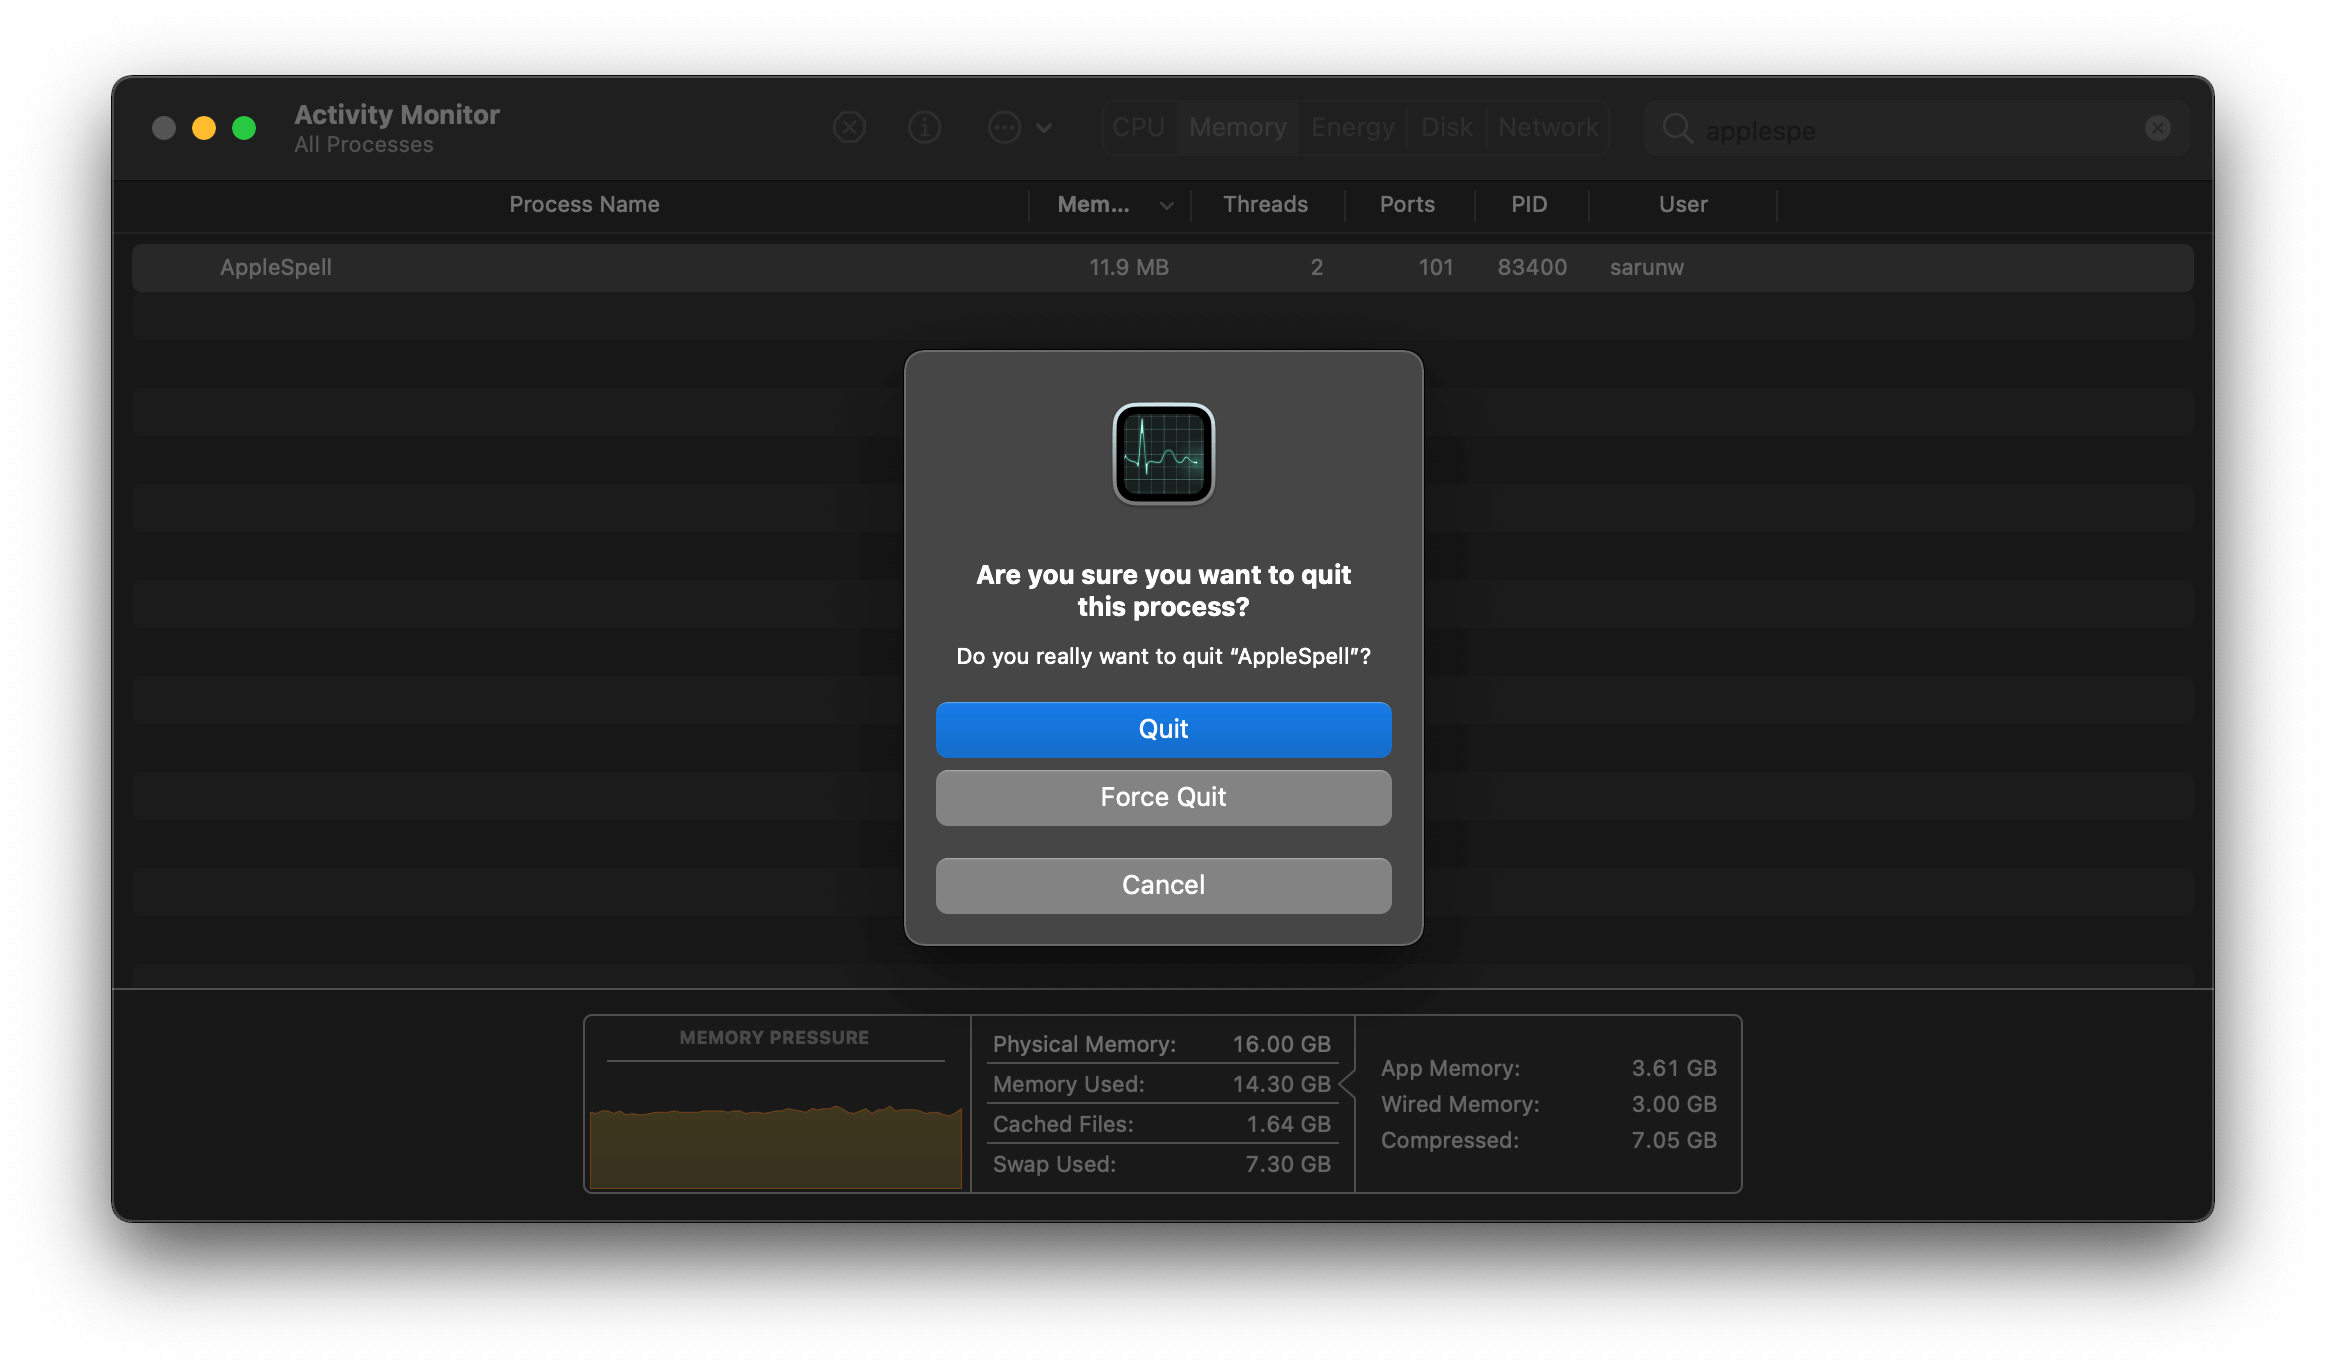
- To make the change reflect in Xcode, we need to restart the AppleSpell process. You can do that by launch Activity Monitor from
/Applications/Utilities. Then search for AppleSpell. Select it and click the X button on the toolbar.
![]()
- Select Force Quit.
![]()
After you quit AppleSpell, it restarts automatically, and the changes made will reflect in Xcode.
You can easily support sarunw.com by checking out this sponsor.
AI Paraphrase:Are you tired of staring at your screen, struggling to rephrase sentences, or trying to find the perfect words for your text?
Conclusion
In this article, we learn how to enable spell-checking in Xcode, quickly find and fix our typos, and learn and unlearn technical terms in our app.
The best part about this feature is it can detect typos on class names, variables, not just a string. It also catches misspelled word writing in all cases that we normally use in codings, such as camelCase, snake_case, PascalCase, and kebab-case.
Read more article about Xcode, Development, or see all available topic
Enjoy the read?
If you enjoy this article, you can subscribe to the weekly newsletter.
Every Friday, you'll get a quick recap of all articles and tips posted on this site. No strings attached. Unsubscribe anytime.
Feel free to follow me on Twitter and ask your questions related to this post. Thanks for reading and see you next time.
If you enjoy my writing, please check out my Patreon https://www.patreon.com/sarunw and become my supporter. Sharing the article is also greatly appreciated.
Become a patron Buy me a coffee Tweet ShareHow to explicitly specialize a generic function in Swift
Learn a workaround to specify a type for your generic functions.
How to ignore safe area insets in UIKit
Learn how to make UIScrollView, UITableView, and UICollectionView ignore safe area insets and put their content behind that navigation bar.