How to Disable and Enable Button in SwiftUI
Table of Contents
How to Disable and Enable Button in SwiftUI
You can disable and enable a button and other views using disabled(_:) modifier.
It takes a boolean value that control whether users can interact with the view or not.
- Set it to
truemeans disabled. - Set it to
falsemeans enabled. This is the default behavior.
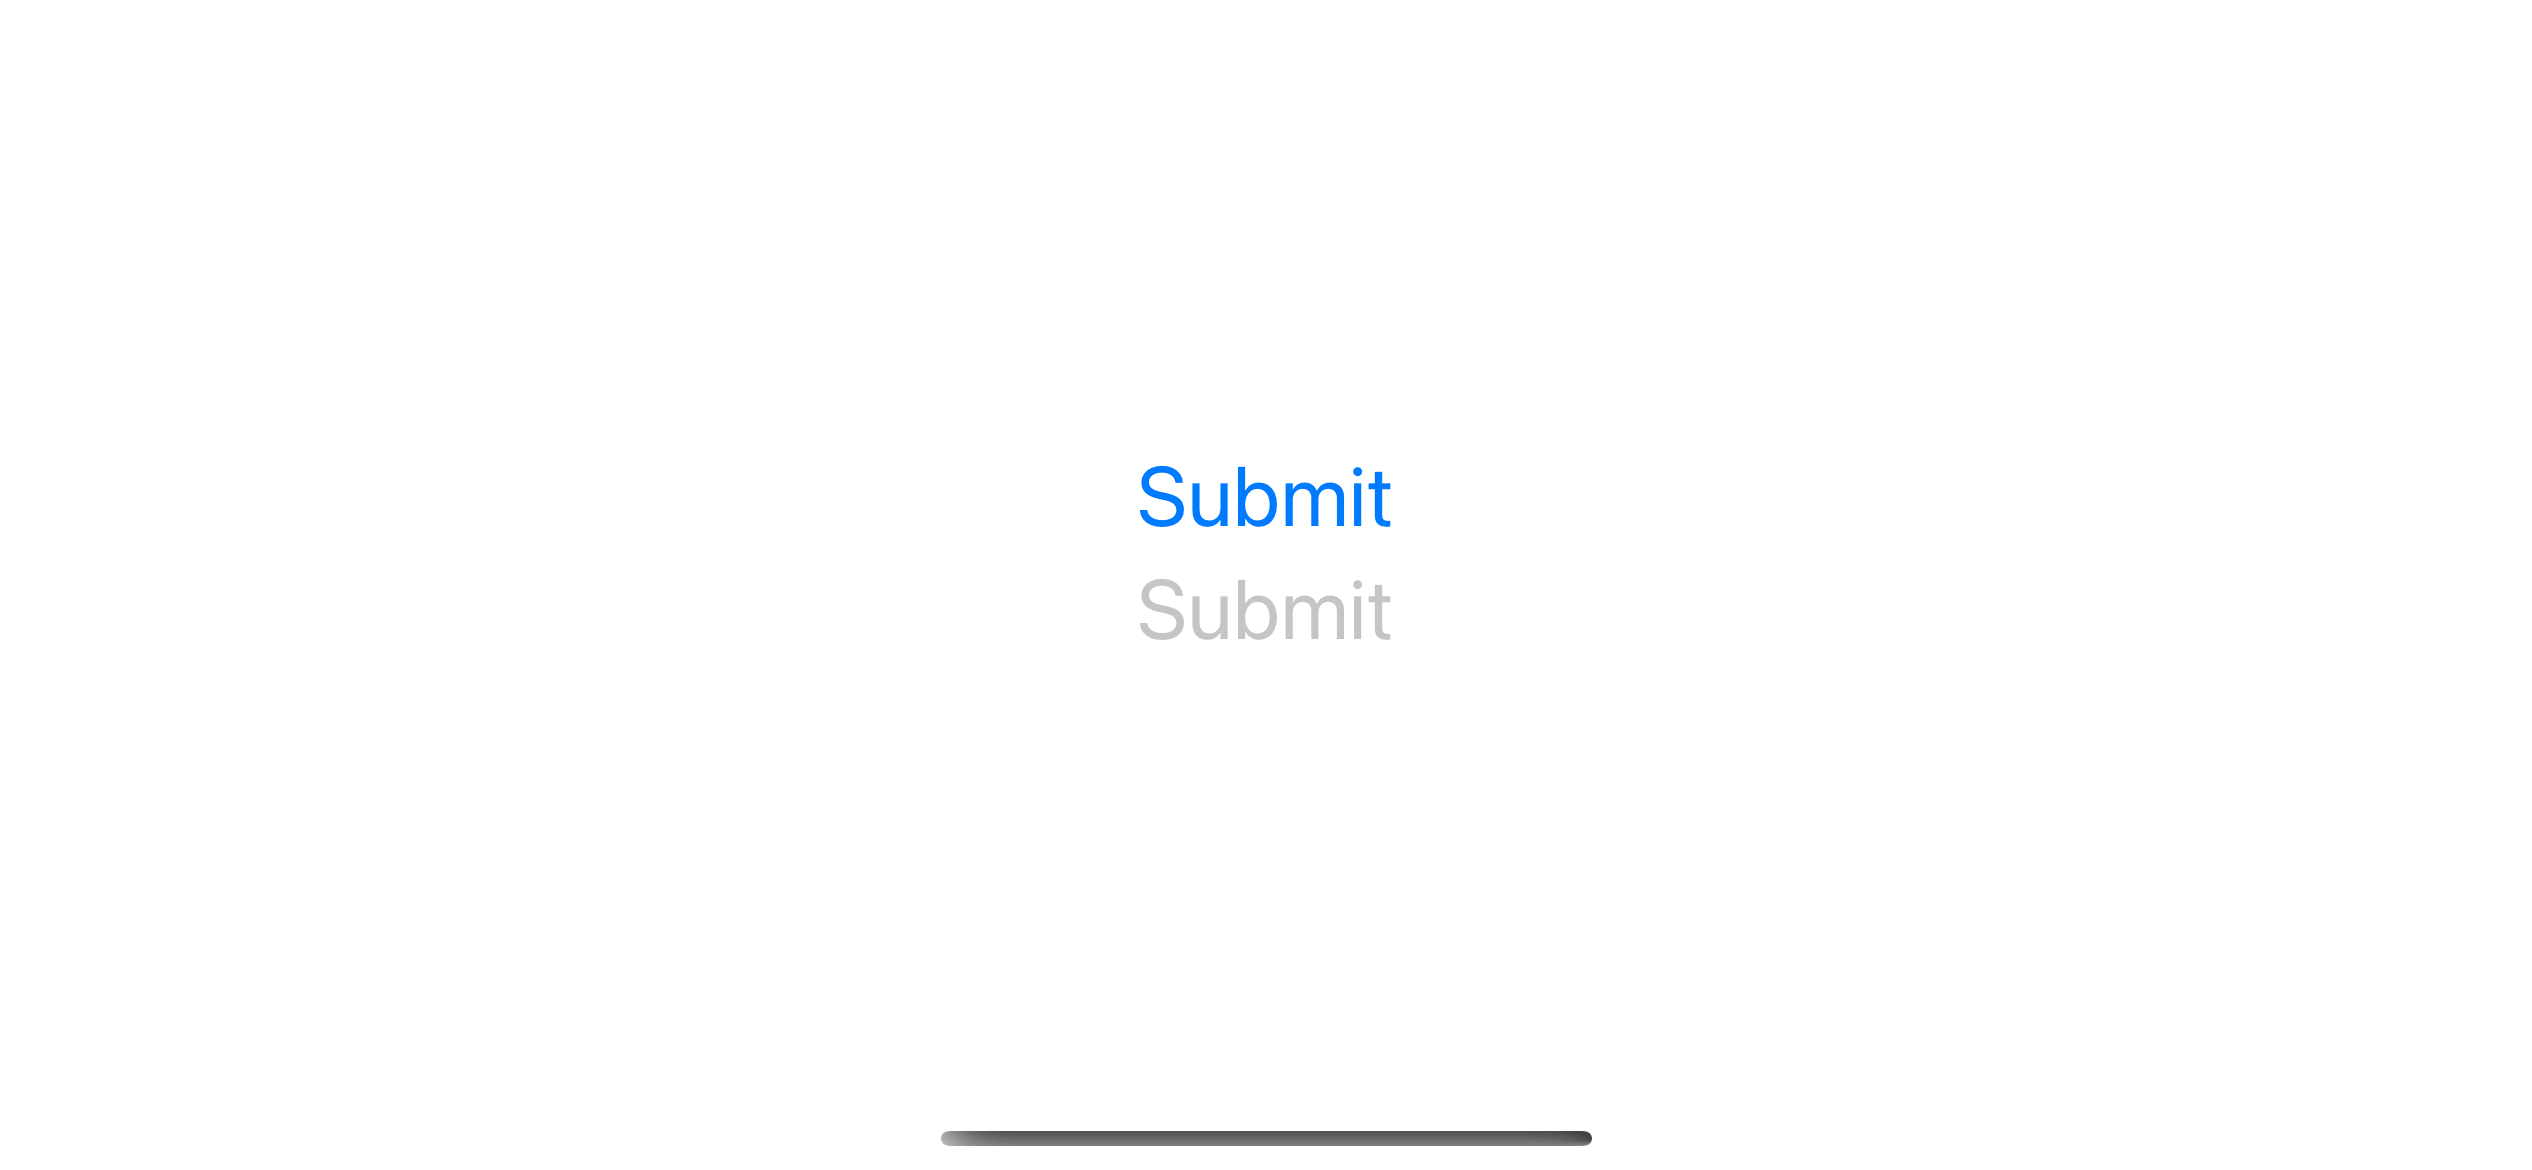
VStack {
    Button("Submit") {

    }
    .disabled(false)

    Button("Submit") {

    }
    .disabled(true)
}
.font(.title)
A disabled button shows in gray color and does not respond to user interaction.
You can easily support sarunw.com by checking out this sponsor.
Localization Buddy: Easiest way to localize and update App Store metadata.
Example
You usually disable and enable a view based on some condition.
In the following example, we disable a button if the username is empty.
struct ContentView: View {
    // 1
    @State var username = ""

    var body: some View {
        VStack {
            // 2
            TextField("Username", text: $username)
                .textFieldStyle(.roundedBorder)
            Button("Log In") {

            }
            .disabled(username.isEmpty) // 3
        }
        .font(.title)
    }
}
1 We declare a state variable, username, to store a username that users type in the text field 2.
3 We use username to control whether to disable or enable the login button.
When the username is empty, we disable the login button.
.disabled(username.isEmpty)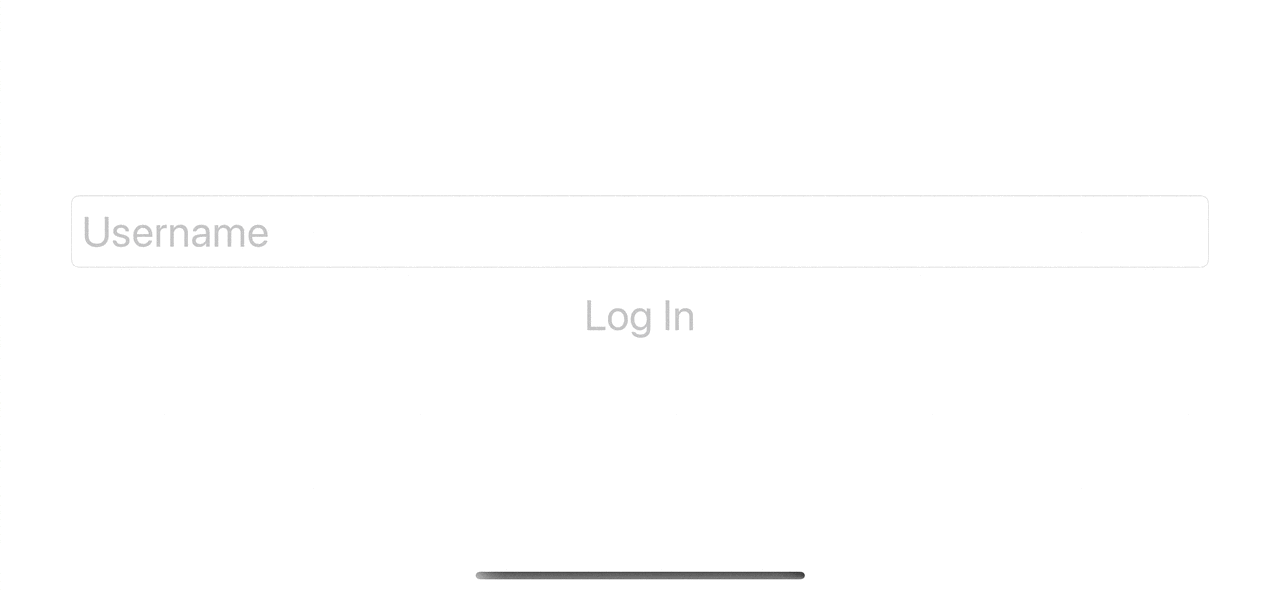
You can easily support sarunw.com by checking out this sponsor.
Localization Buddy: Easiest way to localize and update App Store metadata.
Disable multiple elements
You can disable and enable multiple buttons and views that sit on the same container view by set the disabled modifier on that container view.
The outer disabled modifier will override the inner ones.
For example, both "Log In" and "Register" buttons will be disabled because they are overridden by the outer disabled(_:) modifier that applies on the VStack.
VStack {
    Button("Log In") {

    }
    .disabled(false)
    Button("Register") {

    }
    .disabled(false)
}
.disabled(true)
.font(.title)
The outer disabled modifier will override the inner ones.

Read more article about SwiftUI, Button, or see all available topic
Enjoy the read?
If you enjoy this article, you can subscribe to the weekly newsletter.
Every Friday, you'll get a quick recap of all articles and tips posted on this site. No strings attached. Unsubscribe anytime.
Feel free to follow me on Twitter and ask your questions related to this post. Thanks for reading and see you next time.
If you enjoy my writing, please check out my Patreon https://www.patreon.com/sarunw and become my supporter. Sharing the article is also greatly appreciated.
Become a patron Buy me a coffee Tweet ShareHow to Save and Read Array in UserDefaults in Swift
Learn how to store an array in UserDefaults.
Splash screen vs Launch screen in iOS
Learn the difference between a launch screen and a splash screen in iOS.