How to change line height in SwiftUI
Table of Contents
In iOS 26, SwiftUI gets a new modifier to set the line height of text, lineHeight(_:).
In this article, I will show what each option does, with pictures, so you can pick the right one.
What is line height
Line height is the distance from one baseline to the next one. The baseline is the line that letters sit on.
To set it, add .lineHeight(_:) to a Text, and pass one of the options below.
Text("Line height is the distance from one baseline to the next one.")
    .font(.system(size: 20))
    .lineHeight(.exact(points: 36))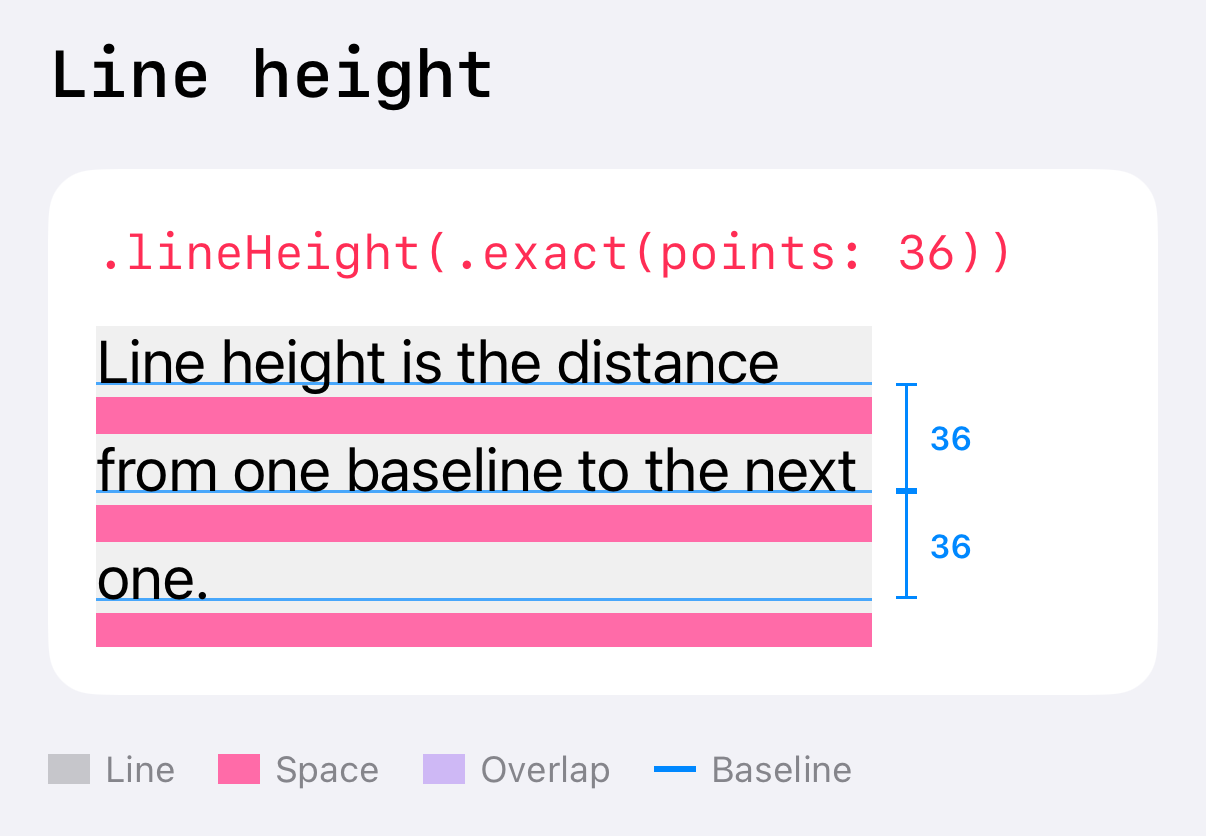
In the example above, we set the line height to a fixed 36 points with .exact(points:). You can also set it in other ways, for example, as a multiple of the font size.
You can easily support sarunw.com by checking out this sponsor.

Screenshot Studio: Create App Store screenshots in seconds not minutes.
The options
lineHeight(_:) takes an AttributedString.LineHeight. There are seven options.
| Option | Line height |
|---|---|
.variable |
From the font. Same as not setting it. |
.exact(points:) |
exactly this many points |
.multiple(factor:) |
factor × point size |
.tight |
1.0 × point size |
.normal |
1.2 × point size |
.loose |
1.5 × point size |
.leading(increase:) |
point size + increase |
Here is the important part: except for .variable, every option is based on the font's point size. It doesn't look at how tall the font really is.
Let's see each of them.
.variable
.variable is the default option. If you don't set a line height, this is what SwiftUI uses.
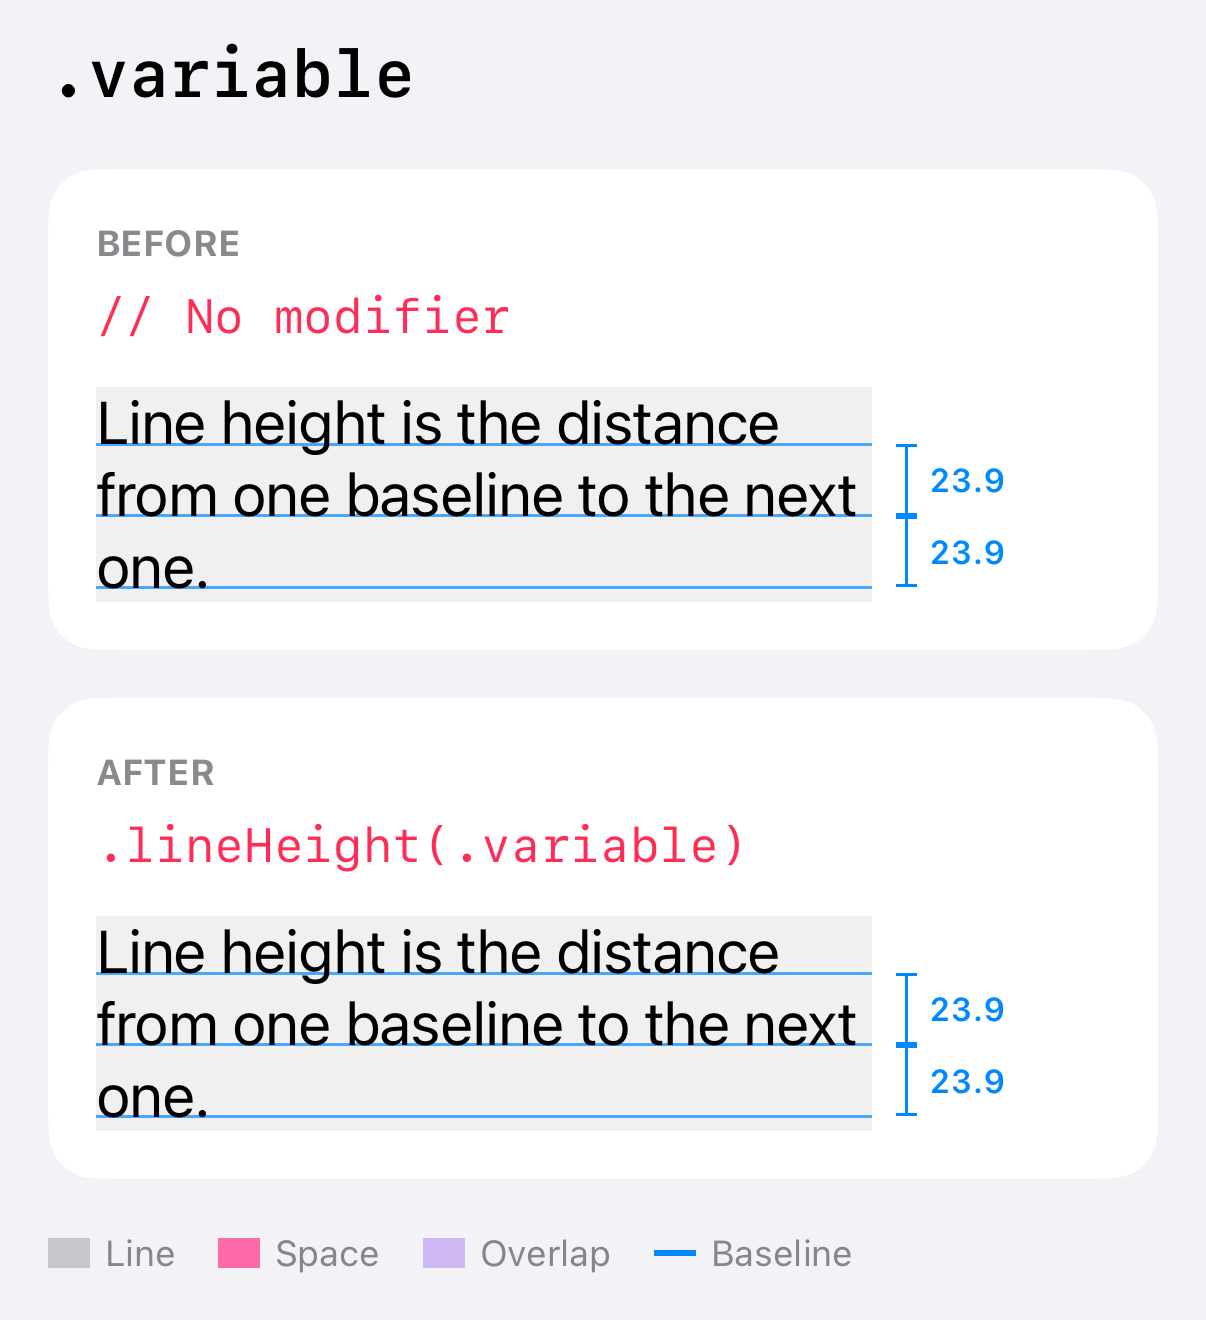
The gray boxes touch each other. There is no extra space between lines, because the line height is exactly the room the font needs.
.variable sets the line height based on font metrics. Every font file stores a few measurements that its designer picked. Two of them decide the line height:
- Ascent: how far the font can go above the baseline, for tall letters like "h" and "l".
- Descent: how far it can go below the baseline, for letters like "g" and "p".
Each font has its own ascent and descent, so the default changes with the font. Here is the same text in the system font and in Avenir Next, both at size 20 with no line height set.
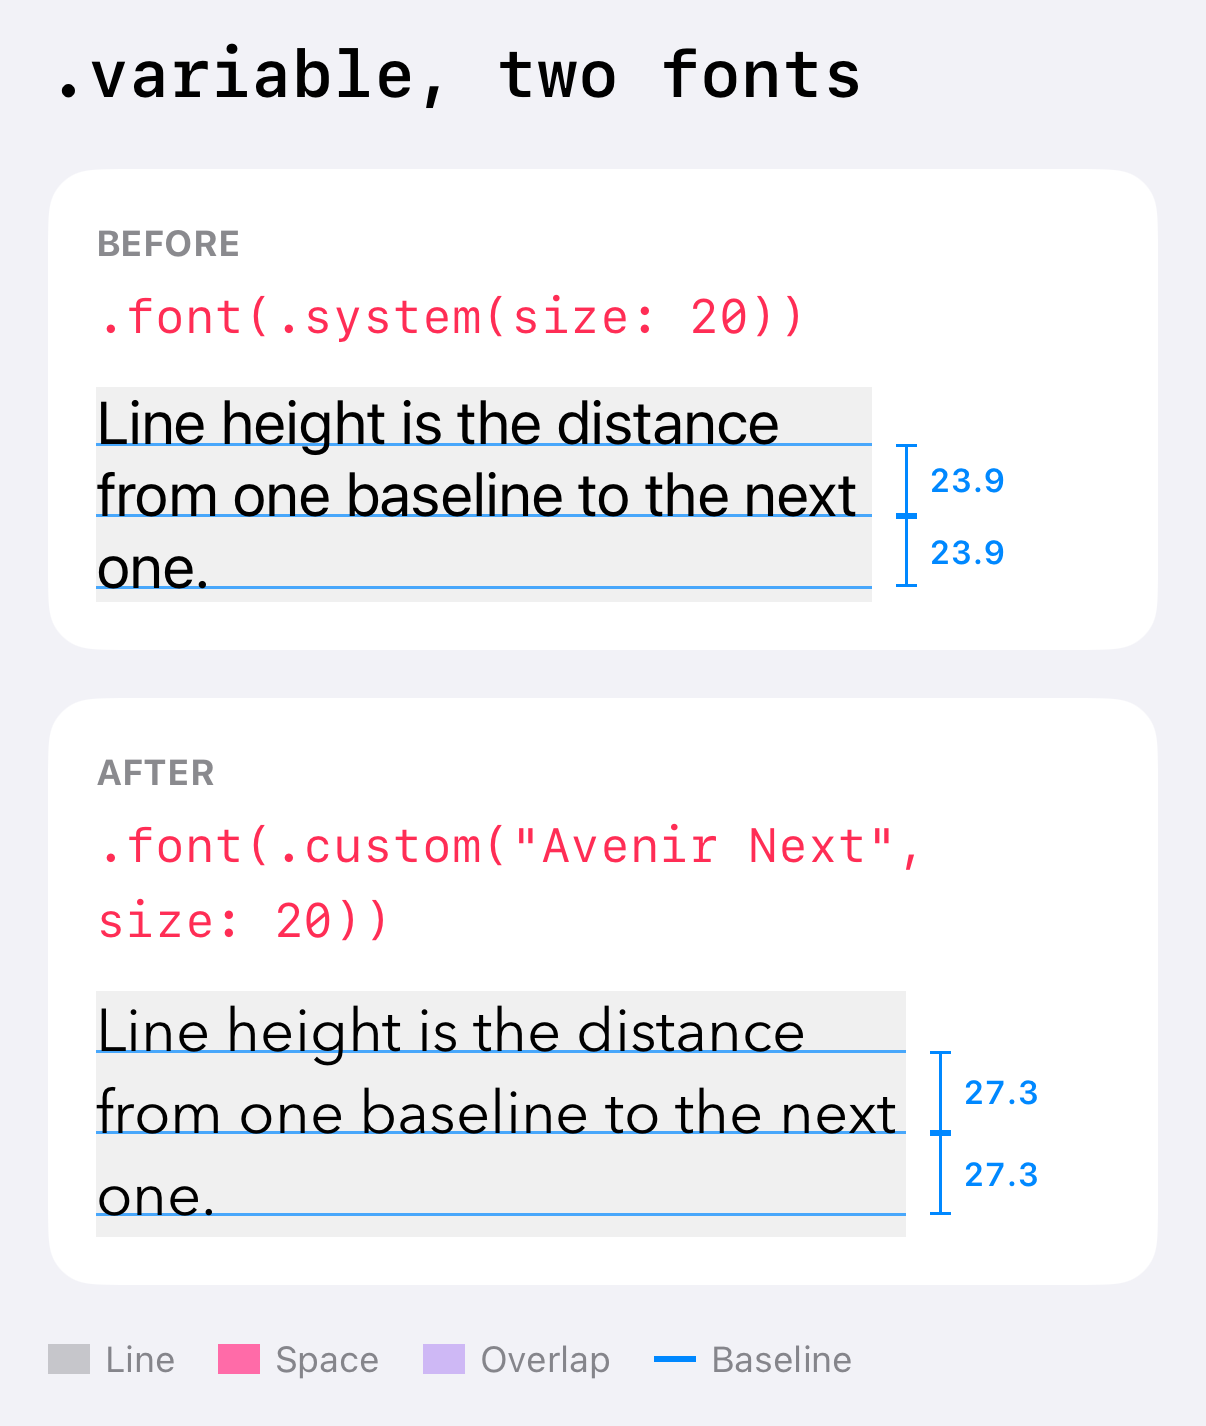
Avenir Next has a bigger descent, so its lines are 27.3 points apart instead of 23.9.
.exact(points:)
.exact(points:) is the most straightforward one. You set the line height you want in points, and SwiftUI uses it regardless of the font size.
Text("Line height is the distance from one baseline to the next one.")
    .lineHeight(.exact(points: 40))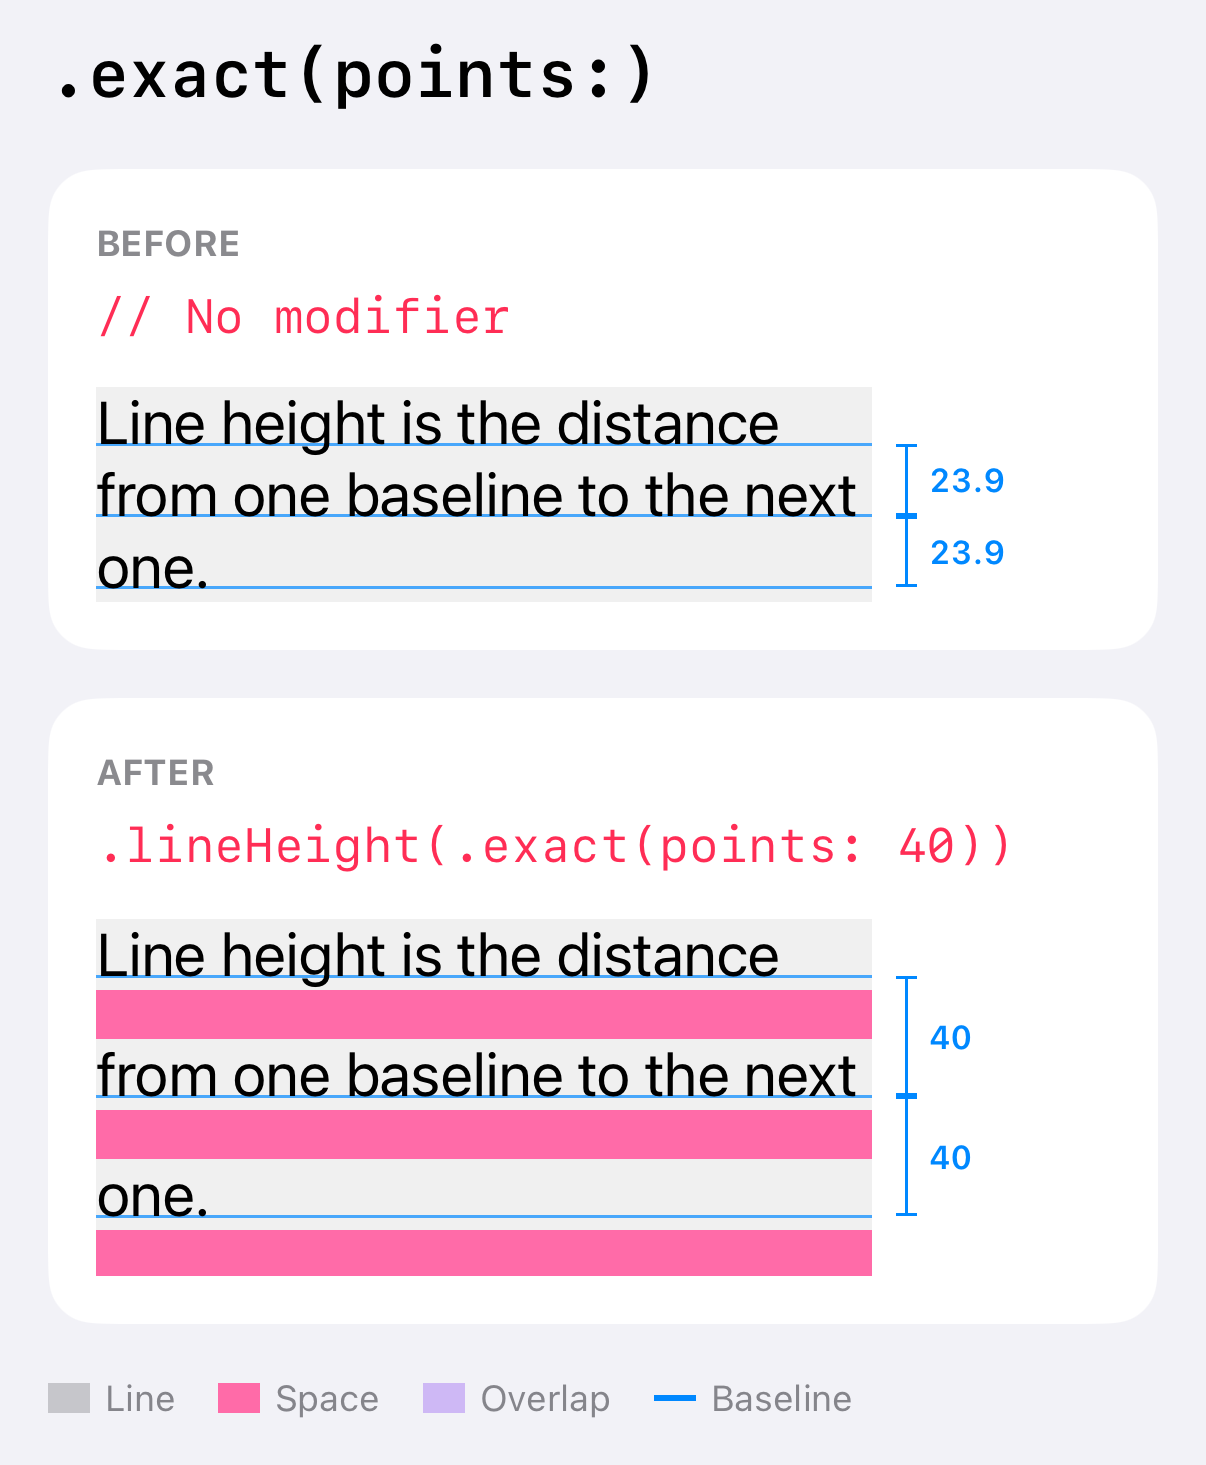
It won't grow with Dynamic Type, though. If the user picks a bigger text size, the letters grow, but the lines don't move apart.
You can also make it smaller than the font. SwiftUI does what you ask, and the lines overlap.
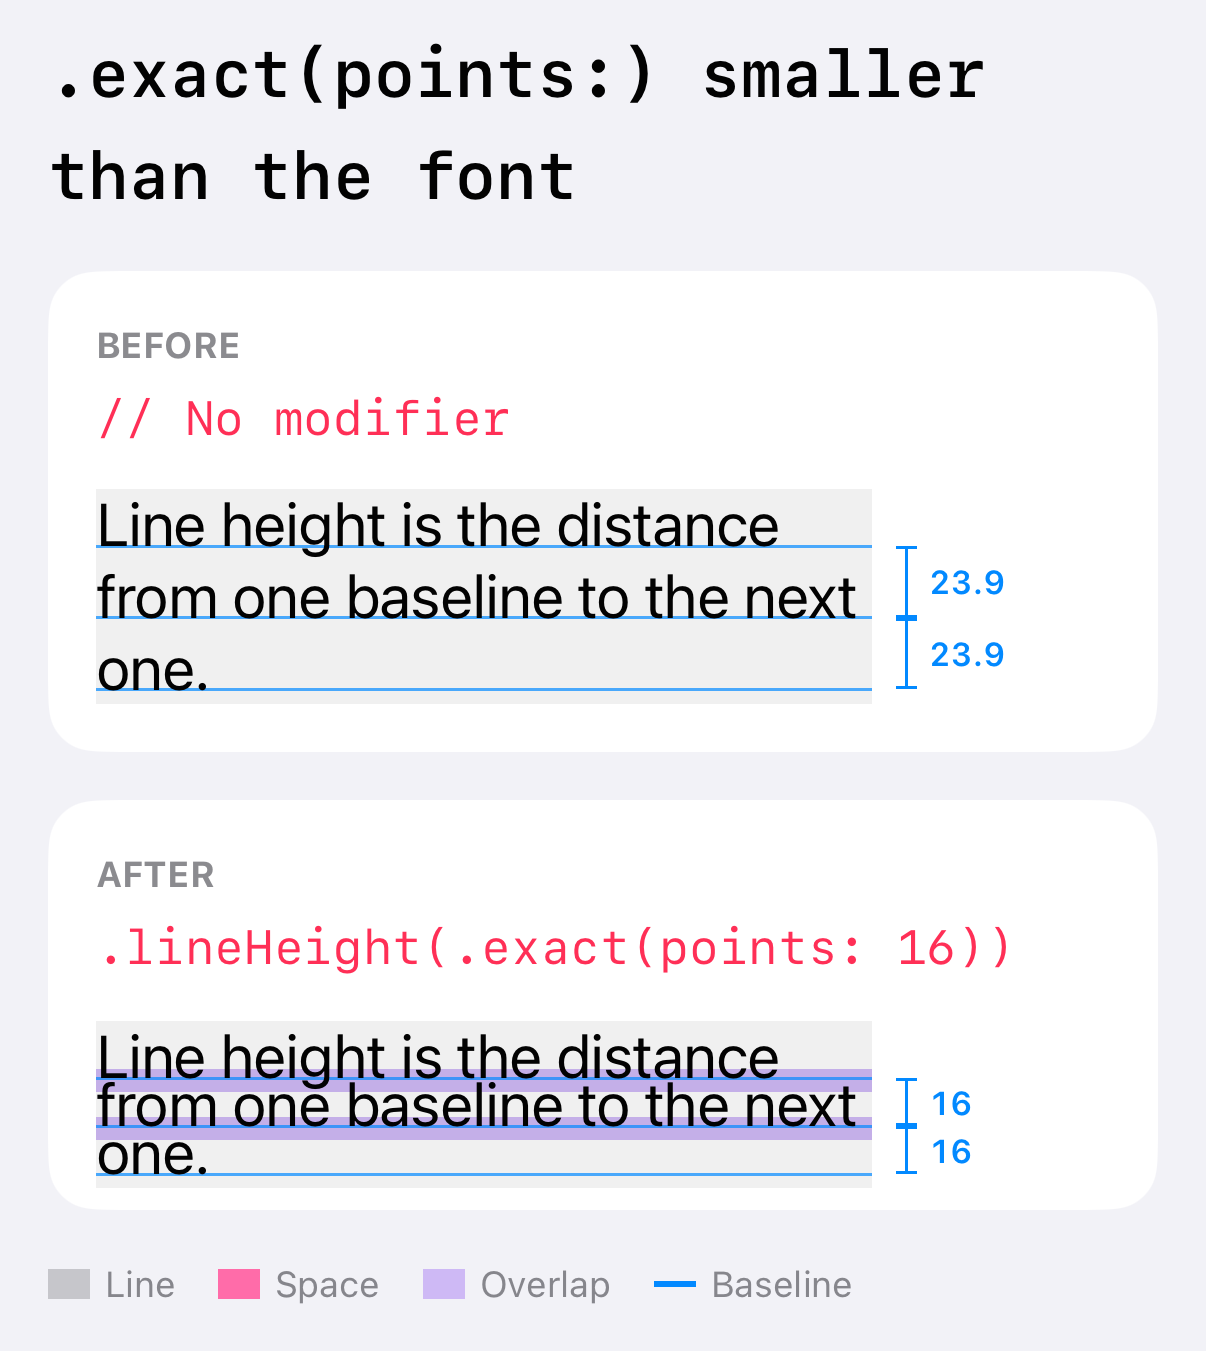
The last line is cut off on iOS 26
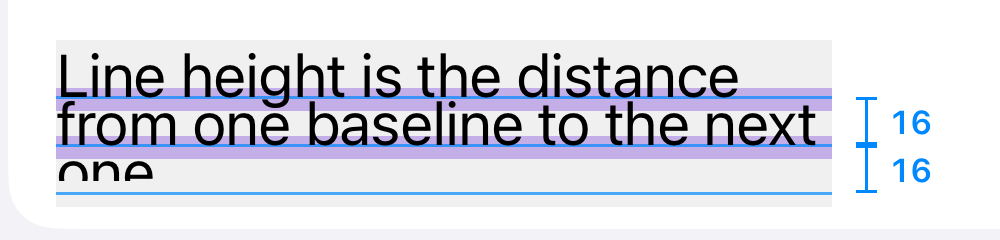
When the line height is smaller than the font, the last line doesn't fit inside the text's frame.
On iOS 26.5, SwiftUI cuts off the part that doesn't fit. On iOS 27, it draws the whole line.
iOS 26.5
iOS 27
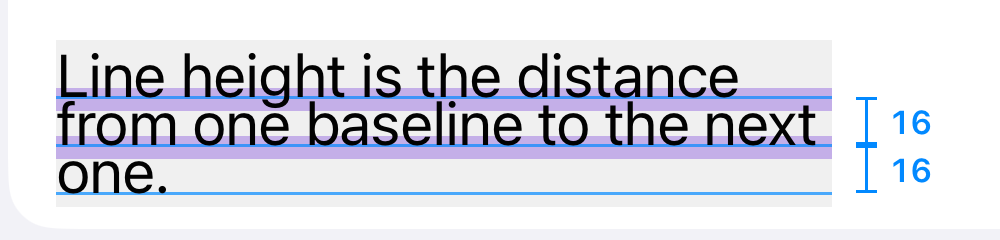
If you support iOS 26, keep the line height at least as big as the font.
.multiple(factor:)
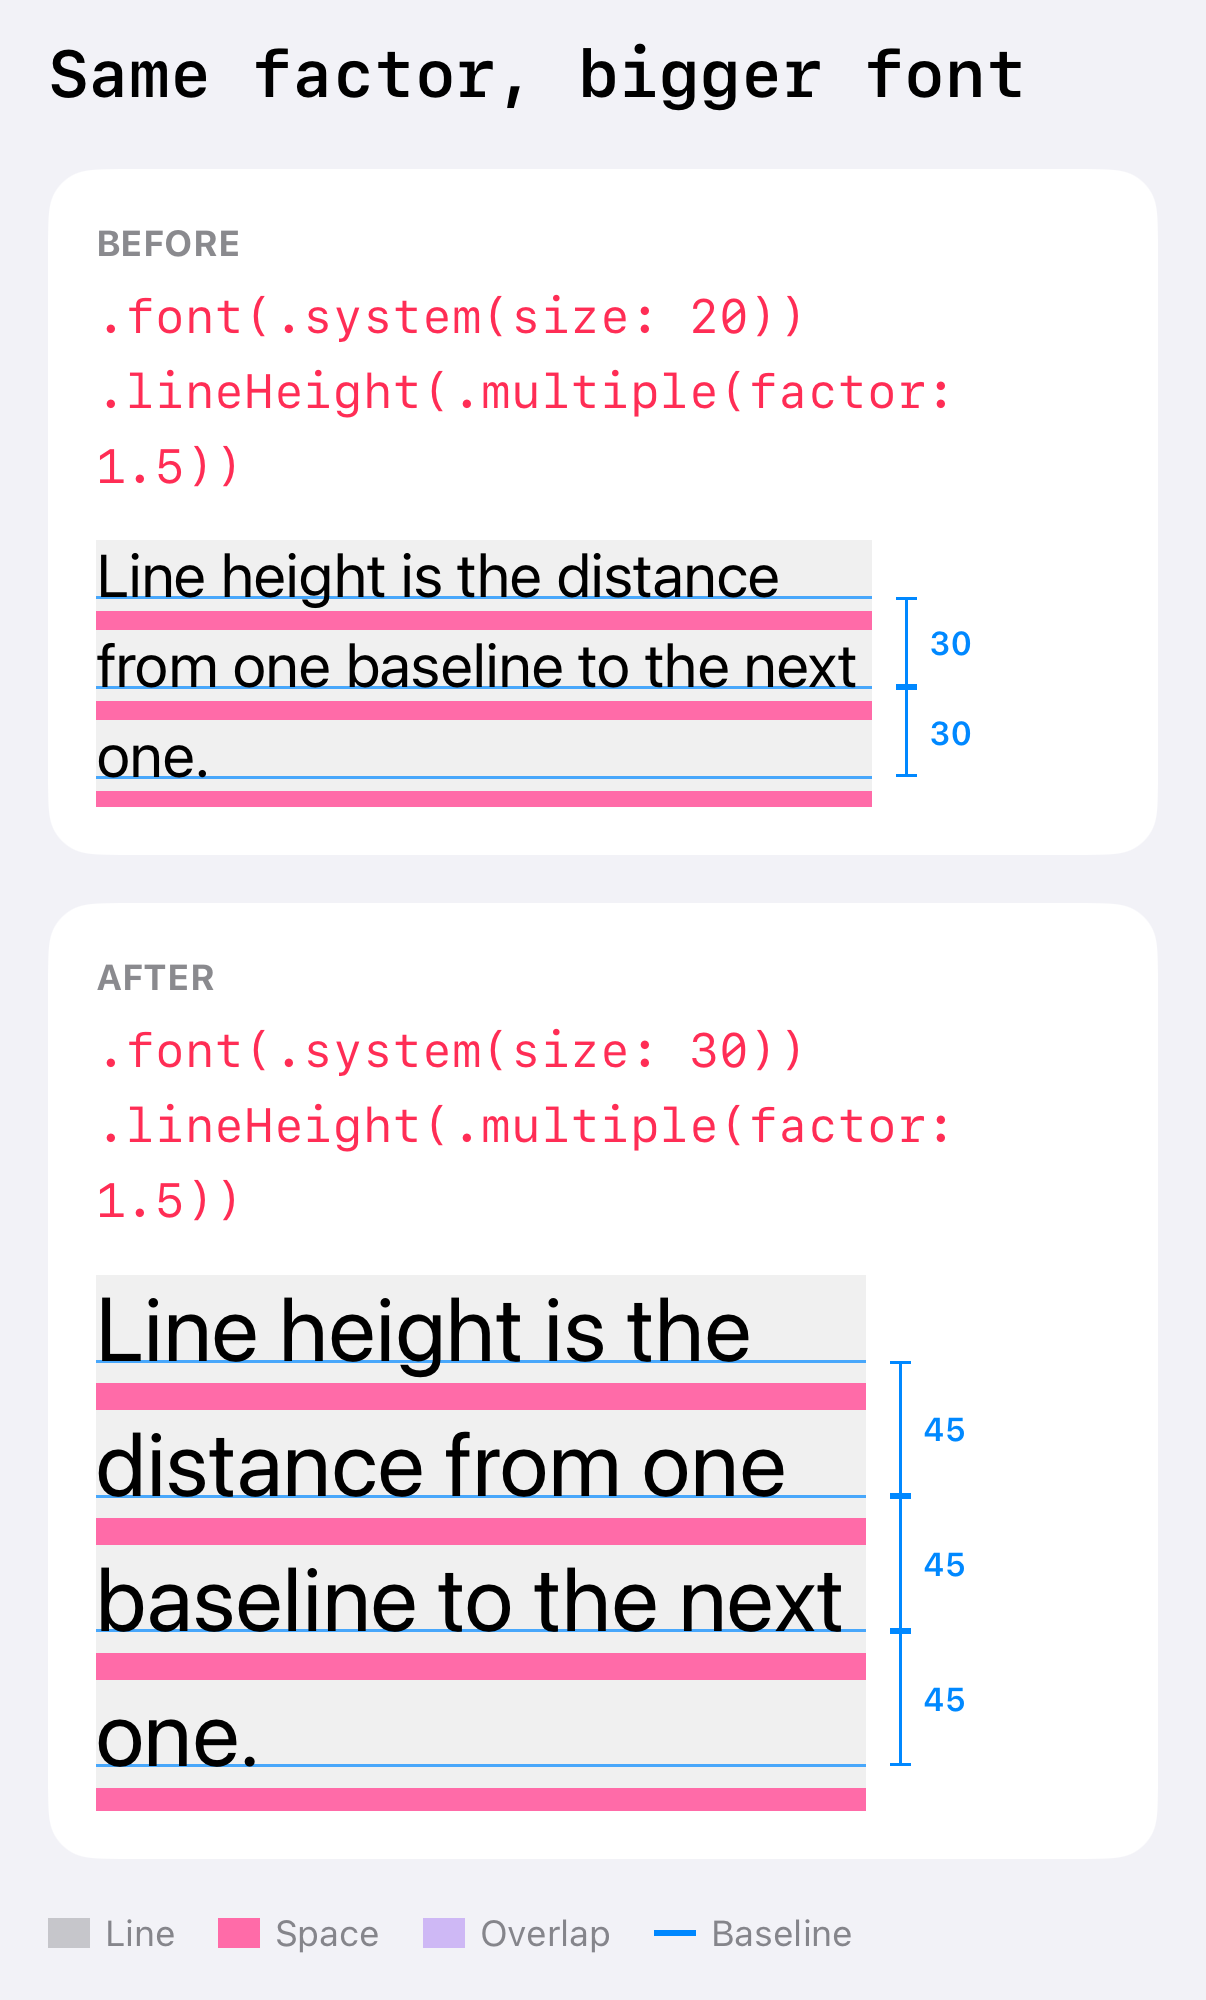
.multiple(factor:) sets the line height as a multiple of the font size.
line height = font size × factorIf you come from the web, this is the one you know. It works like a unitless line-height in CSS, such as line-height: 1.5, which is how most websites set it.
Text("Line height is the distance from one baseline to the next one.")
    .font(.system(size: 20))
    .lineHeight(.multiple(factor: 1.5))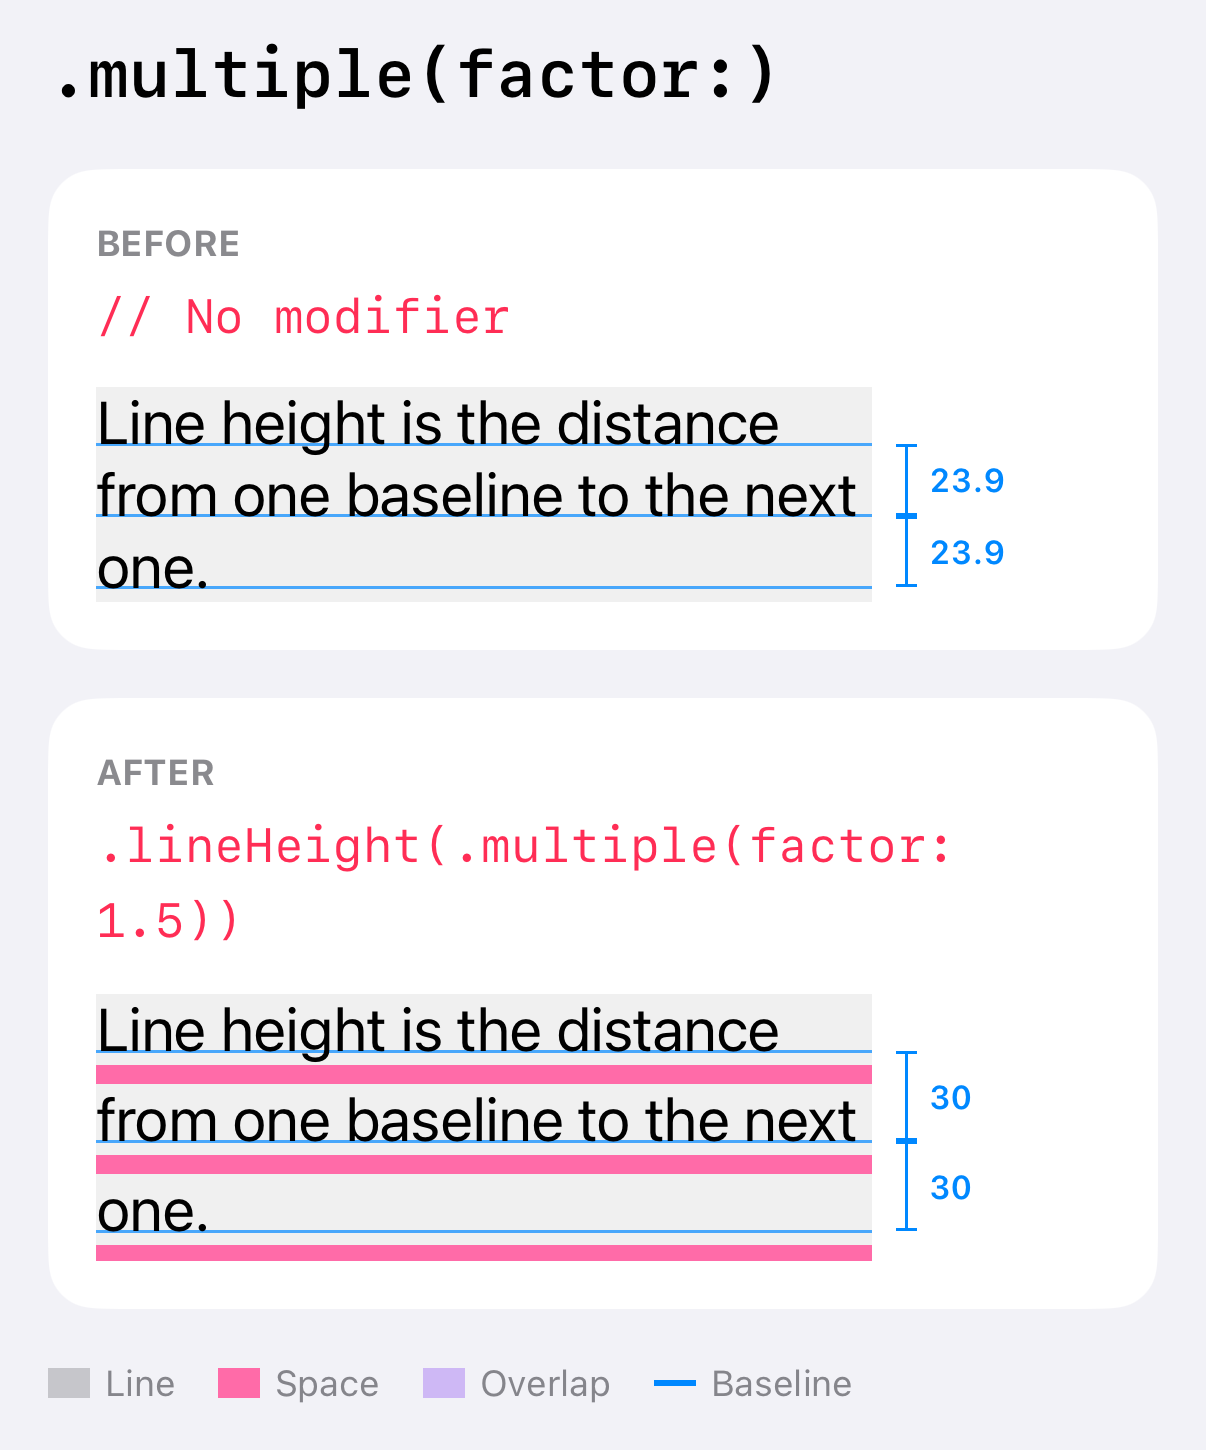
Because it is a multiple, the space grows with the font. With a Dynamic Type font, like .body, the spacing keeps the same look at every text size.
.tight, .normal, and .loose
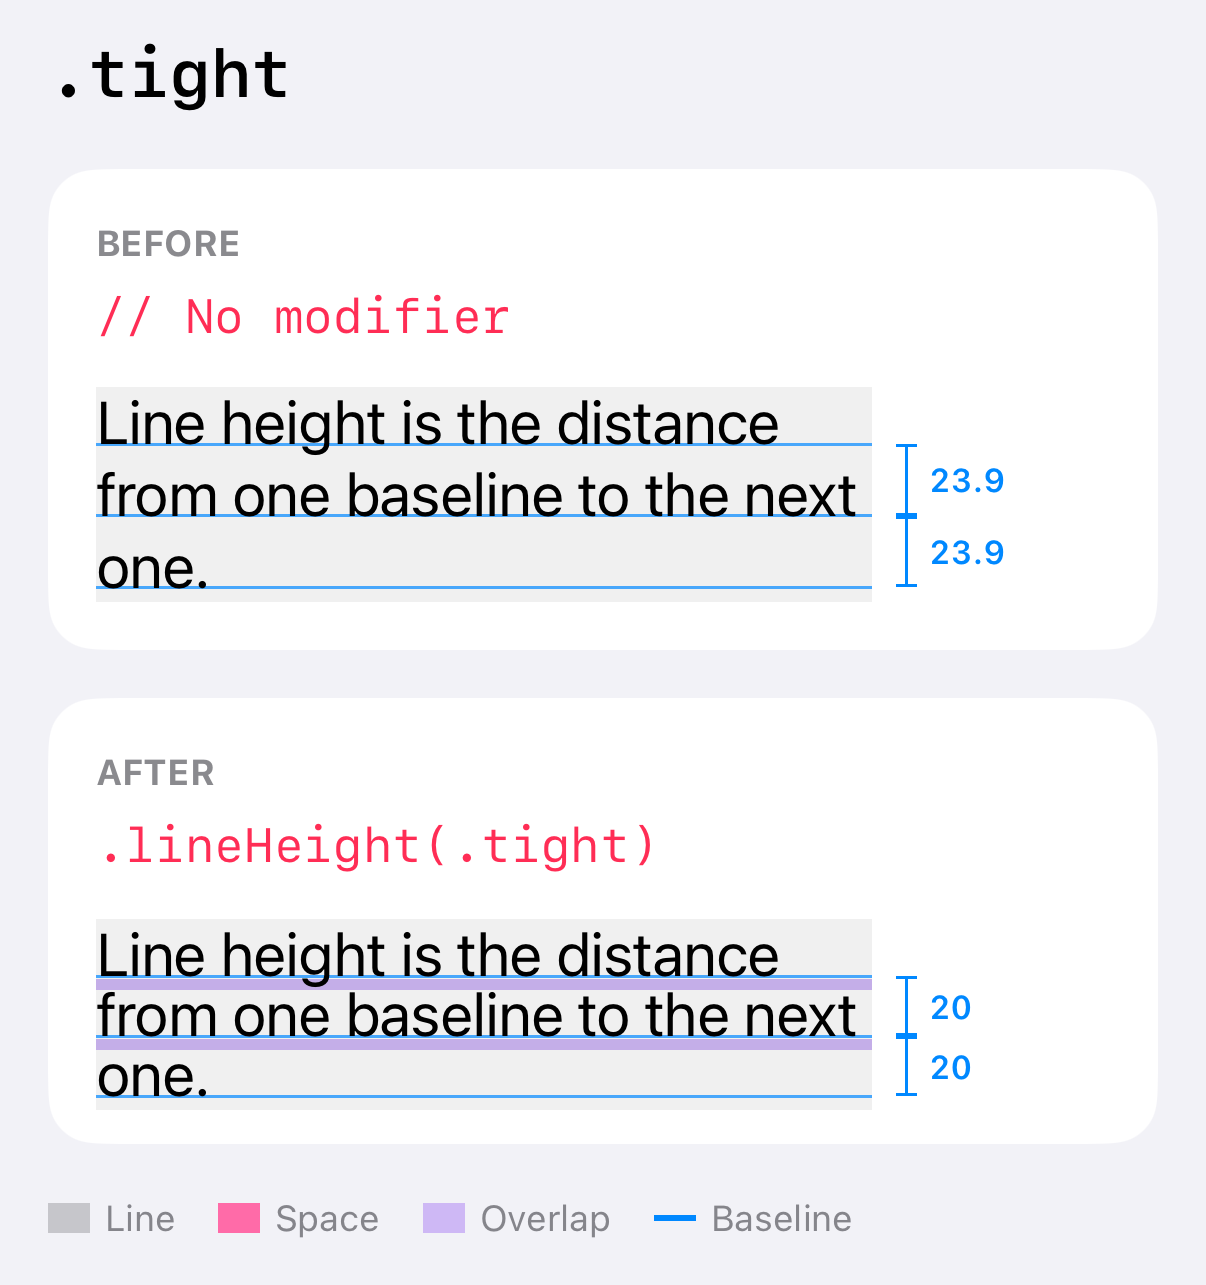
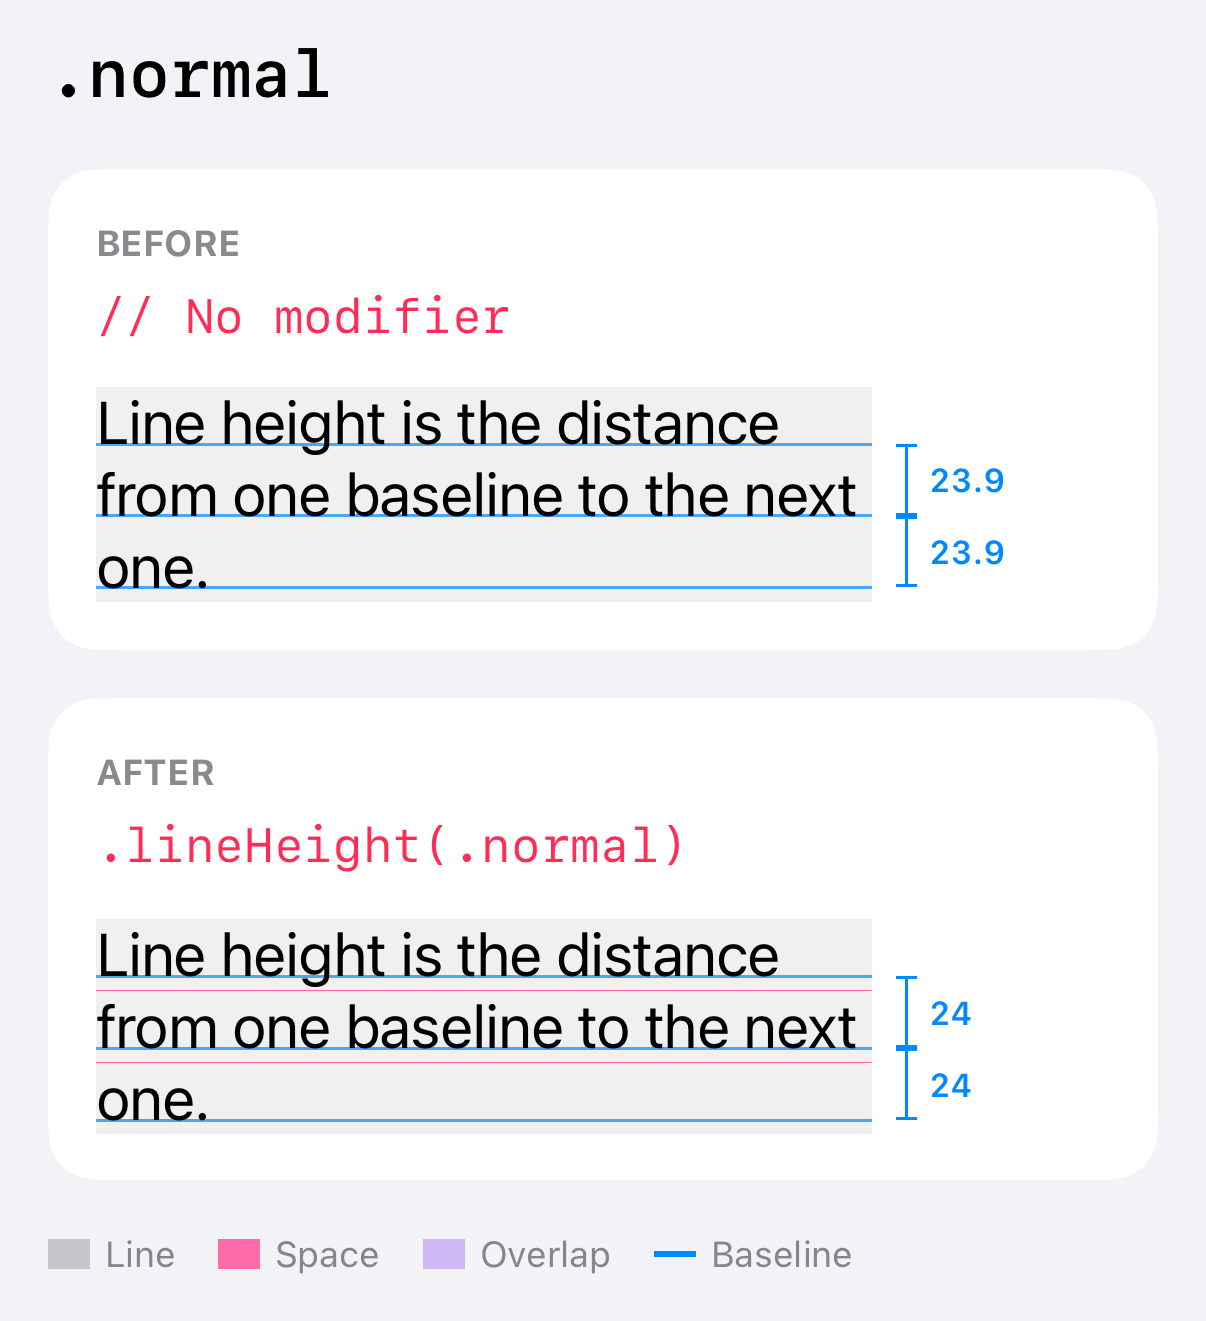
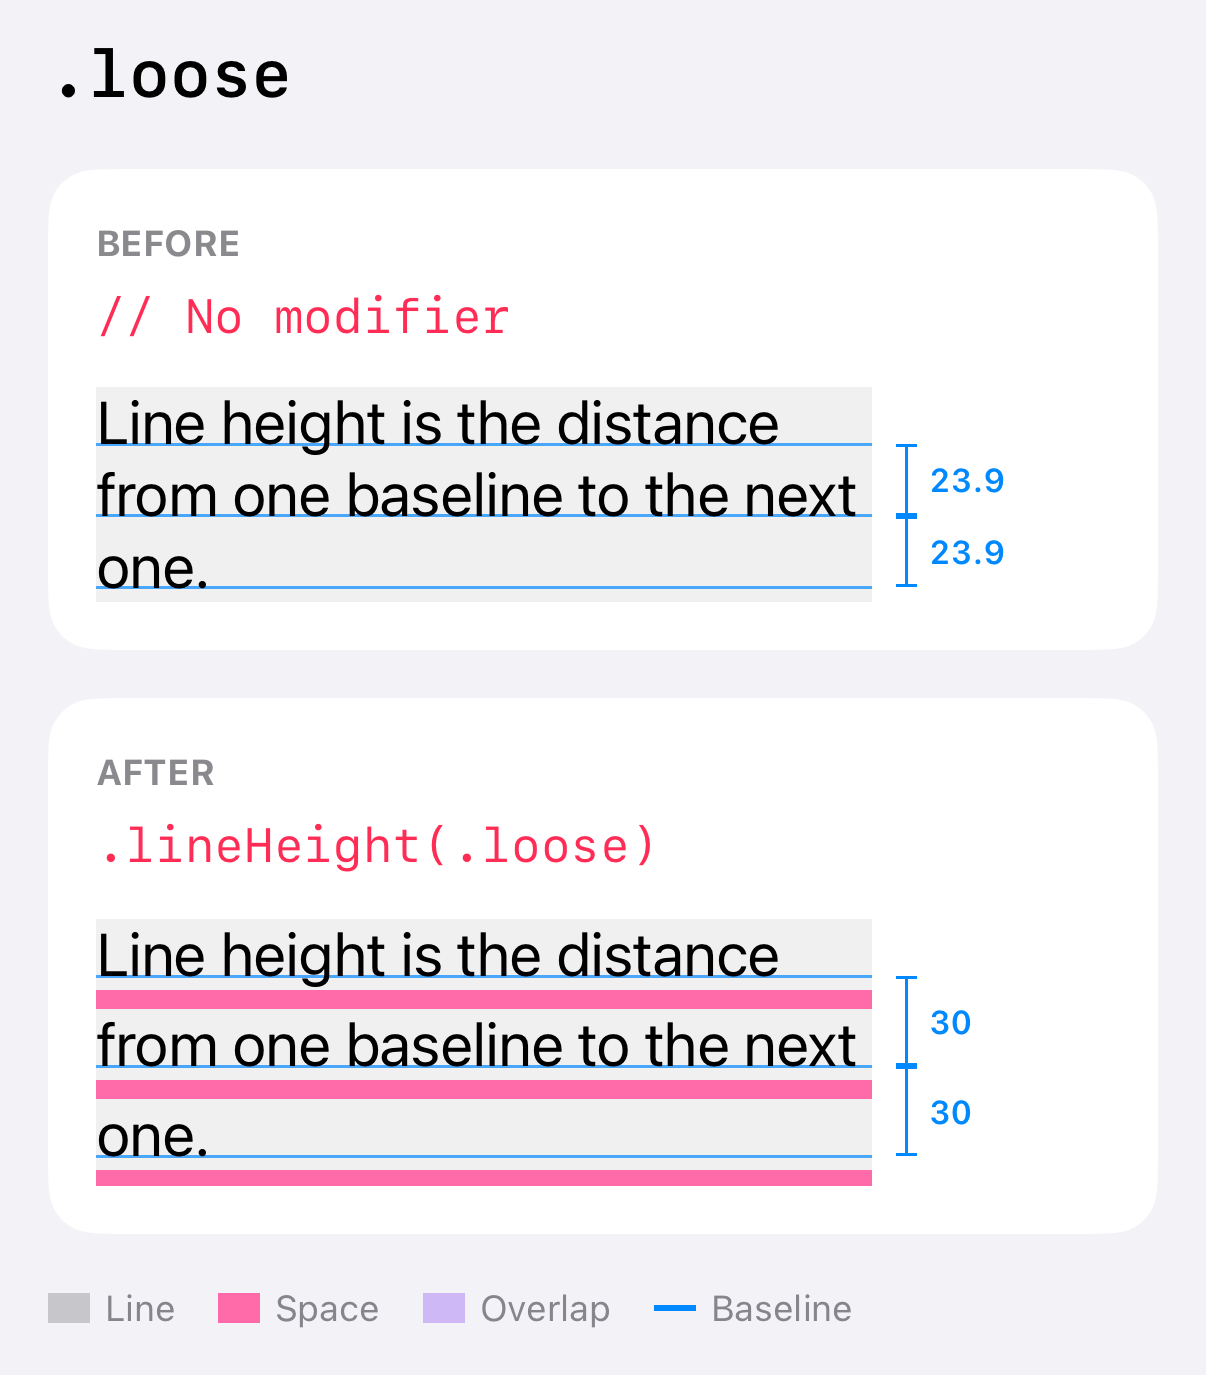
These three are presets of .multiple(factor:), with a factor already picked for you.
Text("...")
    .lineHeight(.tight) // 1.0x
Text("...")
    .lineHeight(.normal) // 1.2x
Text("...")
    .lineHeight(.loose) // 1.5x
In the current implementation, the factors for these presets are 1.0, 1.2, and 1.5.
.tight
.normal
.loose
- .tight is 20 points. The font needs 23.9, so the lines overlap (purple). Letters that go below the baseline, like "g" and "p", can touch the next line.
- .normal is 24 points. That is almost the same as the default for the system font.
- .loose is 30 points. You get about 6 points of pink space between lines.
So .tight is the same as .multiple(factor: 1), and .loose is the same as .multiple(factor: 1.5).
.leading(increase:)
.leading(increase:) adds a fixed number of points to the point size.
Text("Line height is the distance from one baseline to the next one.")
    .font(.system(size: 20))
    .lineHeight(.leading(increase: 10))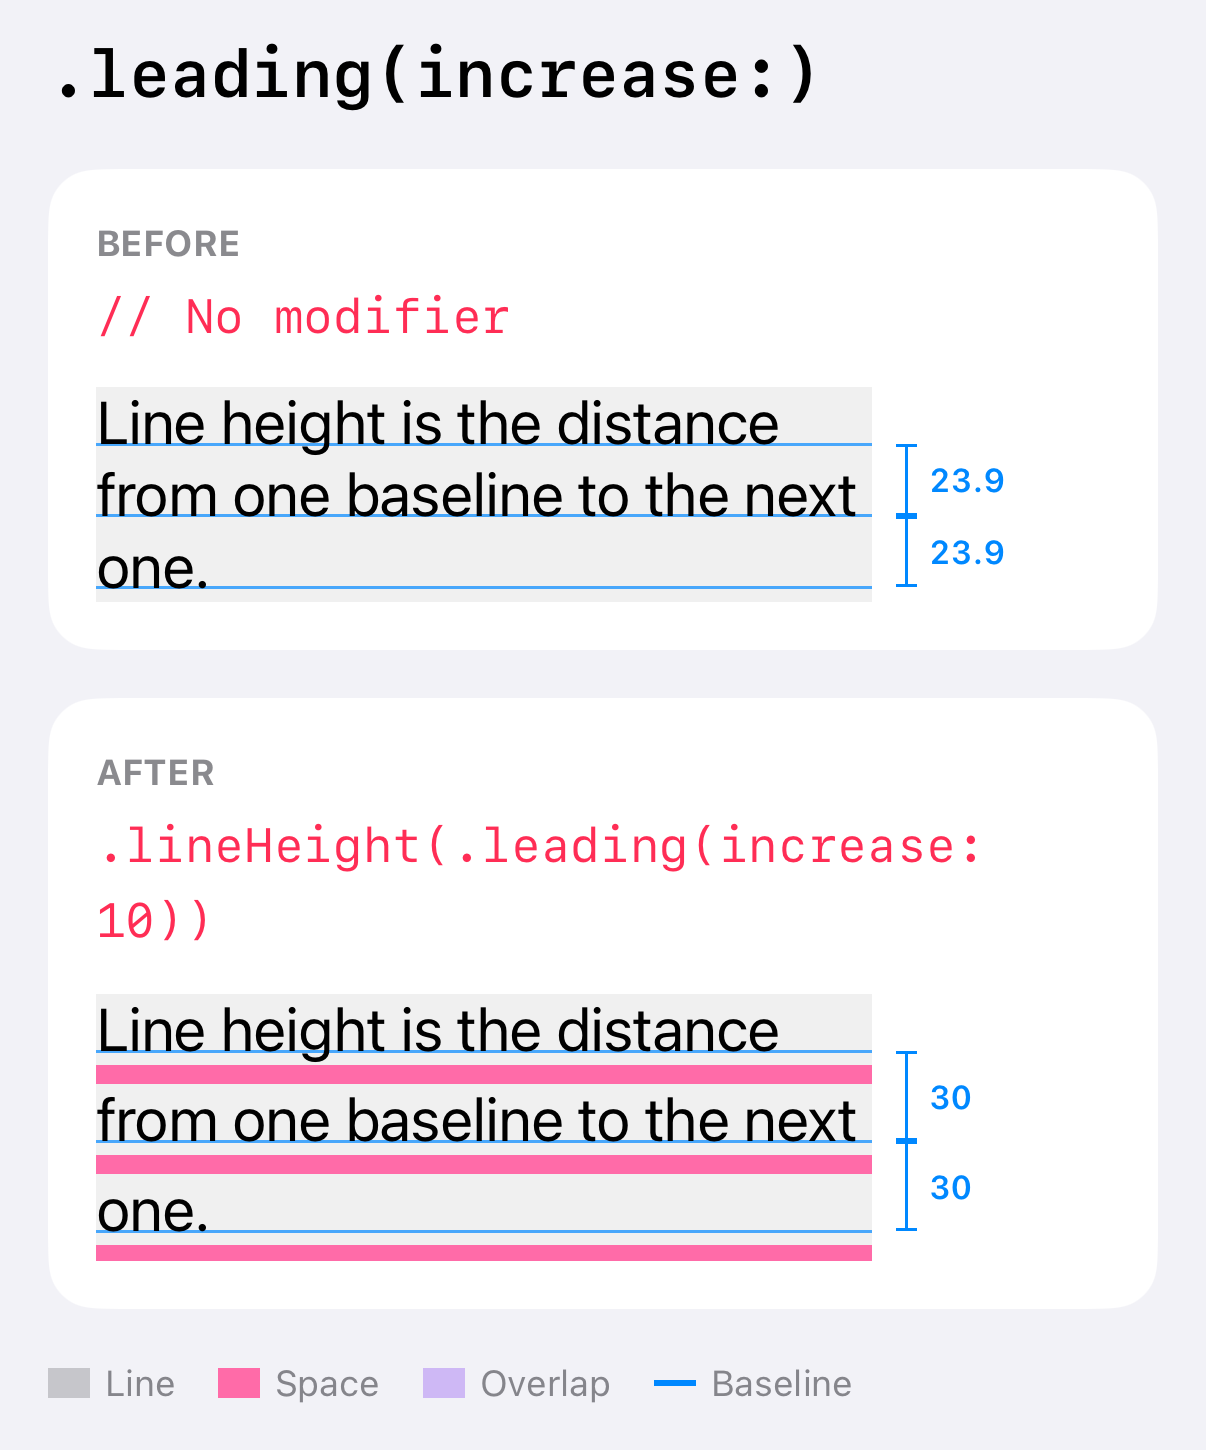
Note that it starts from the point size (20), not from the default line height (23.9). So increase: 10 only adds about 6 points of visible space.
A bigger word in the line
So far, every letter used the same font. What if one word is bigger?
Text("A line with a \(Text("big").font(.system(size: 36, weight: .bold))) word in it, and more text after.")
    .font(.system(size: 20))
With .variable, the line with the big word grows to make room for it. With .exact(points:), it doesn't.
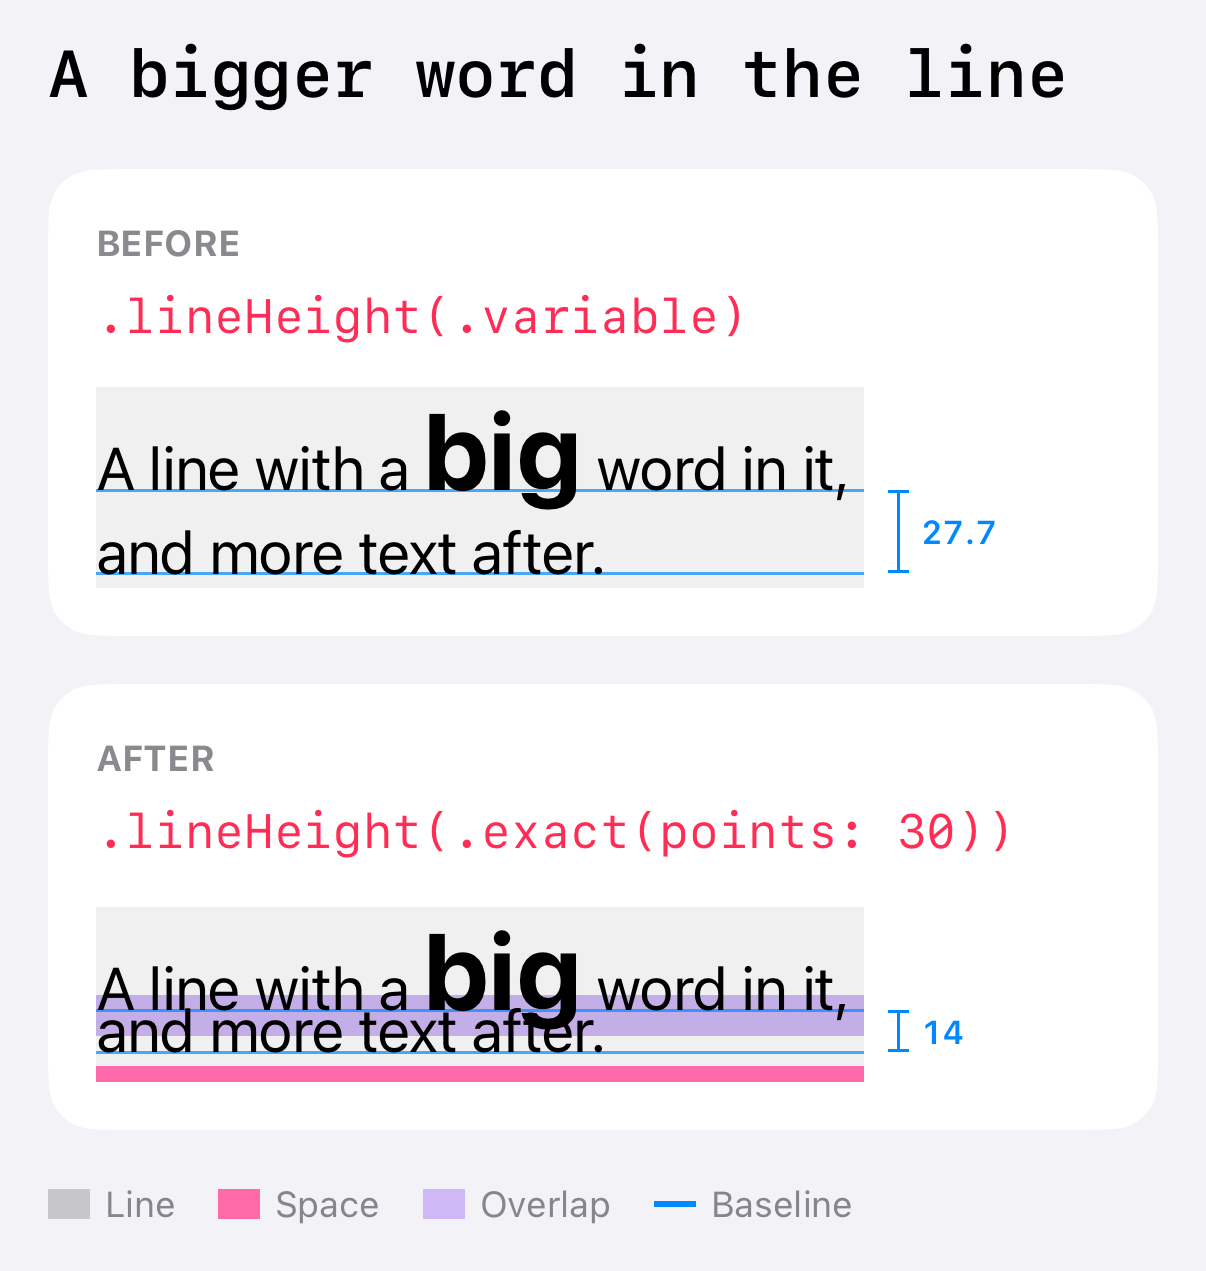
With .exact(points: 30), the two lines crash into each other.
I expected 30 points between the baselines. I measured 14. Each line is 30 points tall, but the first baseline sits at 36 points from the top, the size of the big word. So the second line ends up only 14 points below it.
.multiple(factor:) and .leading(increase:) are based on the biggest point size in the line, so they give that line more room.
You can easily support sarunw.com by checking out this sponsor.
Screenshot Studio: Create App Store screenshots in seconds not minutes.
Where the extra space goes
In all the pictures above, the pink space is below each line, including the last one. Nothing is added above the first line.
That means lineHeight makes a single line of text taller.
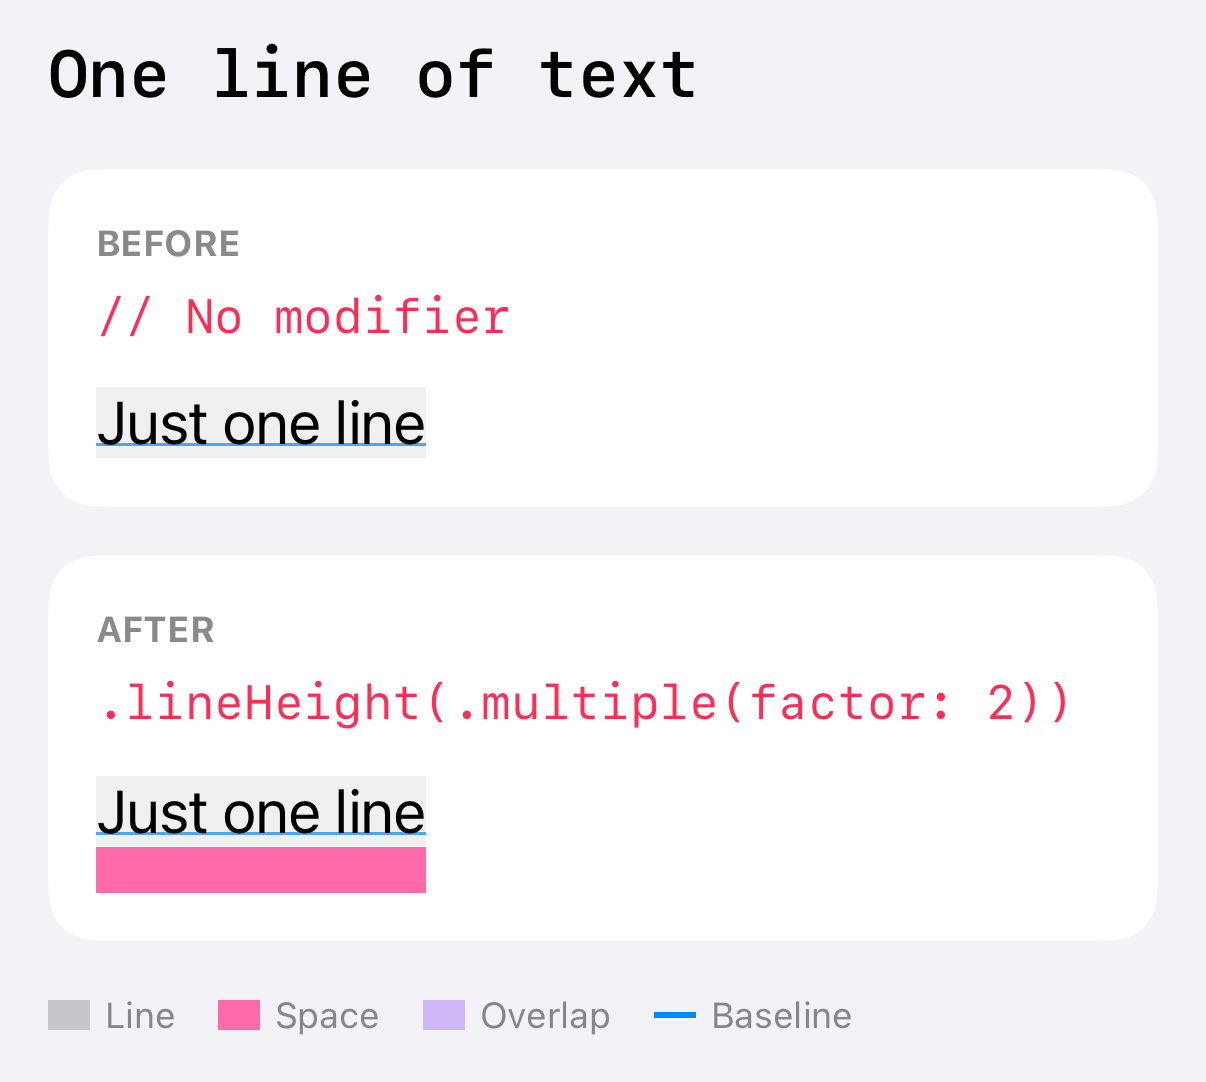
For a 20-point font, .multiple(factor: 2) makes the text 40 points tall, with 16 points of empty space under the letters. If you center this text next to an icon, the text will look like it sits too high.
Read more article about SwiftUI, iOS 26, Text, or see all available topic
Enjoy the read?
If you enjoy this article, you can subscribe to the weekly newsletter.
Every Friday, you'll get a quick recap of all articles and tips posted on this site. No strings attached. Unsubscribe anytime.
Feel free to follow me on Twitter and ask your questions related to this post. Thanks for reading and see you next time.
I also make short videos and visual guides on Patreon. Some things are easier to see than to read, like how an API looks and moves on a real screen. If you like to learn that way, come and watch. Sharing the article is also greatly appreciated.
Become a patron Tweet SharePrepare toolbar items for a vertical bar
Why two pieces of data matter on iPhone Duo, how the system picks a representation, and how to override it with axis behavior.
Adapt custom toolbar views for iPhone Duo
How to opt a custom toolbar view into the vertical bar, change its layout, and read the vertical bar edge.