Prepare toolbar items for a vertical bar
Table of Contents
Part 2 in the series "Vertical bars on iPhone Duo", based on Apple's Raise the bar with iPhone Duo talk.
- Opt in to vertical bars on iPhone Duo
- Prepare toolbar items for a vertical bar
- Adapt custom toolbar views for iPhone Duo
- Toolbar overflow and visibility priority on iPhone Duo
In the previous article, we got a vertical bar to appear. Now let's look at the items inside it.
You don't move items into a vertical bar yourself. You keep declaring the same toolbar content you always have, and the system decides which items can go vertical. This article is about how that decision works and how to influence it.
Toolbar content
Toolbar content can contain two pieces of data:
- Icon
- Title
Most of the time we might set only one, but we should provide both from now on and let the system choose the representation based on the context.
You can easily support sarunw.com by checking out this sponsor.

Translate your app In 1 click: Simplifies app localization and helps you reach more users.
Why two pieces of data really matter on iPhone Duo
The two axes have opposite constraints:
| Bar | Fixed | Flexible |
|---|---|---|
| Horizontal | Height | Item width |
| Vertical | Width | Item height |
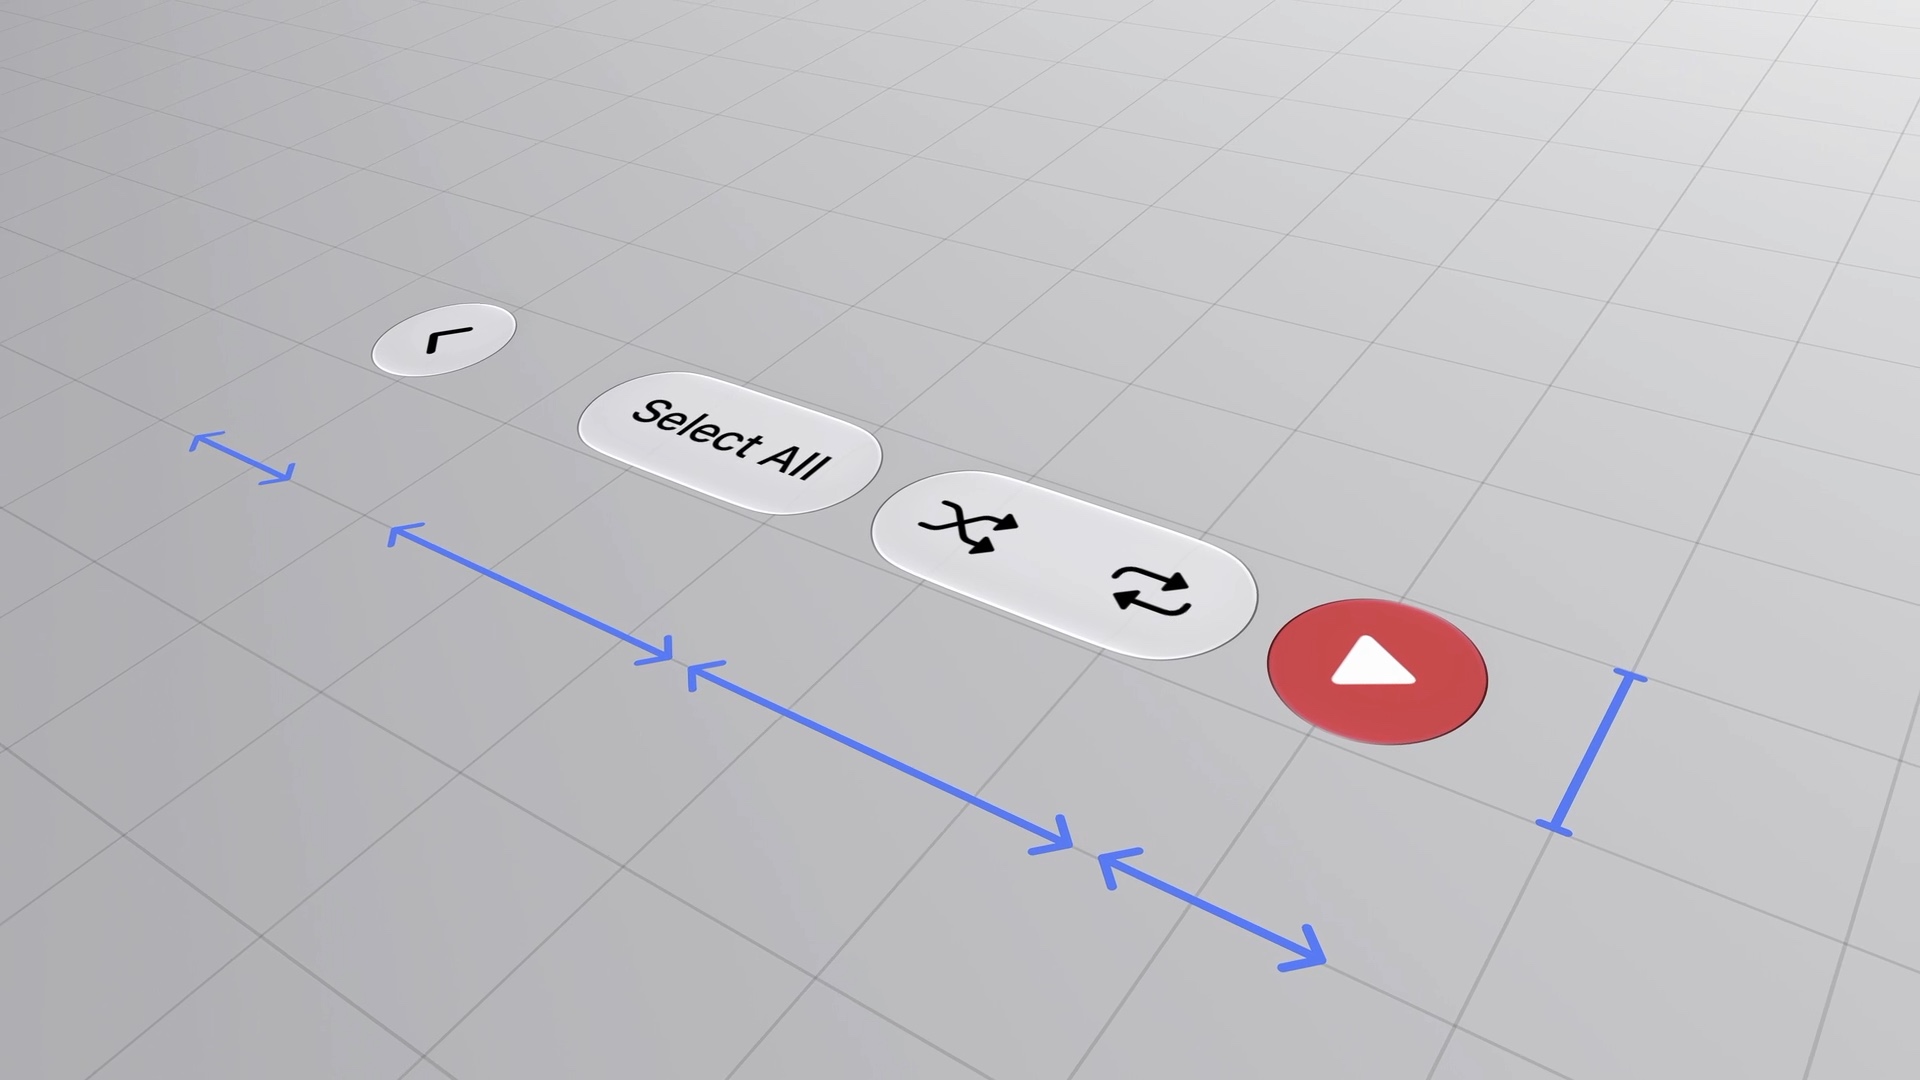
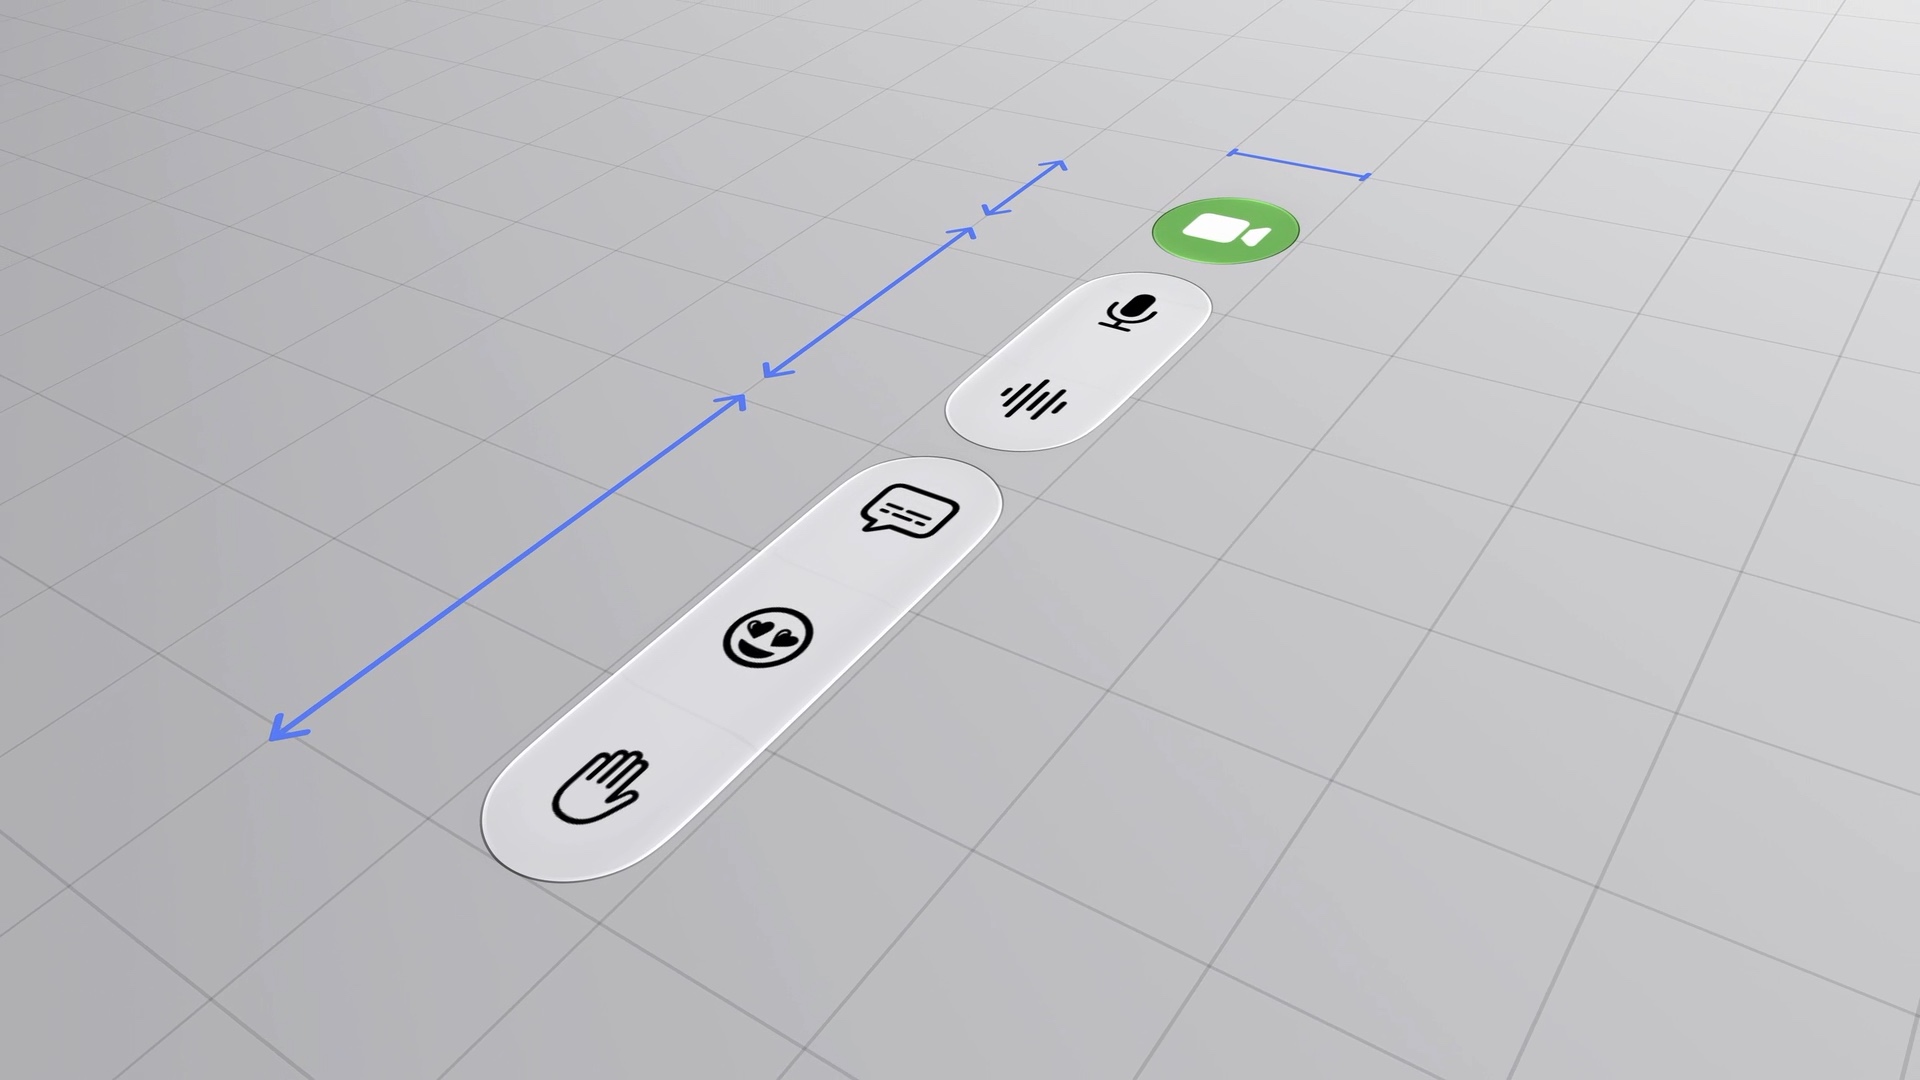
A horizontal bar can let a button grow as wide as its label needs. A vertical bar can't, because its width is fixed. A long text label has nowhere to go.
That single fact explains most of the guidance here: vertical bars suit symbol-only items.
How the system picks a representation
In the top and bottom bars
- an item prefers to show an icon.
- If there's no icon, it shows the text.
In the overflow menu
- it shows both.
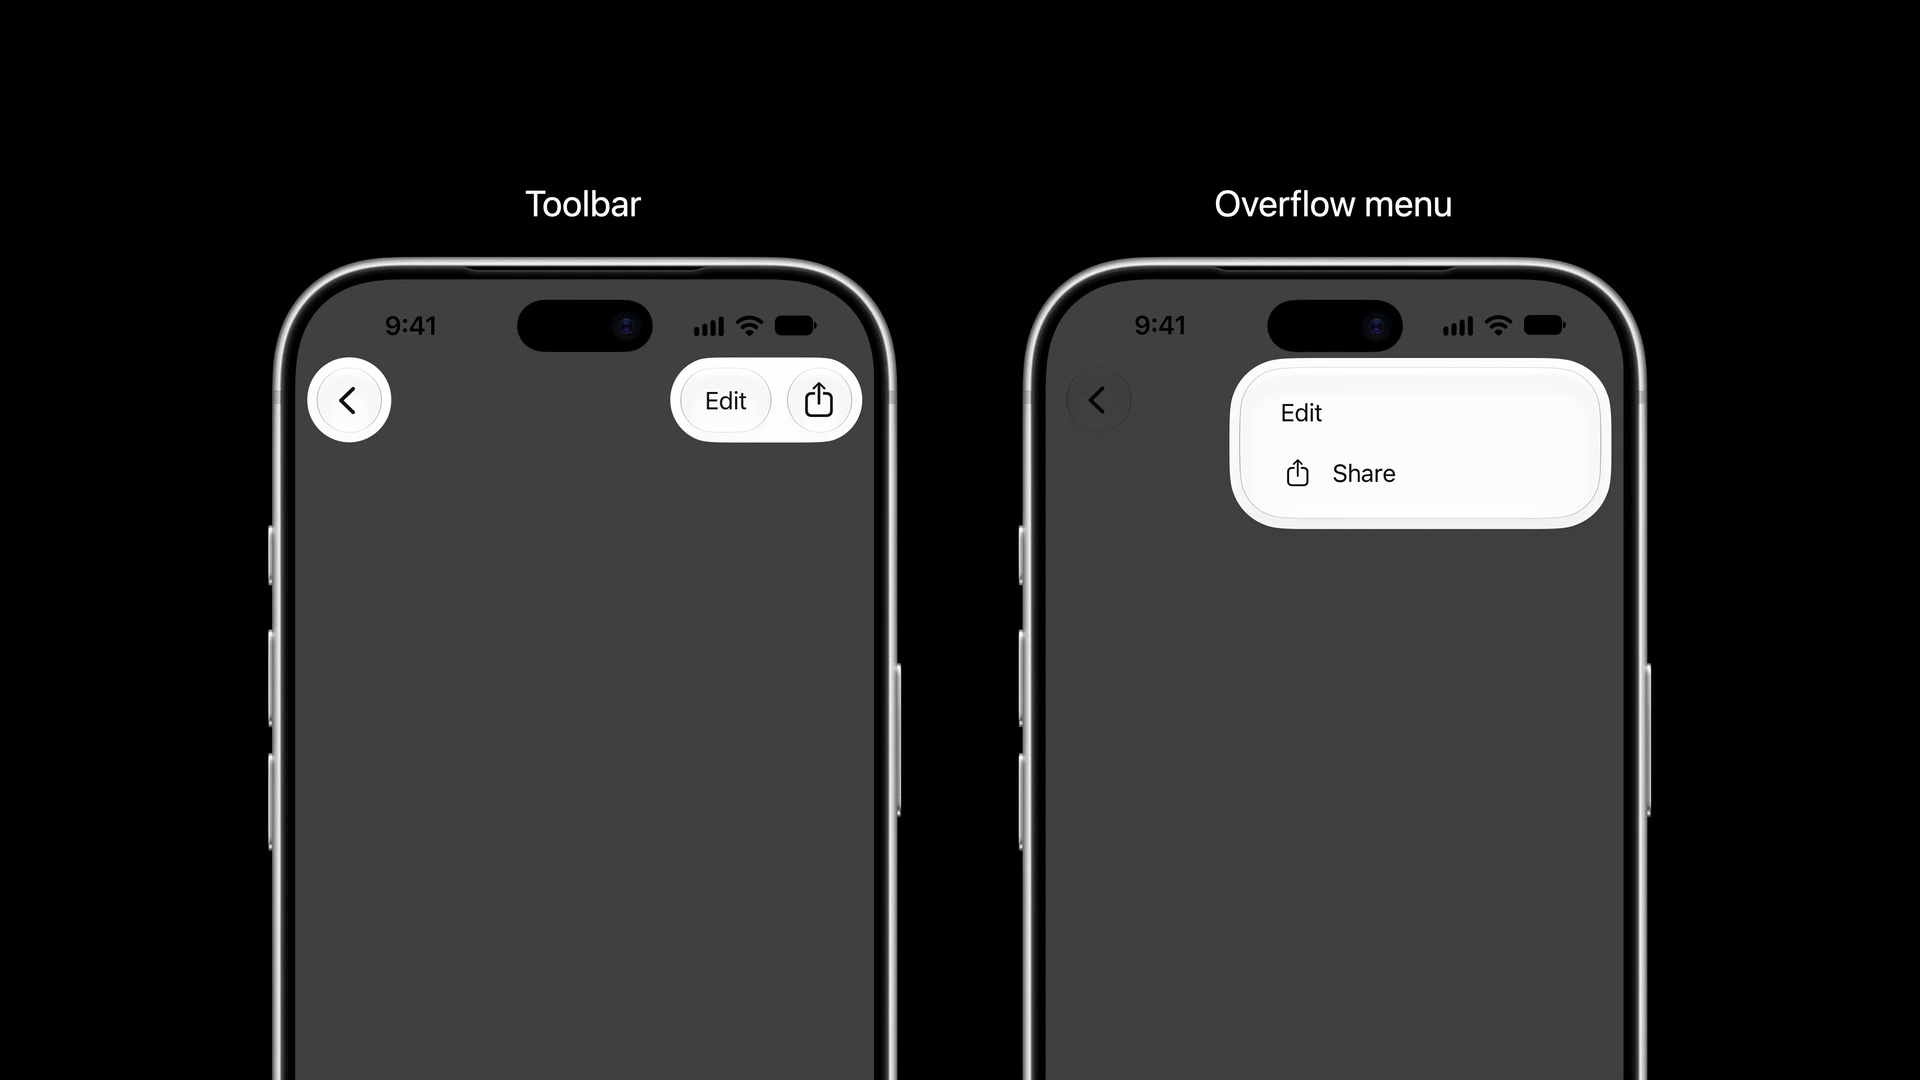
None of that changes with vertical bars. What's new is one extra question the system asks: is this content better suited to a vertical or a horizontal axis?
- Items with an icon, like back and share, move to the vertical axis.
- Text-only items, like Edit, stay horizontal.
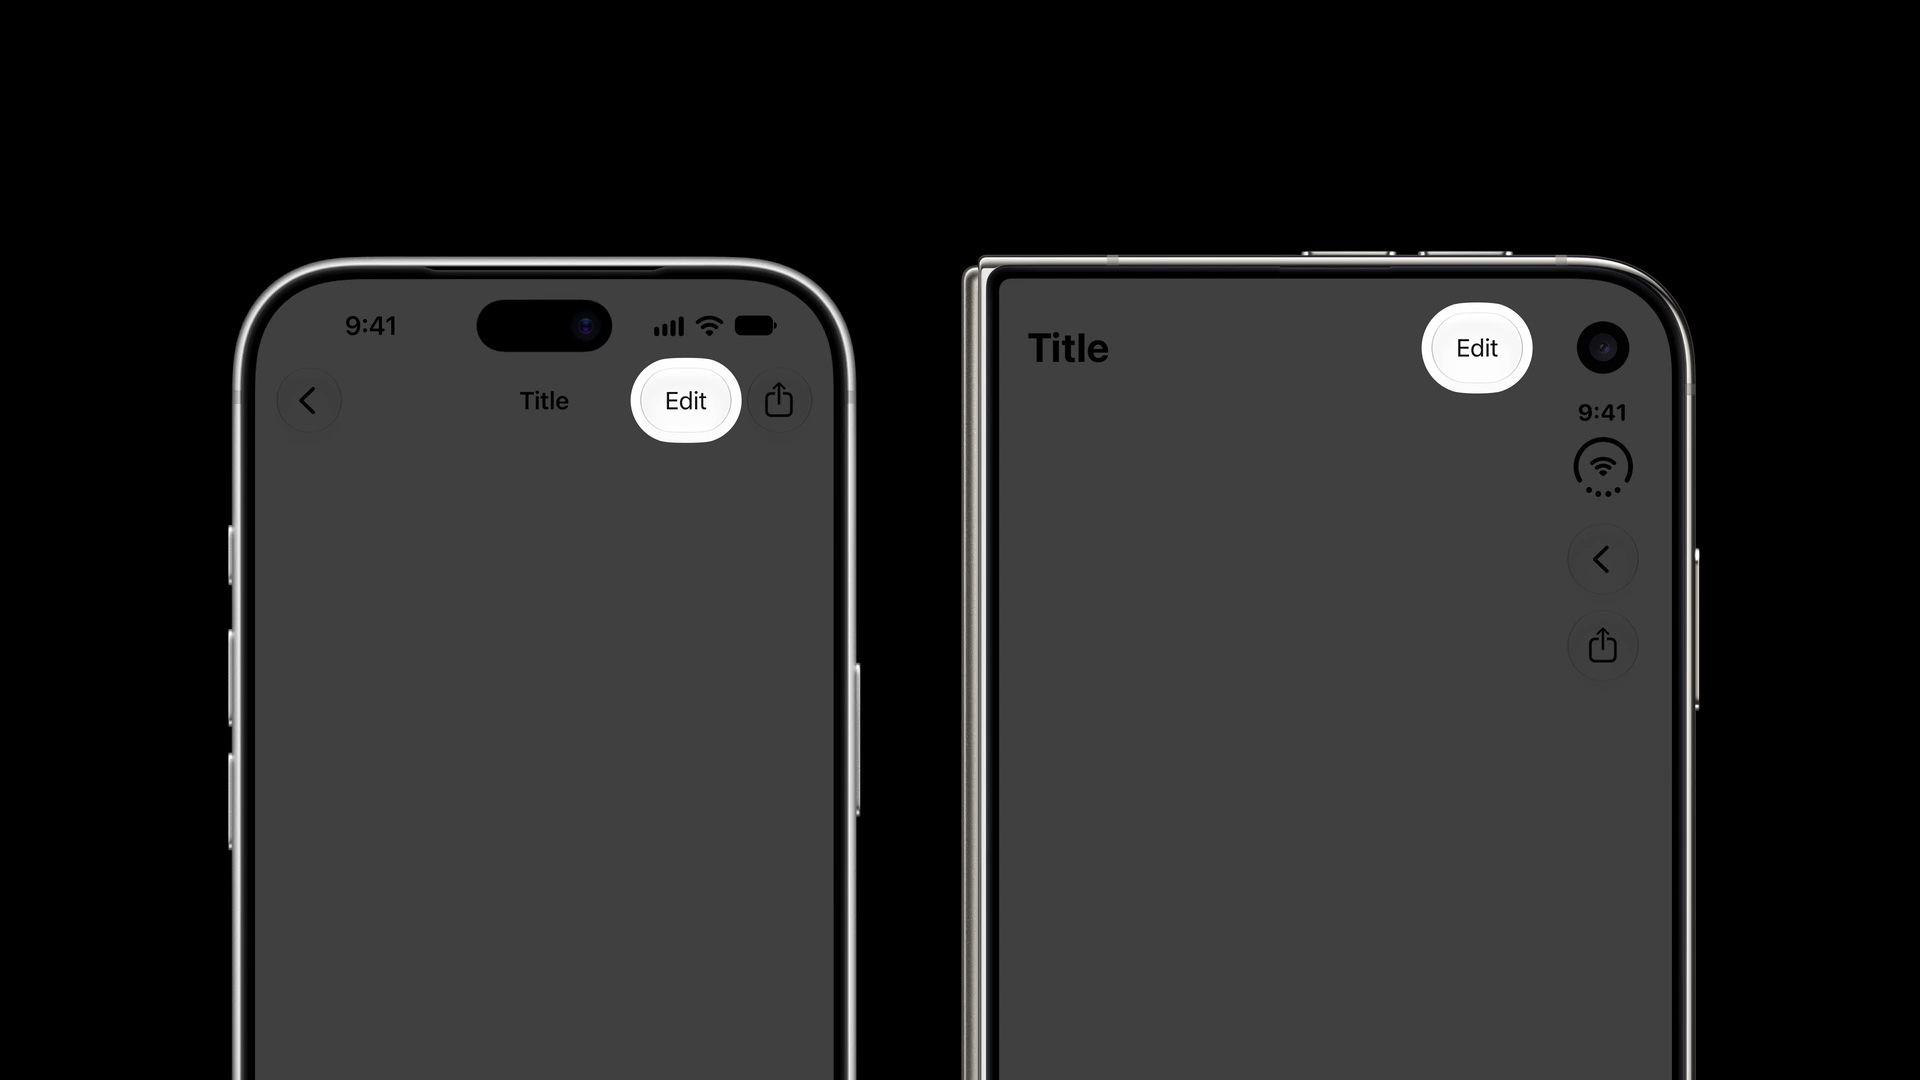
So if you're already setting both a title and an image, through a SwiftUI Label or the properties on UIBarButtonItem, you're most of the way there.
// SwiftUI
Label("Share", image: "arrowUp")
// UIKit
UIBarButtonItem(title: "Share", image: arrowUp)Override the default with axis behavior
Most of the time, you shouldn't need to care where your button is placed. The system should handle that for you.
But in some special cases, we might need to give a hint to the system about our preferred placement with the new axisBehavior API.
There are two cases where this override might be needed.
Keep related items on the same axis
Some buttons swap between a symbol and text. The Edit button in Clock turns into "Done". A symbol could go vertical, but text can't, and an item that jumps between bars as you tap it feels broken.
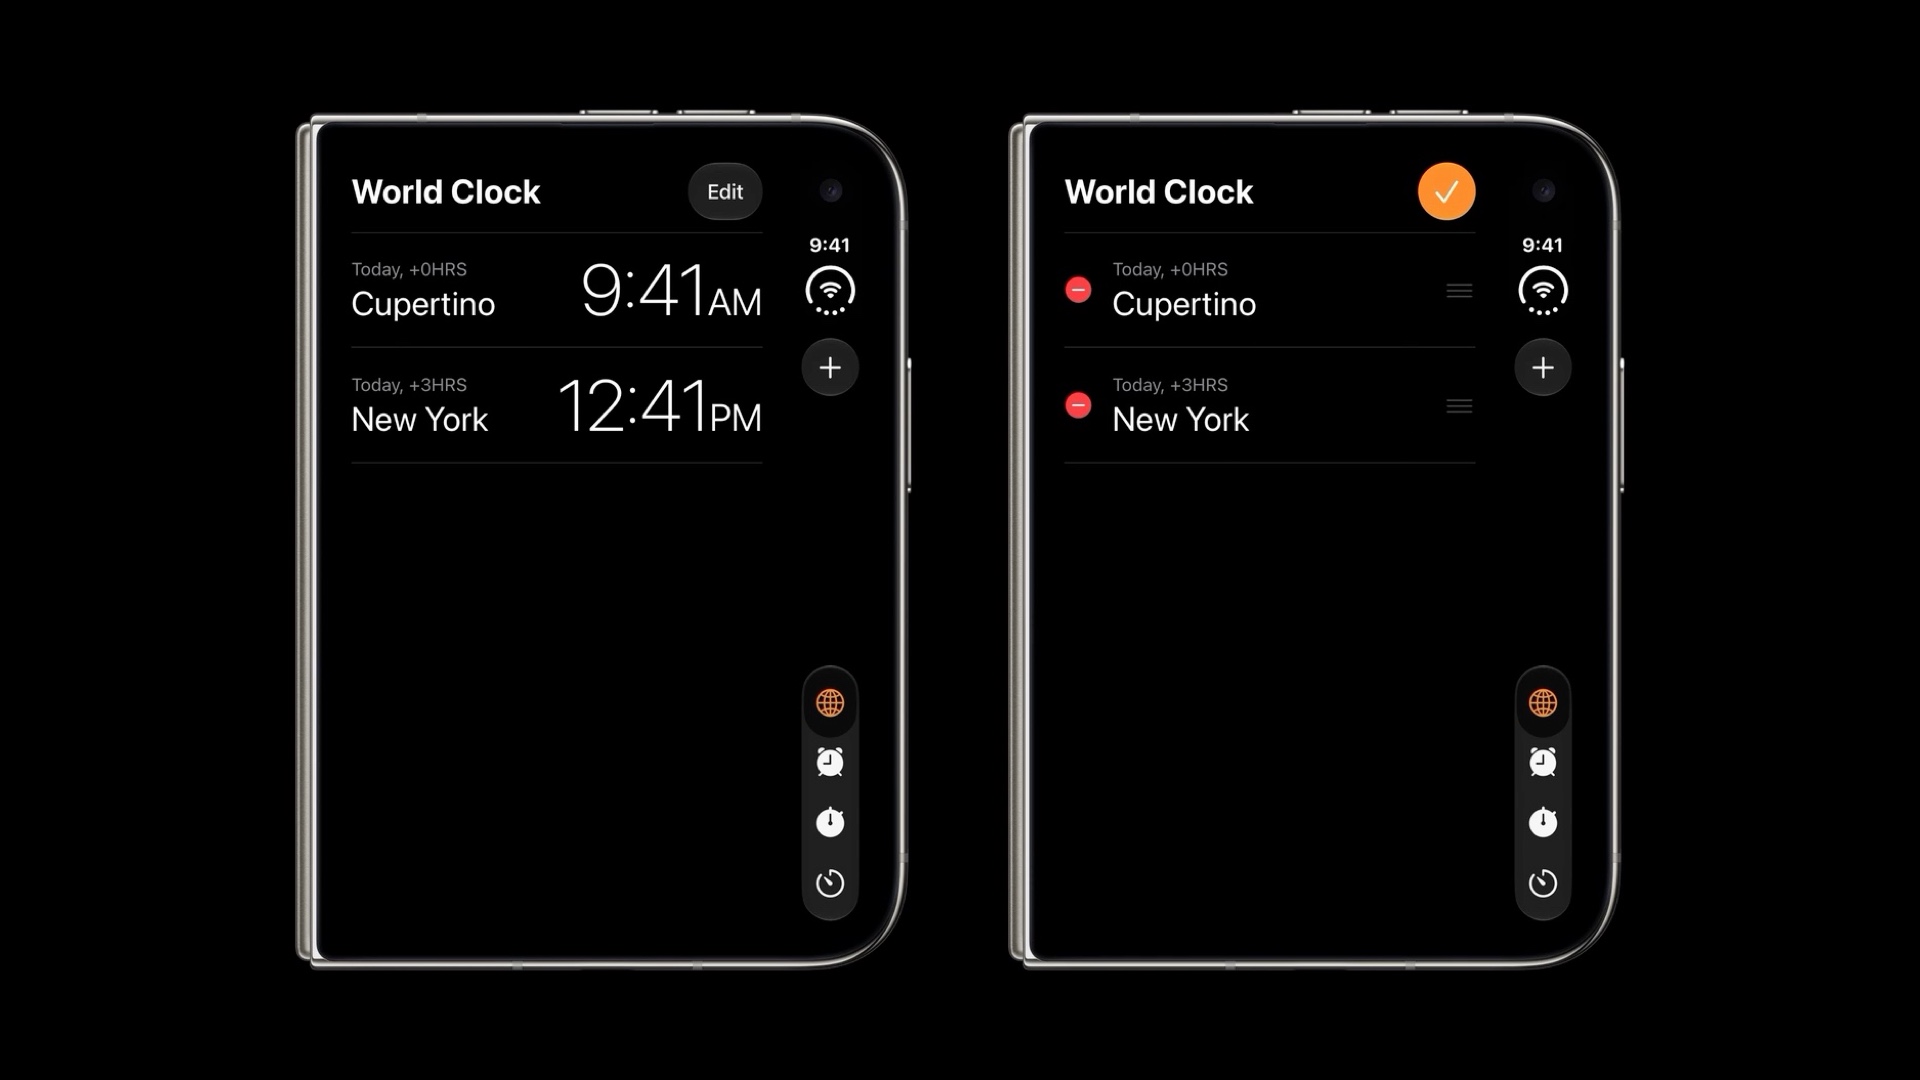
The system Edit button already handles this. For a custom button that swaps between a symbol and text, mark it horizontal only:
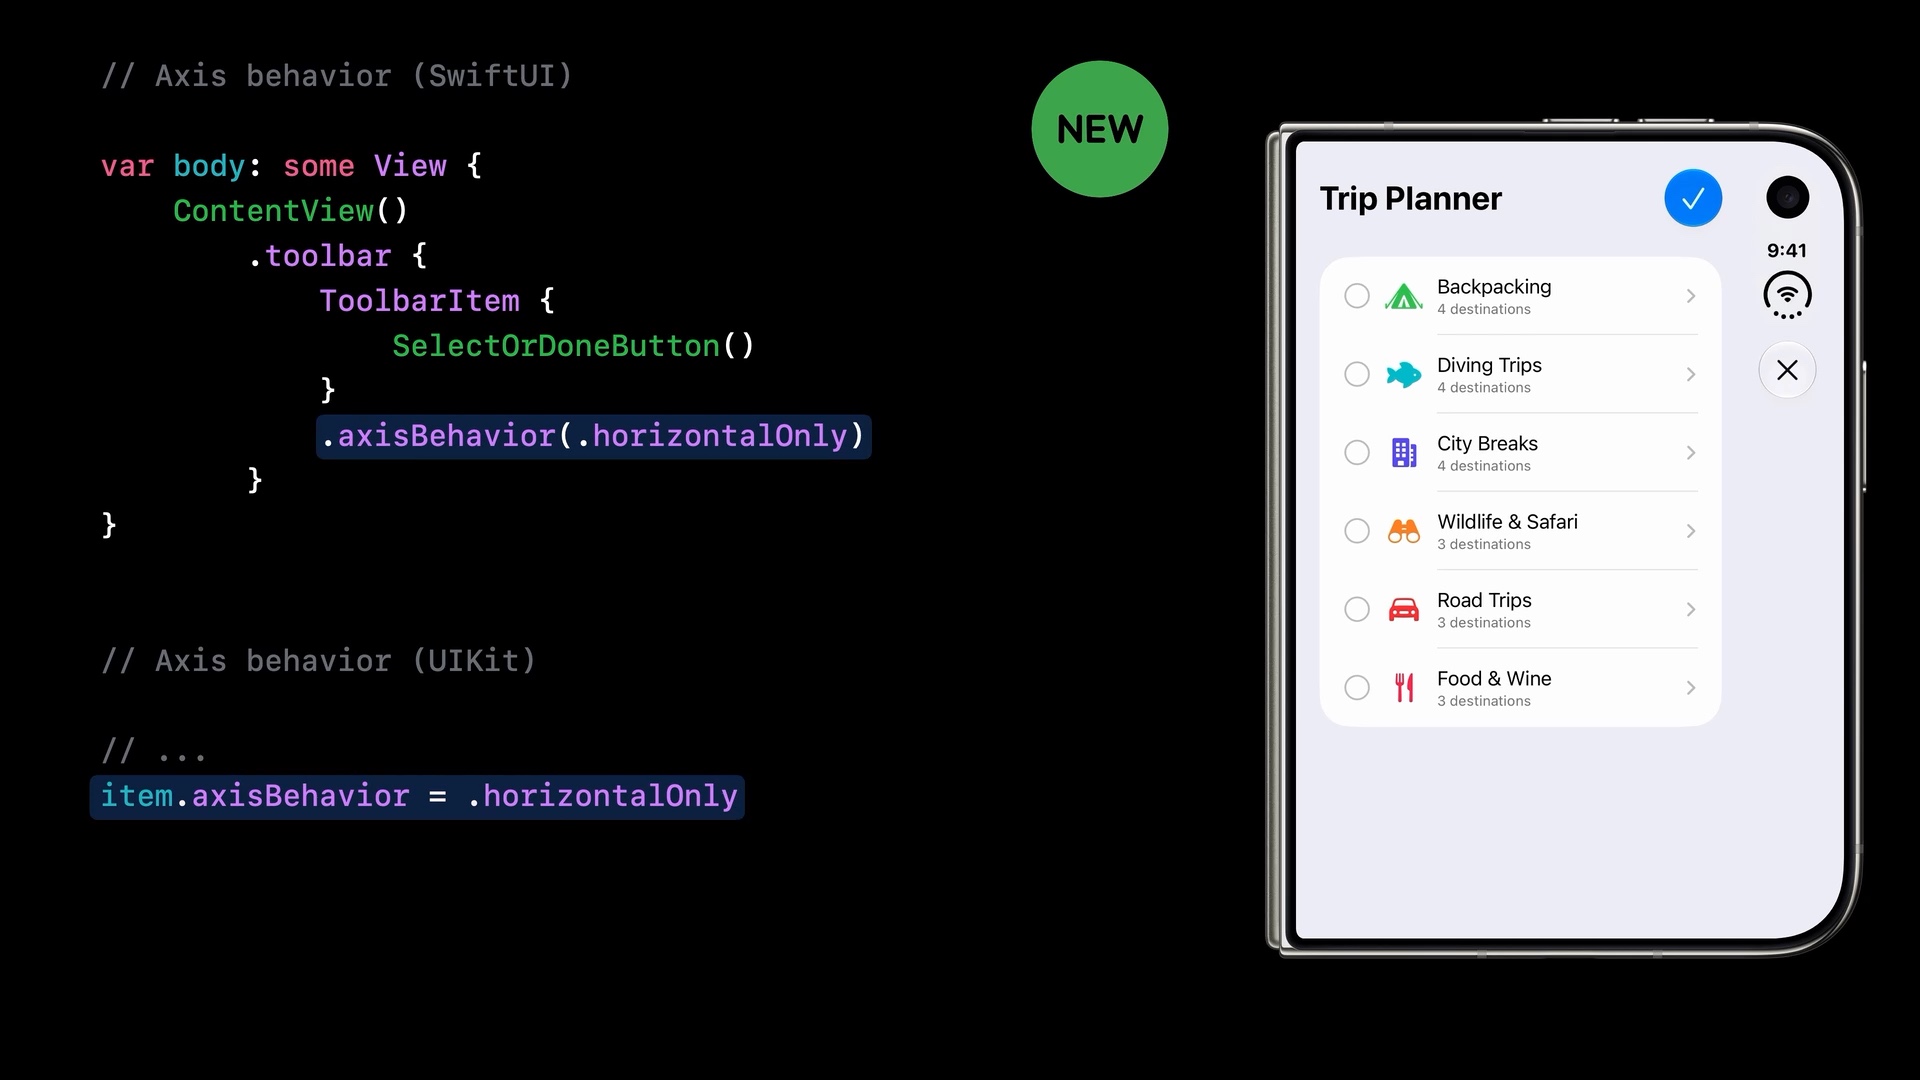
.axisBehavior(.horizontalOnly). Image: Apple, Raise the bar with iPhone Duo, 8:40.// SwiftUI
.toolbar {
ToolbarItem {
SelectOrDoneButton()
}
.axisBehavior(.horizontalOnly)
}// UIKit
item.axisBehavior = .horizontalOnlyLet a custom view go vertical
The system keeps custom views and complex views horizontal by default, because it can't tell whether they'll fit a fixed width.
If yours does work vertically, say so with .axisBehavior(.verticalPreferred):
// SwiftUI
.toolbar {
    ToolbarItem {
        CompassView()
    }
    .axisBehavior(.verticalPreferred)
}
// UIKit
let item = UIBarButtonItem(customView: CompassView())
item.axisBehavior = .verticalPreferredMaking that view actually work in a vertical bar takes a bit more than the flag. That's the next article.
You can easily support sarunw.com by checking out this sponsor.
Translate your app In 1 click: Simplifies app localization and helps you reach more users.
Summary
Vertical bars have a fixed width, so they favor symbol-only items. Keep giving the system both an icon and a title and let it choose. Use .horizontalOnly for items that swap between a symbol and text, and .verticalPreferred for custom views that can adapt.
In the next article, we get those custom views ready for the vertical axis.
Read more article about iOS, SwiftUI, UIKit, or see all available topic
Enjoy the read?
If you enjoy this article, you can subscribe to the weekly newsletter.
Every Friday, you'll get a quick recap of all articles and tips posted on this site. No strings attached. Unsubscribe anytime.
Feel free to follow me on Twitter and ask your questions related to this post. Thanks for reading and see you next time.
I also make short videos and visual guides on Patreon. Some things are easier to see than to read, like how an API looks and moves on a real screen. If you like to learn that way, come and watch. Sharing the article is also greatly appreciated.
Become a patron Tweet ShareOpt in to vertical bars on iPhone Duo
What it takes to get a vertical bar, which containers get one, and the order items appear in.
How to change line height in SwiftUI
iOS 26 adds a lineHeight modifier to SwiftUI. See what each of its seven options does, where the extra space goes, and the cases where lines overlap.