Toolbar overflow and visibility priority on iPhone Duo
Table of Contents
Part 4 in the series "Vertical bars on iPhone Duo", based on Apple's Raise the bar with iPhone Duo talk.
- Opt in to vertical bars on iPhone Duo
- Prepare toolbar items for a vertical bar
- Adapt custom toolbar views for iPhone Duo
- Toolbar overflow and visibility priority on iPhone Duo
In the previous article, we adapted custom toolbar views so they can sit in the vertical bar.
In this article, we deal with the case where everything no longer fits.
There is a high chance that items will overflow, for three reasons:
- Vertical bars need to pack three components together: navigation controls, toolbar items, and tab bars.
- Landscape.
- Extra UI like the keyboard and Picture in Picture.
So overflow isn't an edge case here. It's the normal state of a vertical bar, and it's worth deciding now what survives it.
The default behavior
When there isn't enough space, toolbar actions compress first and move to the overflow menu.
If your app has a navigation-focused screen where you want the user to be able to navigate easily, you don't have to do anything.

Prefer keeping toolbar items
In task-oriented experiences, the tab bar should compress first to preserve the actions people came to use. A view in the Games app works this way.
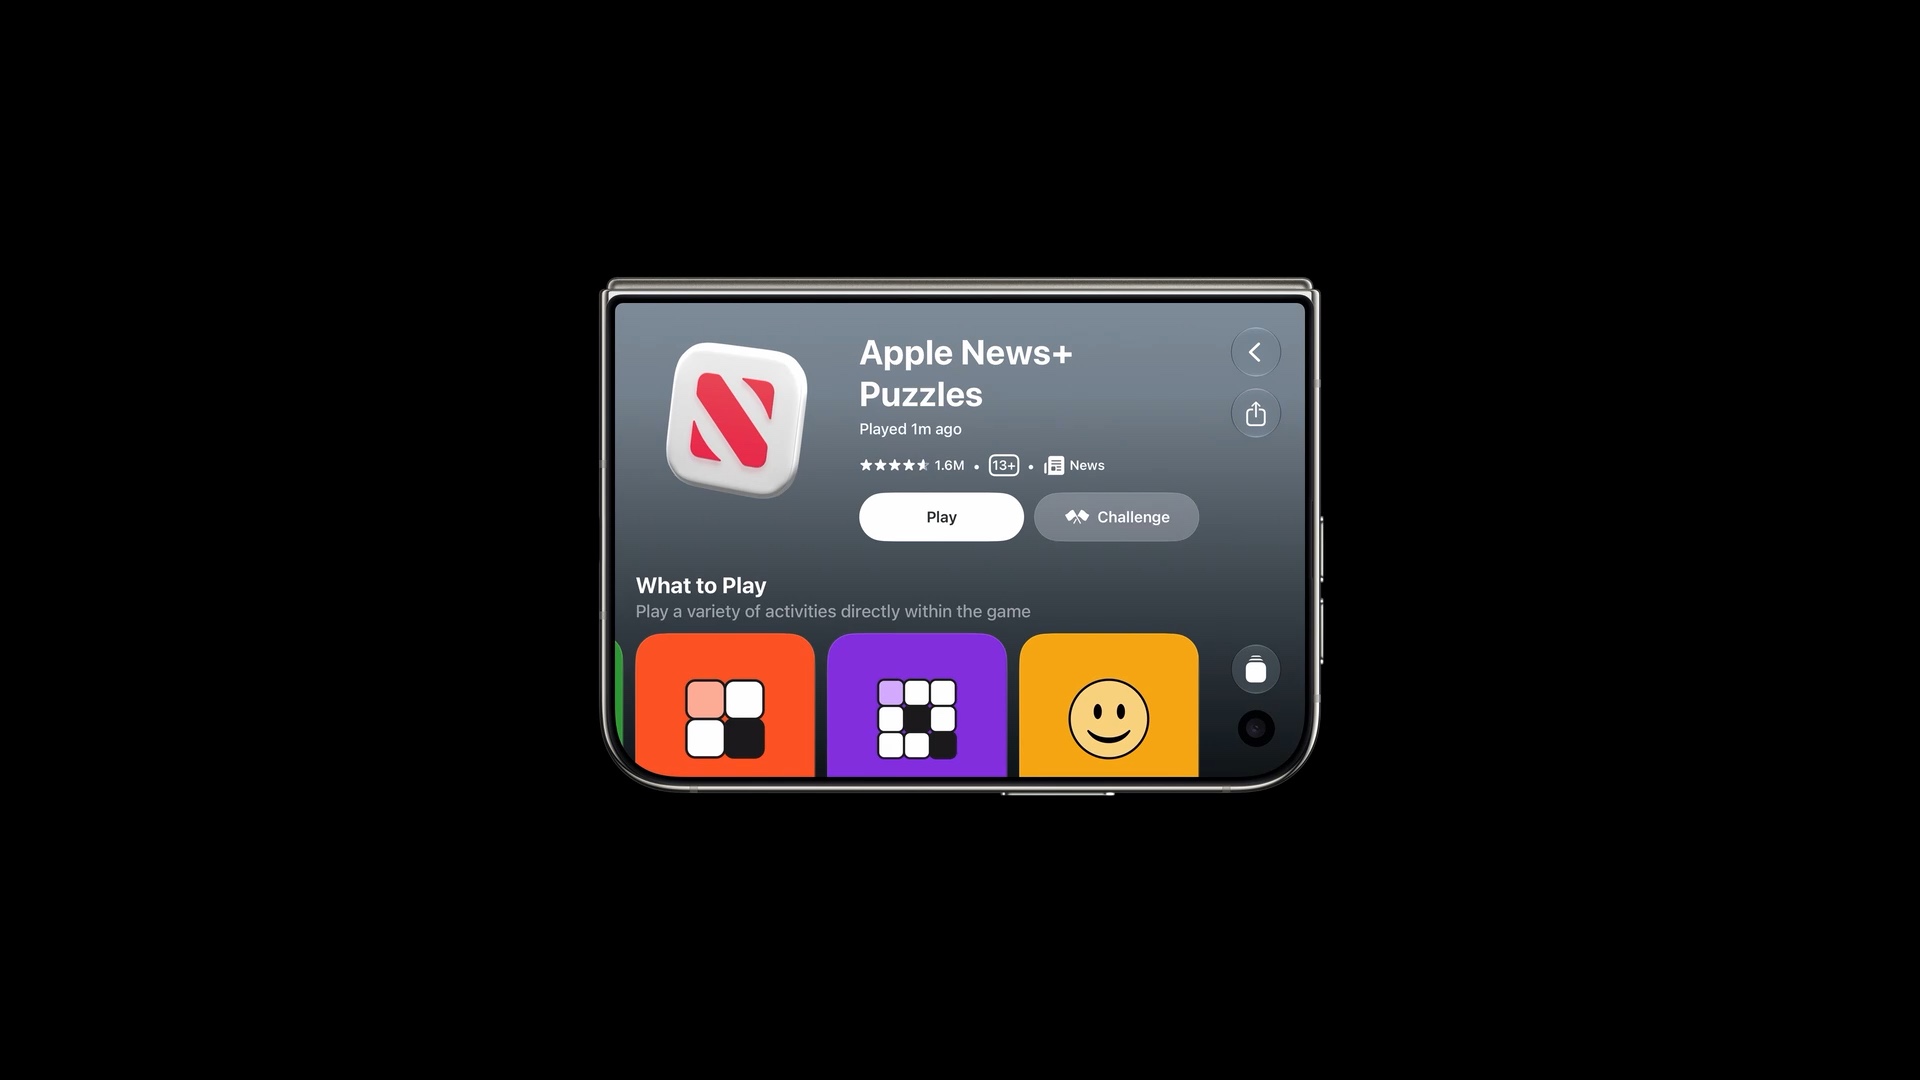
To ask for the second behavior, use the toolbarCompressionBehavior modifier.
// SwiftUI
var body: some View {
    TabView {
        Tab("Recents", systemImage: "clock") {
            ContentView()
                .toolbarVerticalCompressionBehavior(.prefersToolbarItems)
        }
    }
}
// UIKit
navigationItem.verticalBarCompressionBehavior = .prefersBarItemsYou can easily support sarunw.com by checking out this sponsor.

Offline Transcription: Fast, privacy-focus way to transcribe audio, video, and podcast files. No data leaves your Mac.
Use one overflow menu
If your app already has its own "more" menu, migrate that to the new ToolbarOverflowMenu, so other overflow actions can group under the same menu.
// SwiftUI
var body: some View {
    ContentView()
        .toolbar {
            ToolbarOverflowMenu {
                Button("Scan") { /* ... */ }
                Button("Connect") { /* ... */ }
            }
        }
}
// UIKit
navigationItem.additionalOverflowItems = UIDeferredMenuElement({ provider in
provider(self.persistentOverflowItems())
})Choose items to be visible/overflow
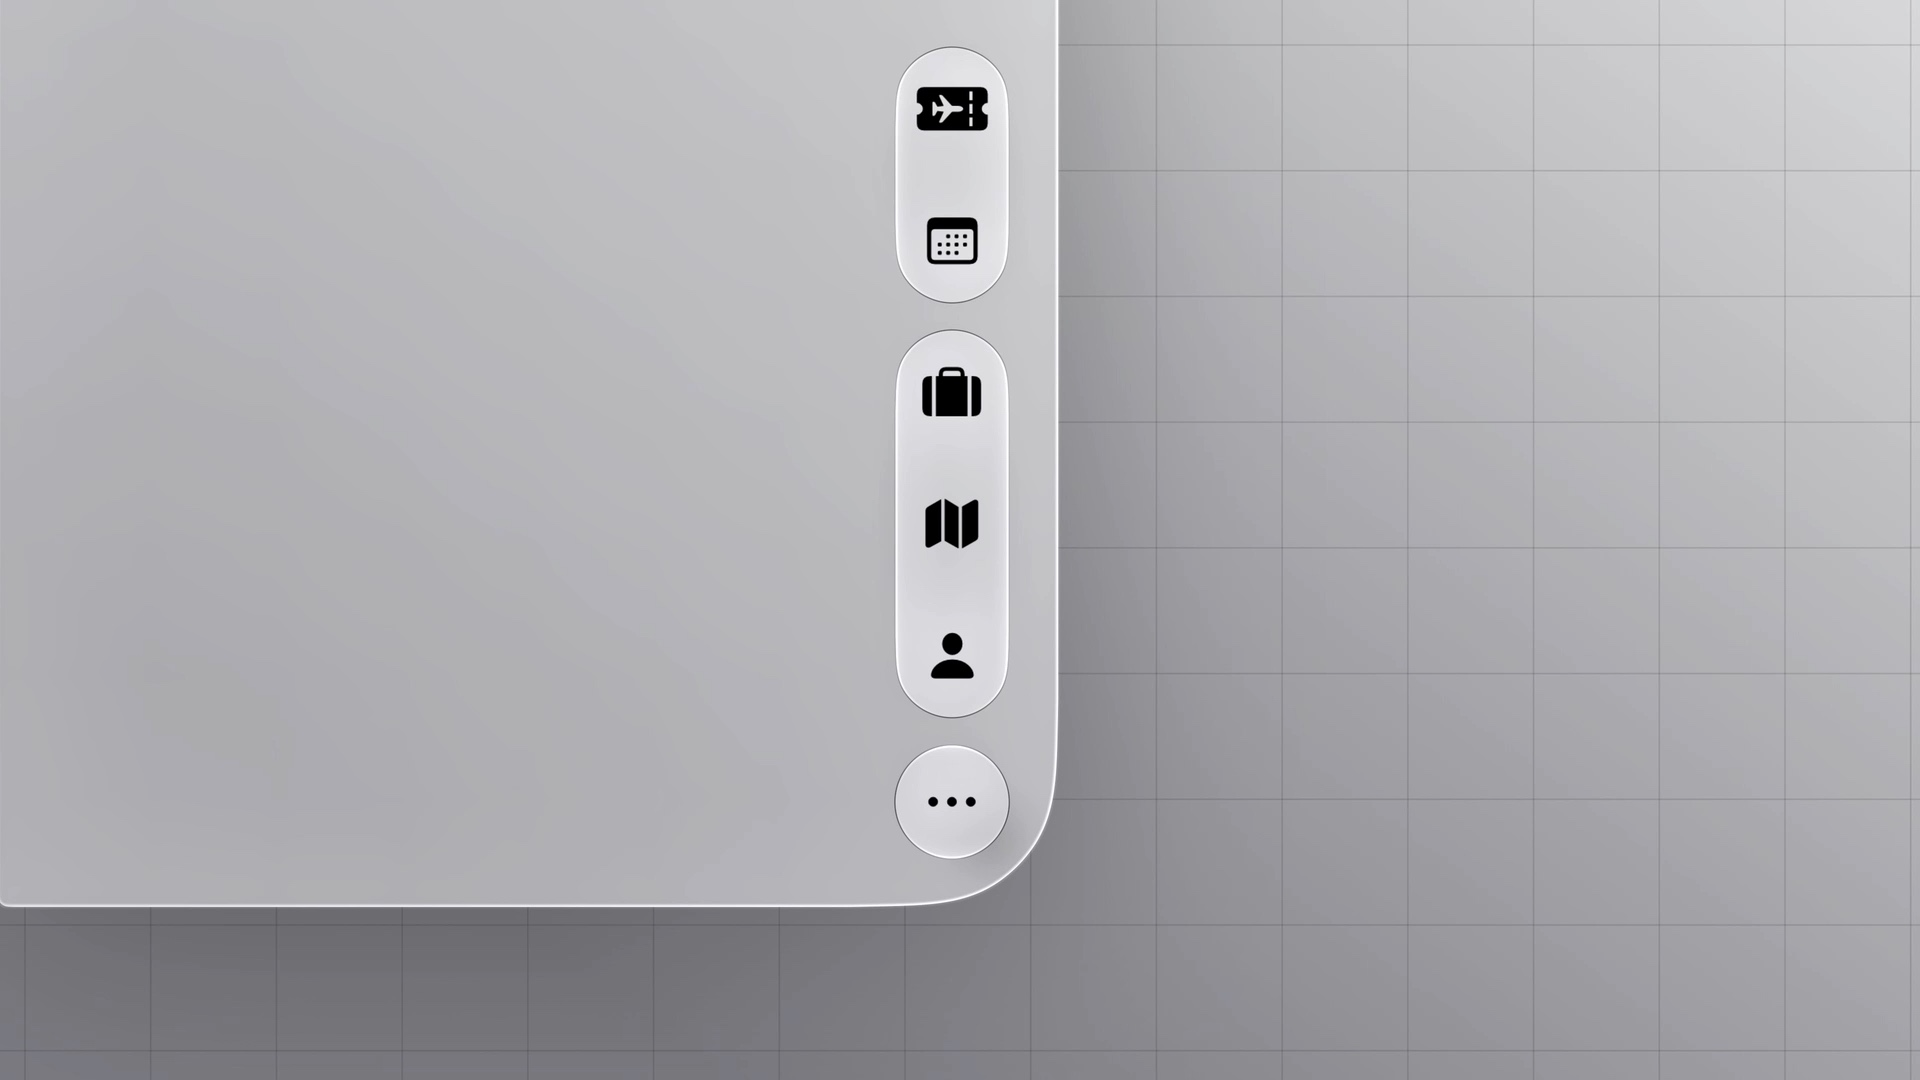
When the system has to choose which item goes into the overflow menu, the bottom items overflow first by default.
In the following image, the person icon will be the next to overflow.
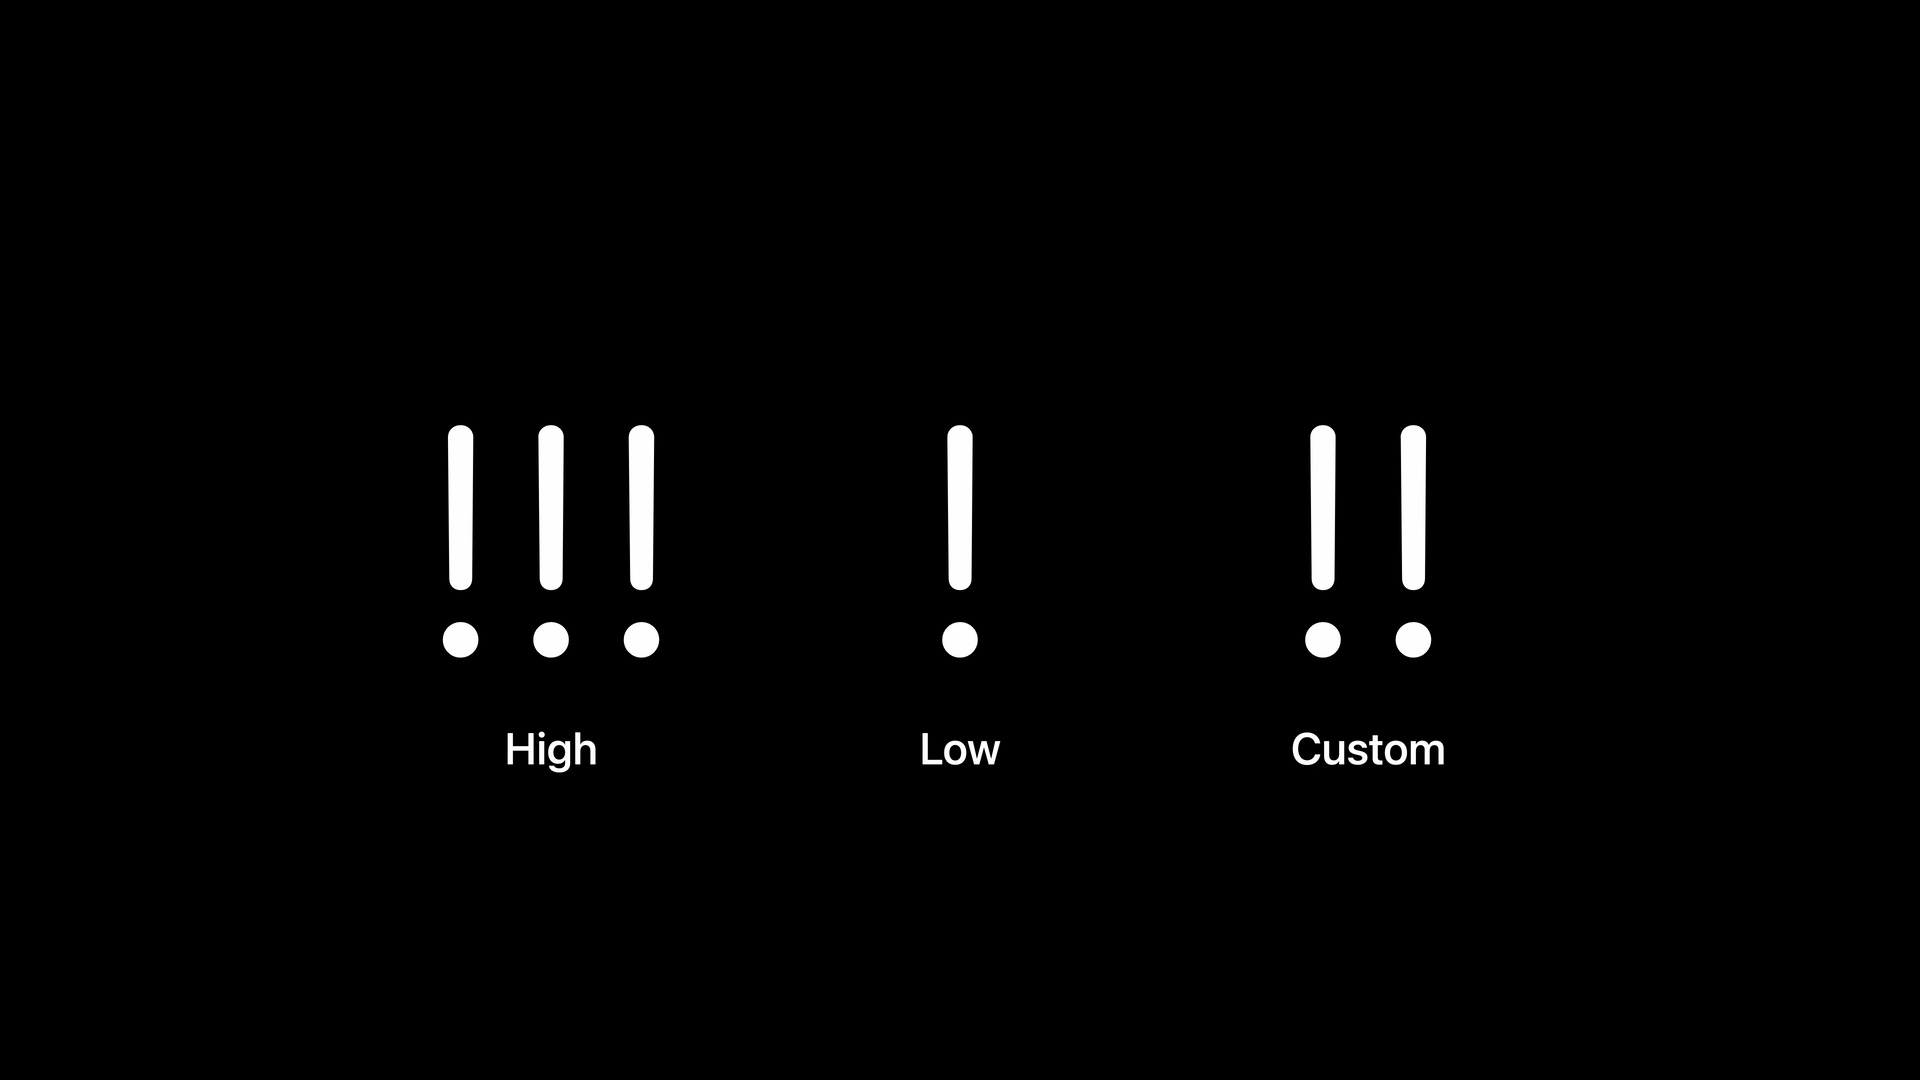
To control this behavior, we assign a .visibilityPriority of high, low, or a custom value to an item or group.
// SwiftUI
var body: some View {
    ContentView()
        .toolbar {
            ToolbarItem {
                Button(/* ... */) { /* ... */ }
            }
            .visibilityPriority(.high)
        }
}
// UIKit
let item = UIBarButtonItem(/* ... */)
item.visibilityPriority = .highWork at the group level first, then set priorities on individual items inside a group only if you need finer control. Starting with groups tends to give you a sensible result with far fewer decisions.
When to turn vertical bars off
Not every app needs to use vertical bars. You can opt out if it doesn't make sense for your app.
A single-page app with a bottom-heavy layout. Calculator is the example. There's no navigation to speak of, and a horizontal layout lets the content expand across the full display.
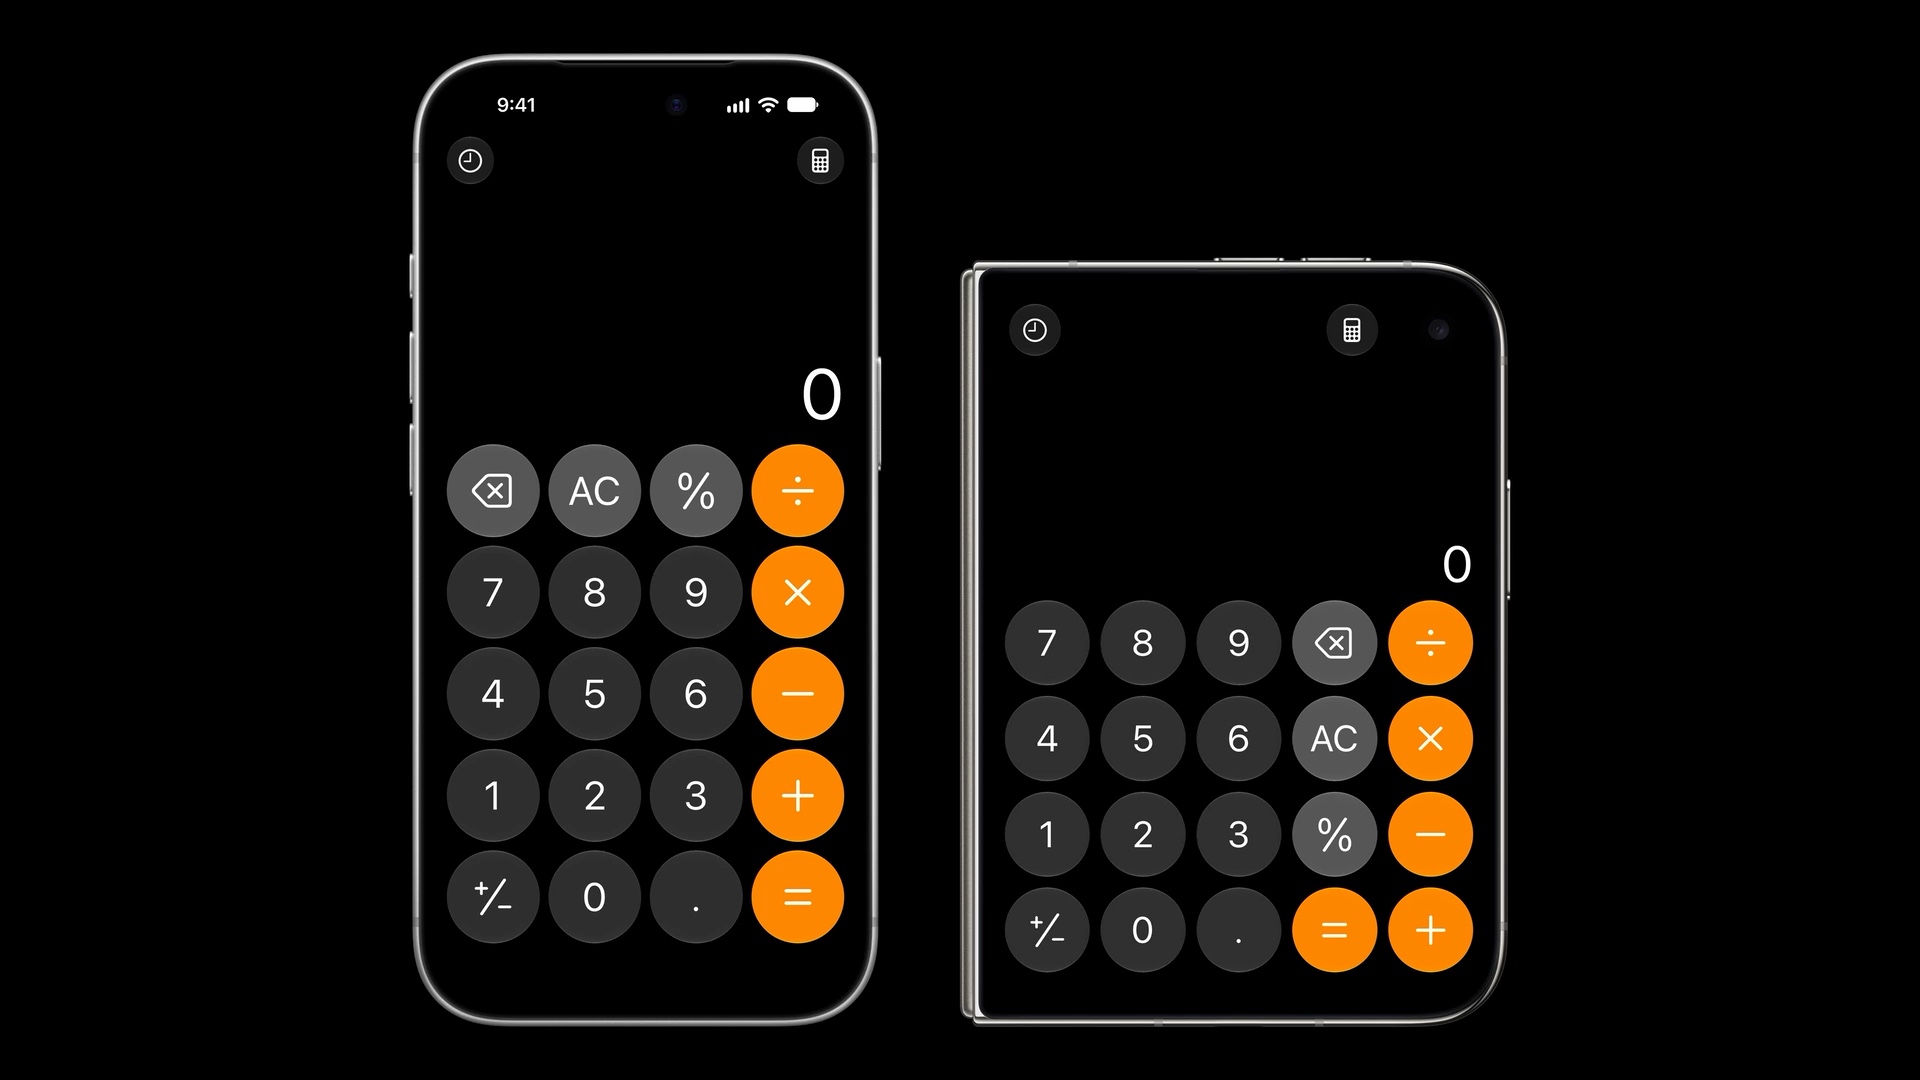
To disable it:
// SwiftUI
var body: some View {
    NavigationStack {
        ContentView()
            .toolbarVerticalBehavior(.disabled)
    }
}
// UIKit
class MyViewController: UIViewController {
override var preferredVerticalBarBehavior: UIVerticalBarBehavior {
.disabled
}
}Reach for this when the vertical bar is taking space and giving little back, not as a way to avoid the adaptation work.
You can easily support sarunw.com by checking out this sponsor.
Offline Transcription: Fast, privacy-focus way to transcribe audio, video, and podcast files. No data leaves your Mac.
The checklist
That's the whole series. To get an app ready for bars on iPhone Duo:
- Build with the latest SDKs, and use the bars your navigation containers provide.
- Audit your existing bars so items follow the top-to-bottom order.
- Give every item a title, even the ones that show an image.
- Update custom items so they can be placed vertically, with
axisBehaviorand a layout that fits a fixed width. - Assign visibility priorities so the system knows what to keep when space runs out.
The first three articles in this series cover steps 1 through 4:
Read more article about iOS, SwiftUI, UIKit, or see all available topic
Enjoy the read?
If you enjoy this article, you can subscribe to the weekly newsletter.
Every Friday, you'll get a quick recap of all articles and tips posted on this site. No strings attached. Unsubscribe anytime.
Feel free to follow me on Twitter and ask your questions related to this post. Thanks for reading and see you next time.
I also make short videos and visual guides on Patreon. Some things are easier to see than to read, like how an API looks and moves on a real screen. If you like to learn that way, come and watch. Sharing the article is also greatly appreciated.
Become a patron Tweet ShareAdapt custom toolbar views for iPhone Duo
How to opt a custom toolbar view into the vertical bar, change its layout, and read the vertical bar edge.
Why the navigation title moves to the left in iOS 26
In iOS 26, an inline navigation title is centered only when it fits. Add a few toolbar items, and it jumps to the leading edge, or gets cut short next to a back button.